

Purpose of this Guide
The purpose of this guide is to familiarize you with PeerGFS working with Amazon FSx for NetApp ONTAP (FSxN). While there are several use cases that combine PeerGFS and FSxN, this guide focuses on file caching deployment. It will walk you through the basic configuration steps required, including steps on how to deploy key components in Amazon Web Services (AWS).
This guide assumes general familiarity with installing and using PeerGFS. This guide focuses on integration with FSxN, not on the broader capabilities of PeerGFS. If you are not familiar with installing PeerGFS, please connect with your Peer Software point-of-contact. See the PeerGFS User Guide for more information about other features and settings.
Overview
Amazon FSx for NetApp ONTAP is a storage service that allows you to launch and run fully managed NetApp ONTAP file systems in the AWS Cloud up to petabyte scale. It provides the familiar features, performance, capabilities, and APIs of NetApp file systems with the agility, scalability, and simplicity of a fully managed AWS service.
PeerGFS optimizes on-premises access to FSxN SMB file shares by making it easier for users to access FSxN files with lower latency.
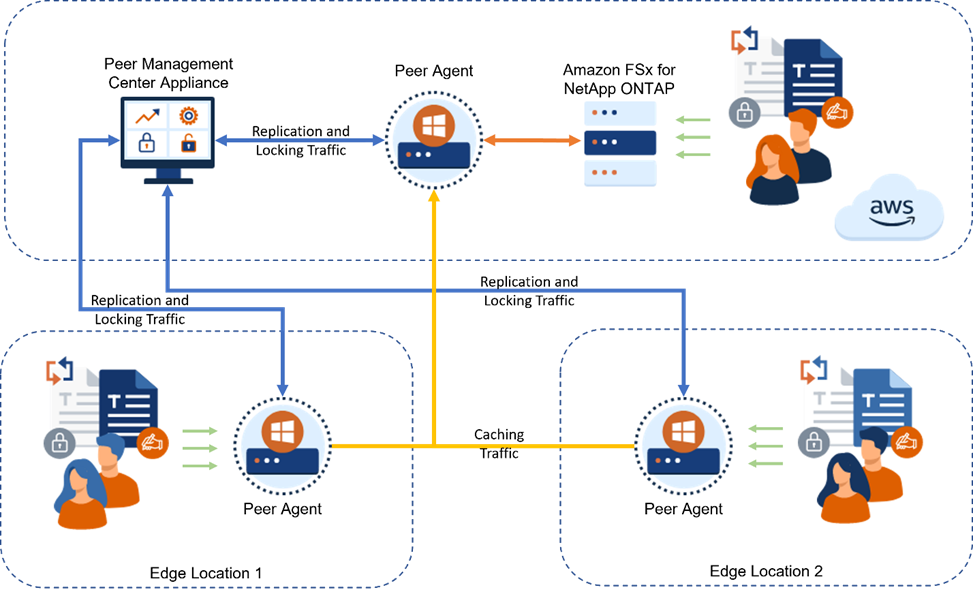
PeerGFS uses real-time replication to keep files shares from FSxN in-sync with on-premises locations. In addition, you can prevent multiple users from editing the same file in multiple locations via integrated distributed file locking. For remote locations with limited storage capacity, PeerGFS can cache recently accessed or modified files to satisfy performance needs while allowing remotely stored files to be visible and accessible if needed. A single global namespace is provided through incorporation and control of Microsoft DFS Namespaces, which also enables automatic failover and failback across sites in the event of site outages or redirection by load balancers.
With these capabilities, you can consolidate all of your on-premises file share data in FSxN and benefit from the protected, resilient, fully managed FSxN file system while also providing local performance to your geographically-dispersed workforce.
Use Cases
There are four primary use cases for combining PeerGFS with Amazon FSxN. This guide will focus on the first one.
The four use cases are:
-
File caching from AWS FSx for NetApp to on-premises edge storage
-
Distributed file services between on-premises edge and data center storage with AWS FSx for NetApp ONTAP
-
Continuous data protection and high availability from on-premises storage to AWS FSx for NetApp ONTAP
-
Migration from on-premises storage to AWS FSx for NetApp ONTAP
Task 1. Deploy FSxN
To communicate with FSx for NetApp ONTAP, PeerGFS requires the ability to authenticate against a Microsoft AD environment. The AWS Directory Service can manage a Microsoft AD directory. AWS deployment details can be found in Getting Started with AWS Directory Service.
You may also use an on-premises Active Directory environment extended into AWS or host Active Directory manually within an AWS Windows VM.
Once Microsoft AD is available, FSx for NetApp ONTAP can be deployed. Details on how to deploy FSxN in your AWS account can be found in Getting Started with Amazon FSx for NetApp ONTAP.
Task 2. Deploy PMC in AWS
The primary management component of PeerGFS is Peer Management Center (PMC). The PMC is available as an Amazon Machine Image for Amazon Elastic Computer Cloud (EC2). It can be deployed in your AWS account using the following marketplace listing:
https://aws.amazon.com/marketplace/pp/prodview-oovy3gor763fc
To deploy the PMC:
-
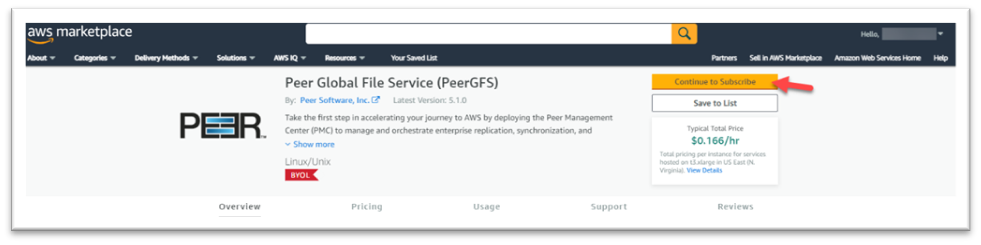
Log in to your AWS account and navigate to https://aws.amazon.com/marketplace/pp/prodview-oovy3gor763fc.
-
Click Continue to Subscribe.
-
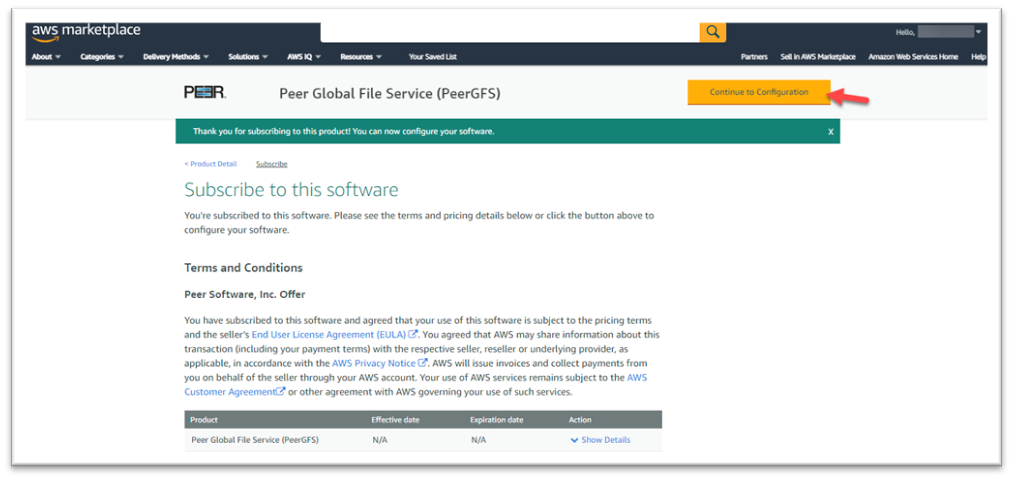
When prompted, review and accept the Peer Software EULA.
-
Once the AWS Marketplace has enabled PeerGFS in your account, click Continue to Configuration to set up the PMC.
-
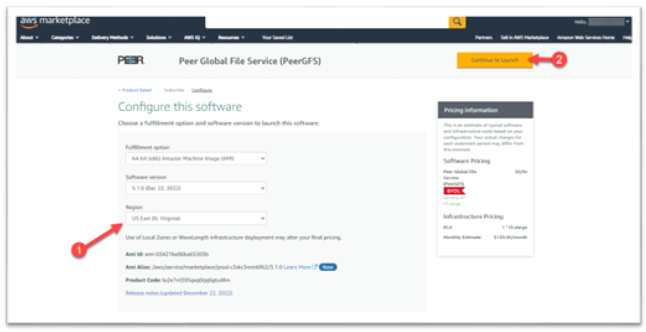
In the Configure this software section, keep the defaults for Fulfillment option and Software version.
-
Select the desired area for Region, and then click Continue to Launch.
-
In the Launch this software section, specify the launch configuration details:
We recommend an instance with at least 4 cores and 16 GB of RAM for the PMC.


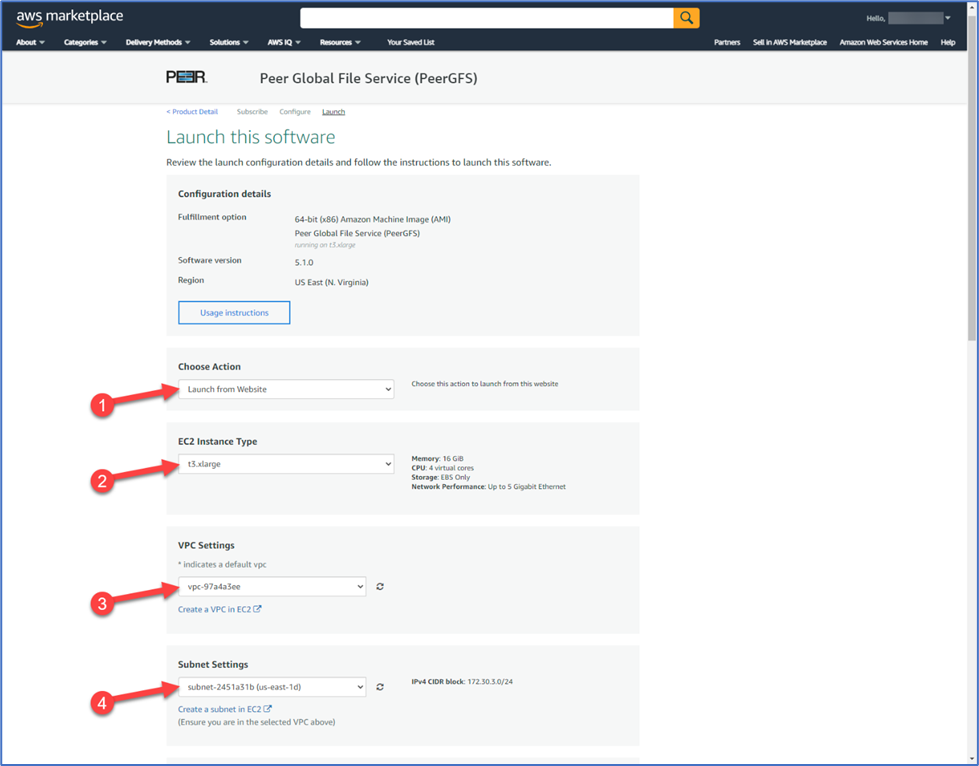
-
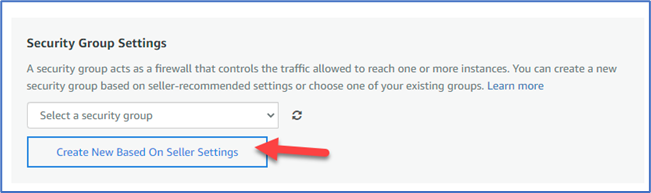
For Security Group Settings, select Create New Based on Seller Settings.
This will create a new security group with open TCP ports of 8443 and 61617. Port 8443 is used for management and 61617 is used for communication between all Peer Agents and the PMC.
-
For Key Pair Settings, create a new key pair in EC2 or select an existing one.
The selected key pair will be used if you ever need to remotely log into the EC2 instance using SSH. -
Click Launch at the bottom of the form.
-
Wait 5 minutes or so after launching the PMC for all PeerGFS services to be deployed and started.
-
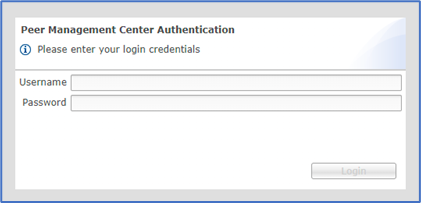
Access the Peer Management Center's web interface via a web browser at https://<Resolvable Hostname or IP Address>:8443/hub.
-
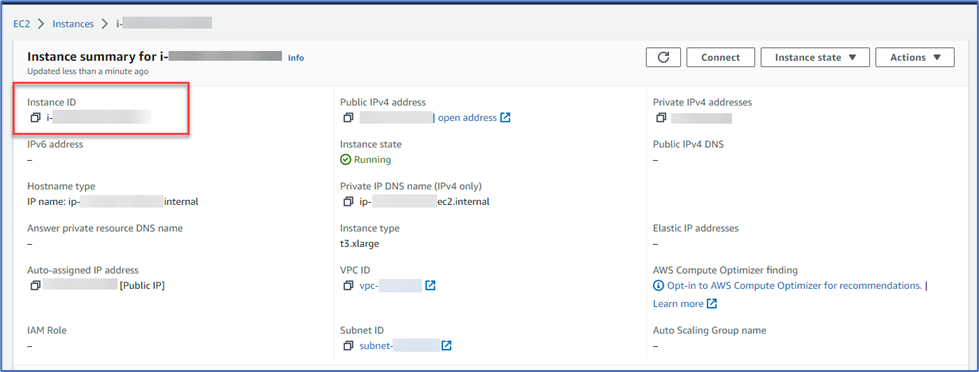
Login with the username admin and the EC2 instance ID (including the starting i-) as the password.
To find the instance ID and/or public IP address of the newly deployed PMC instance, navigate to the EC2 console, click Instances, and then select the instance.
-
When prompted, upload your license file obtained from Peer Software.
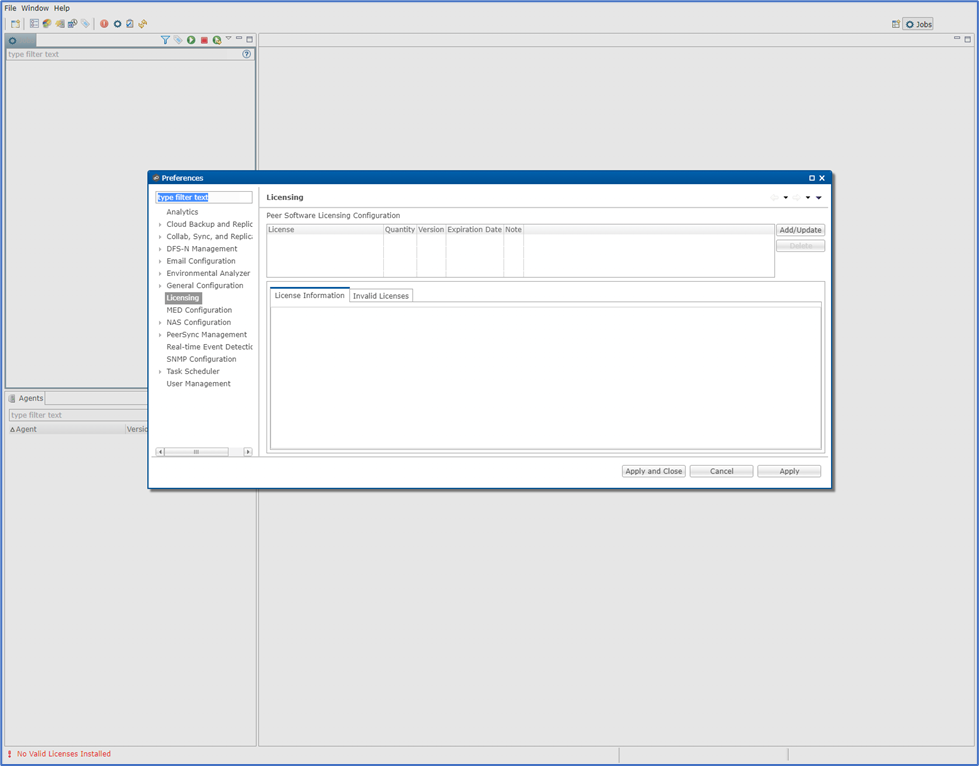
Congratulations! You've now deployed Peer Management Center!
Task 3. Deploy Peer Agent for FSxN in AWS
Once FSxN and the PMC are both deployed, the Peer Agent is deployed within AWS to monitor file shares on FSxN. The Peer Agent requires a Windows-based VM in AWS to facilitate SMB replication between FSxN and on-premises storage.
To deploy a Windows VM in AWS with the Peer Agent:
-
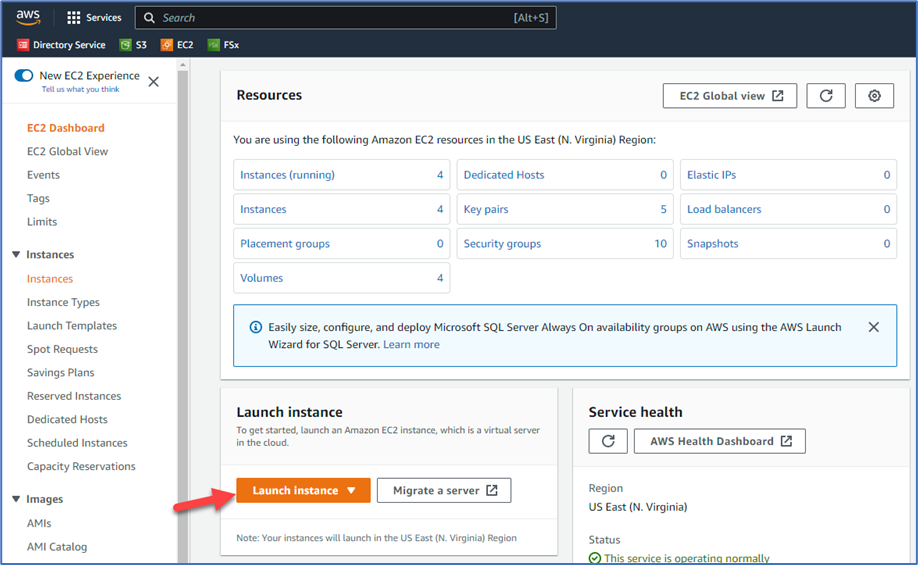
Log in to your AWS account and navigate to the EC2 console.
-
Select Launch instance.
-
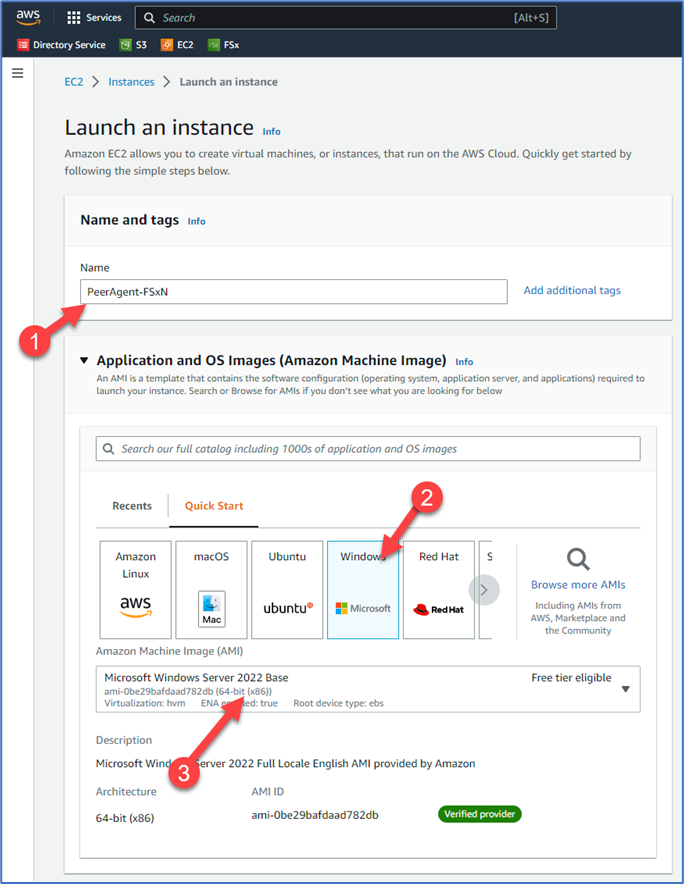
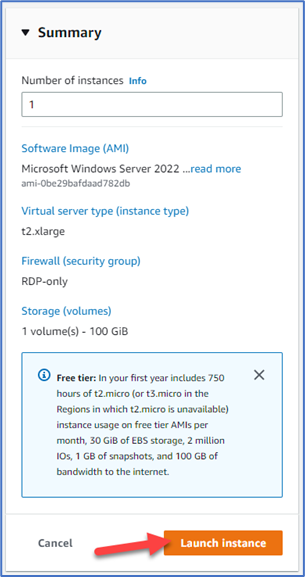
Specify the instance details:


-
Microsoft Windows Server 2022 Base
-
Microsoft Windows Server 2019 Base
-
Microsoft Windows Server 2016 Base
-
-
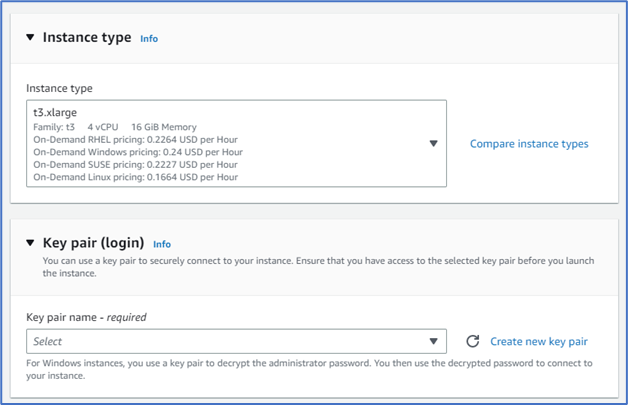
Specify values for Instance type and Key pair (login).
We recommend an instance with at least 4 cores and 8GB of RAM for the Peer Agent.
-
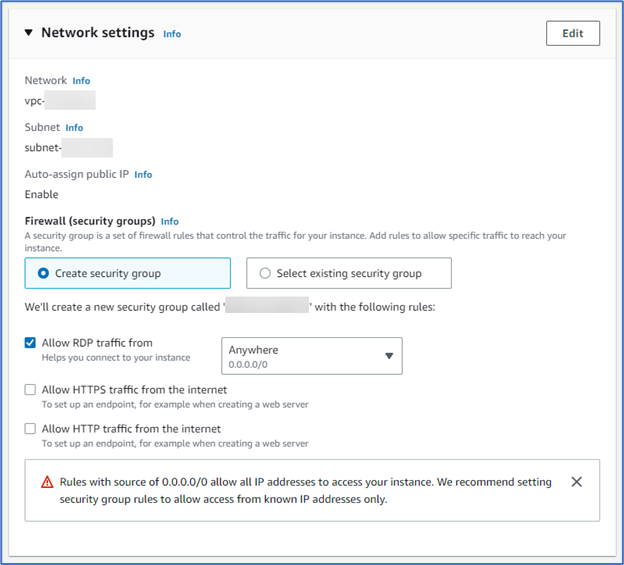
In the Network settings section, match the VPC and Subnet configuration to those used by FSxN.
-
Specify your firewall settings.
-
For firewall (security group) settings, allowing RDP traffic will make it easier to manage the virtual machine.
-
To enable edge caching with FSxN as the central repository, you must also open up inbound port 8446 for each edge location. This port will be used by the edge locations to read data from the central repository.
-
To enable the flow of real-time activity from FSxN to the Peer Agent, inbound port 9883 must also be open to the networks used by your FSxN deployment.
For more detailed information, see Firewall Requirements.
-
-
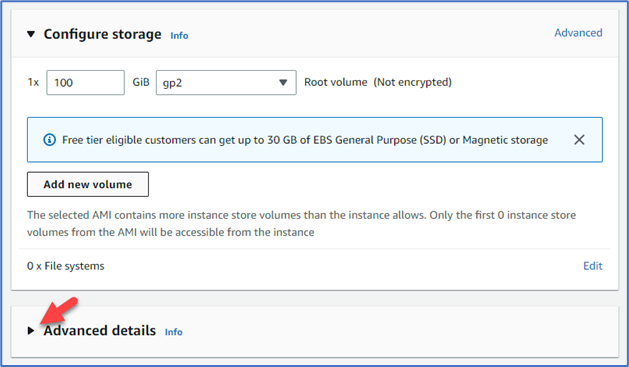
In the Configure storage section, set at least 100 GiB of general purpose or provisioned IOPS SSD.
-
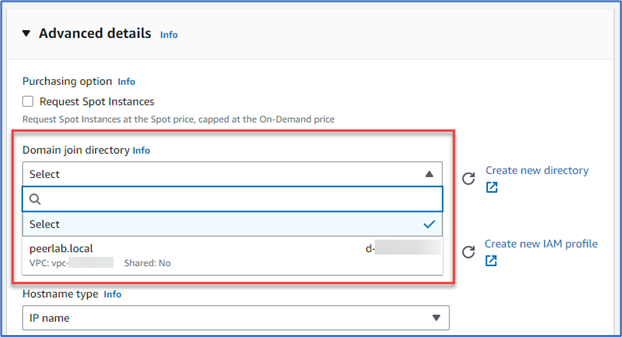
If you are using AWS-managed AD, expand the Advanced details section. Otherwise skip to Step 11—you will have to join the VM to your AD manually after deployment.
-
Under Domain join directory, select the same AWS-managed AD directory that is used by your FSxN deployment.
-
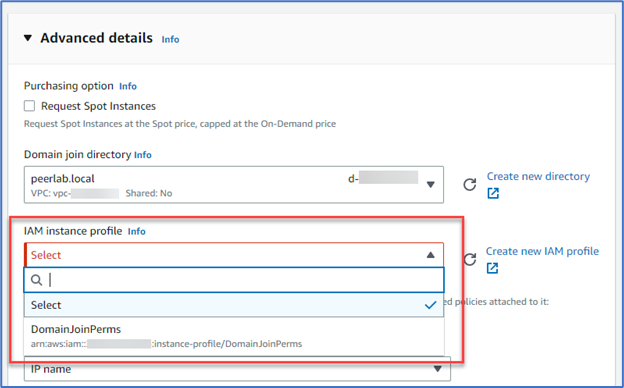
Select the appropriate IAM instance profile.
For more details, see Seamlessly join a Windows EC2 instance.
-
In the Summary section (on the right), click Launch instance.
-
Once the instance is created, connect using RDP to the public IP address of the instance.
To find this address, navigate to the instance's details and look for Public IPv4 address.

-
Log in using administrative-level credentials from your AWS-managed AD directory. If you are using your own AD, log in as a local administrator and join the VM to your AD. After the reboot, log in as a domain user with administrative-level credentials and proceed from here.
-
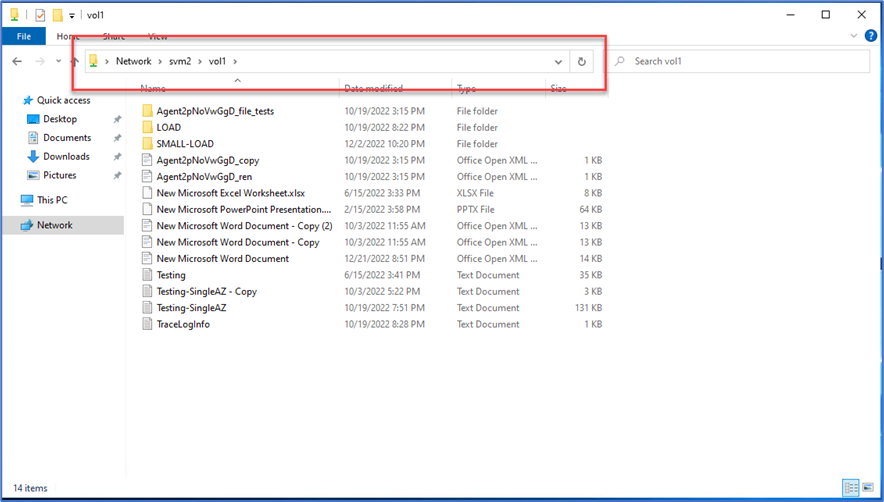
Once you have connected using RDP into the VM, use Windows Explorer to verify that you are able to access the share(s) on the Storage Virtual Machine (SVM) that you deployed on FSxN.
-
In addition to setting the appropriate inbound network settings within AWS, you also need to allow the inbound ports 8446 (to support edge caching) and 9883 (to allow FPolicy connectivity from FSxN to the Peer Agent) through Windows firewall within the VM itself. Make sure to allow both inbound ports across all available network types (Domain, Private, Public).
-
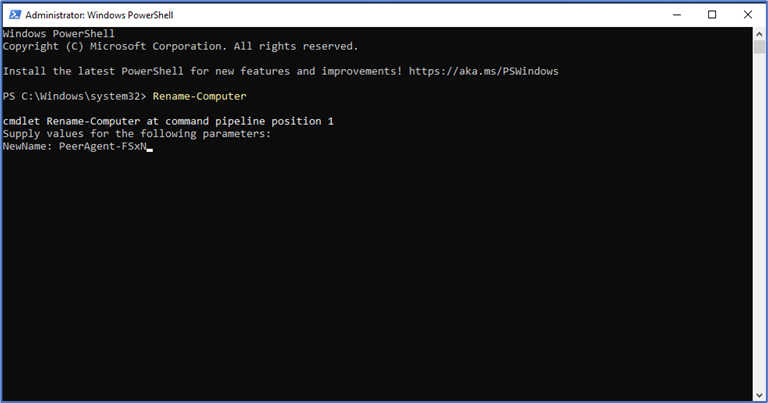
[Optional] Rename the server to a name other than a randomly generated one:
-
Open an administrative PowerShell prompt.
-
Run the Rename-Computer cmdlet.
-
Specify the new name.
-
Press the Enter key.
-
Run the Restart-Computer cmdlet.
-
When the server is available again, confirm the name change.
-
Task 4. Deploy One or More Edge Servers in AWS and/or On-Premises
For each edge location, deploy a Windows Server 2016 or newer system to run the Peer Agent software. Each of these servers will represent edges in the file services fabric.
Once all servers are deployed, continue with Task 5 to install the Peer Agent software on each server.
Task 5. Install Peer Agent Software
-
Download the Peer Agent software. The link to the Agent installer can be found in the email containing your license file for PeerGFS.
-
Run the Peer Agent installer. Review and accept the license agreement and keep the default destination directory.
-
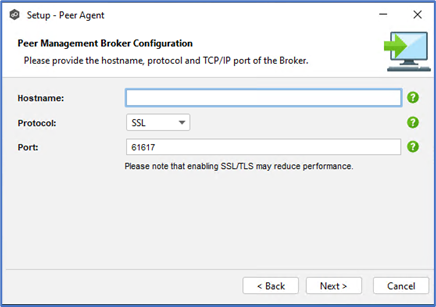
When prompted for Peer Management Broker configuration, enter the public IP of the PMC instance deployed in Task 2 in the Hostname field, and then click Next.
-
When prompted for the Agent Service Account details, enter a domain username and password for an account that is a local admin on this Agent server. If this Agent will be interacting with FSxN, the domain account must be a member of the Local Admin Group on the SVM.
.

-
Click Next and finish the installation wizard by keeping the remaining defaults. When the installation is complete, click Finish to exit the installation wizard and to start the Agent service.
-
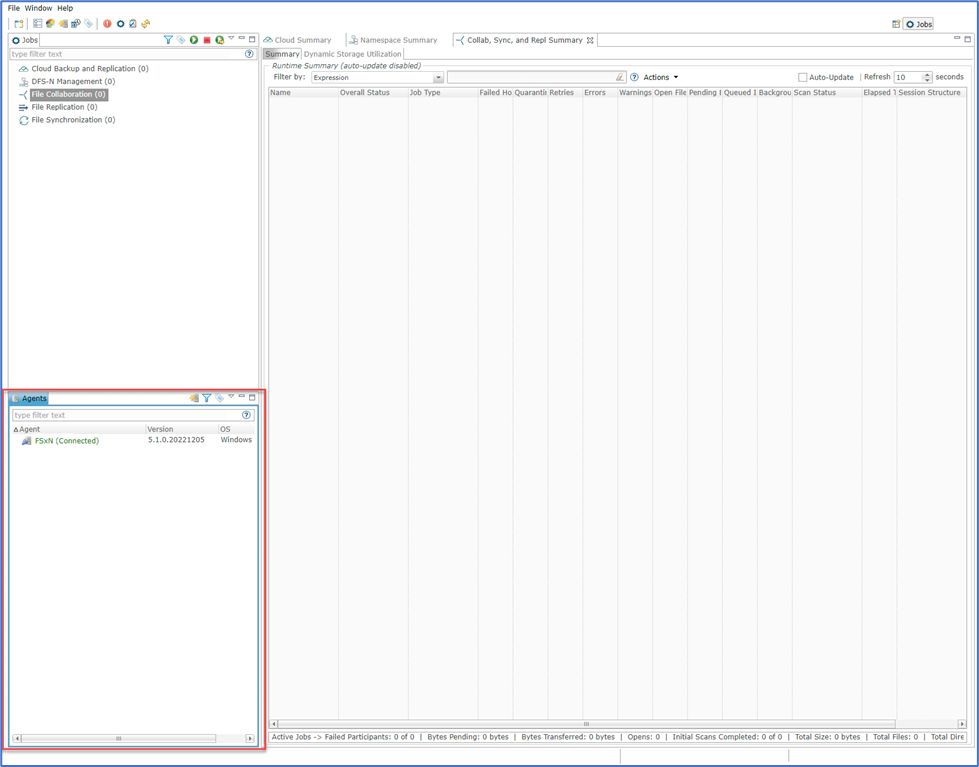
In the PMC's web client, confirm that the Agent has connected. It should appear in the bottom right corner of the UI.
-
If this Agent will be interacting with FSxN, review and apply the prerequisites for FSxN, detailed in Amazon FSx for NetApp ONTAP Prerequisites.
The prerequisites for FSxN are required for the joint AWS+Peer solution to work. If any are skipped or not met, you will run into configuration or performance issues later.
-
Repeat this task for each Agent server in the environment.
Task 6. Create a Collaboration Relationship with Edge Caching
Support for edge caching in PeerGFS is provided by the Dynamic Storage Utilization (DSU) feature. For details on how to create a collaboration relationship, see Getting Started with Edge Caching.
The Peer Agent tied to FSxN should be defined as a master participant during the configuration process as it will host the complete data set for the environment. Multiple masters are possible if needed.
Follow these FSxN-specific settings while going through Getting Started with Dynamic Storage Utilization:
-
While configuring the Peer Agent tied to FSxN, make sure to select Amazon FSxN on the Storage Platform page.

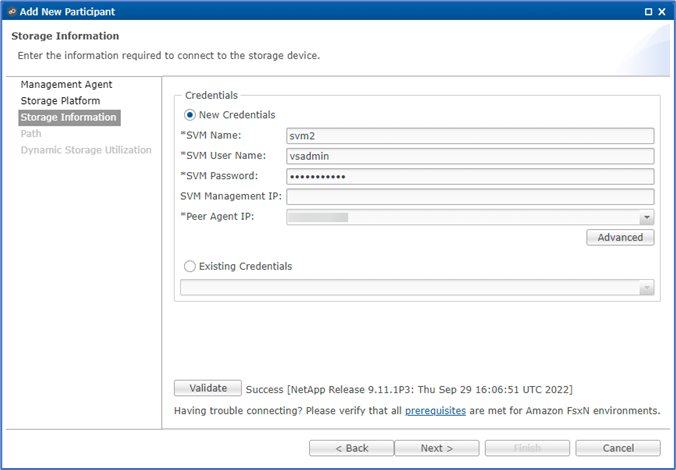
-
When prompted for details on the Storage Information page, you will need to enter the name of your SVM, as well as a username and password for accessing the ONTAP API, as well as the private IP address of the Peer Agent server that will be paired with FSxN. Click the Validate button to ensure all configuration is correct.
-
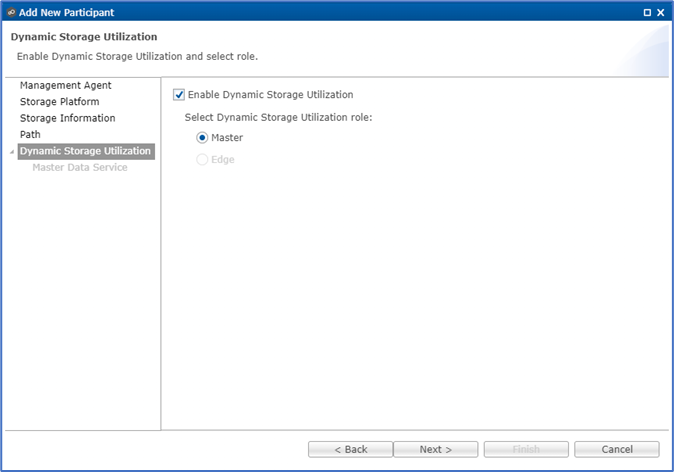
On the Dynamic Storage Utilization page for the Peer Agent tied to FSxN, make sure to check Enable Dynamic Storage Utilization and select Master.
-
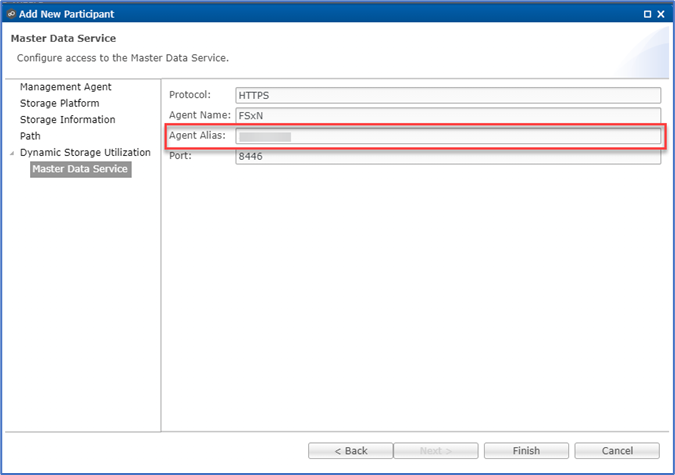
When prompted for access settings for the Master Data Service, make sure to set the Agent Alias field to a name or IP address that your edge locations can resolve. This may need to be the public IP address of this Agent server in AWS.
Each Agent server at an edge location should be defined as an edge participant during the configuration process. The steps for edge participants laid out in Getting Started with Dynamic Storage Utilization apply to your edge participant(s) as well.
Related articles
Page: Amazon FSx for NetApp ONTAP Prerequisites Page: Does Windows Search rehydrate PeerGFS's edge files? Page: Error 112: Not enough space on the disk Page: Getting Started with Edge Caching Page: Getting Started with Multi-Protocol for PeerGFS Page: Getting Started with PeerGFS and Amazon FSx for NetApp ONTAP Page: NetApp ONTAP Prerequisites Page: PeerGFS jobs fail to start after initial job due to NetAPP ONTAP v9.15.1 upgrade