
Excerpt - Configuration Tasks 2-6
Task 2. Installing the .NET Framework on the CEE Server
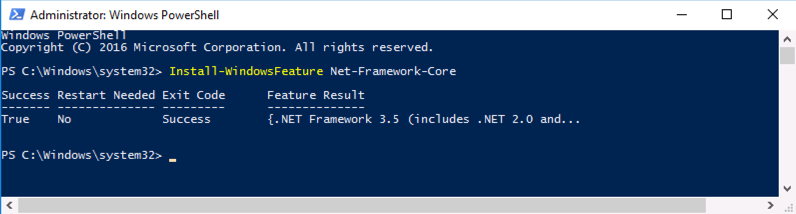
- Run Windows PowerShell as an administrator.
Enter the following command to install .NET Framework v3.5:
Install-WindowsFeature Net-Framework-CoreAfter the installation is complete, the results are displayed in the PowerShell window.
- Close the PowerShell window.
Task 3. Installing CEE Framework on the CEE Server
- If any versions of CEE framework software earlier than v8.6 (including stand-alone CAVA or CEPA) are already installed on the CEE server, uninstall them before continuing.
- Download and stage the 64-bit CEE framework installer on the CEE server.
- If deploying for use with Isilon, we require v8.6.1 or v8.7.0 of the CEE framework. To obtain one of these versions, please contact Dell EMC technical support or your Peer Software technical contact.
- If deploying for use with Unity or VNX, we support v8.6.1, v8.7.0, and newer versions of the CEE framework (such as v8.9.1). CEE v8.9.1 can be found here: https://dl.dell.com/downloads/DL81214_Common-Event-Enabler-8.9.1.0-for-Windows---32-and-64-bit.iso. Note that this download requires a Dell EMC support login.
- Install the CEE framework software:
- Run the CEE framework installer as an administrator.
The Welcome page of the CEE Install wizard appears. - Click Next.
The License Agreement page appears. - Accept the terms of the license agreement, and then click Next.
The Customer Information page appears. - Enter your user name and organization, select Anyone who uses this computer (all users), and then click Next.
The Setup Type page appears. - Select Complete, and then click Next.
The Symantec SAV for NAS page appears.
- Ensure that the Work with Symantec SAV for NAS/Protection Engine checkbox is not selected, and then click Next.
The Ready to Install the Program page appears. - Click Install.
When the installation is complete, the InstallShield Wizard Completed page appears. - Click Finish.
A dialog prompting you to restart the system appears.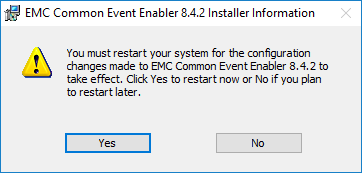
- Click No. You will restart the system later.
- Run the CEE framework installer as an administrator.
Task 4. Configuring CEE on the CEE Server
- Modify the registry value to instruct CEE framework to send events to RabbitMQ:
- Open the Registry Editor as an administrator.
- Navigate to the following location: HKEY_LOCAL_MACHINE > Software > EMC > CEE > CEPP > CQM > Configuration.
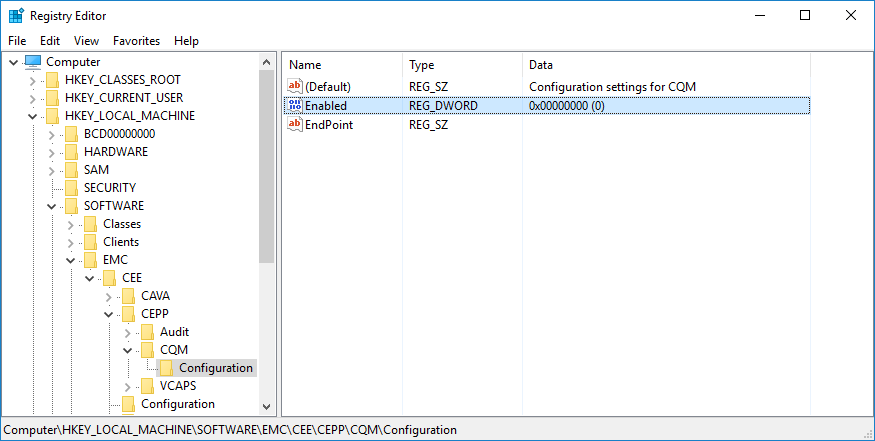
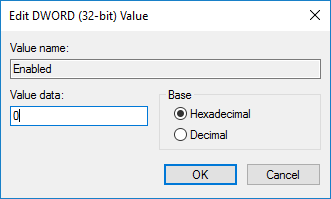
- Double-click the Enabled registry key.
The Edit DWORD (32-bit) Value dialog appears. - Change the number in Value data to 0, and then click OK.
- Close the Registry Editor.
- Set the login credentials for the EMC CAVA service. The credentials should be the same as the ones you will use for the Peer Software service.
- Open the Windows Services manager as an administrator.
- Find the service named EMC CAVA.
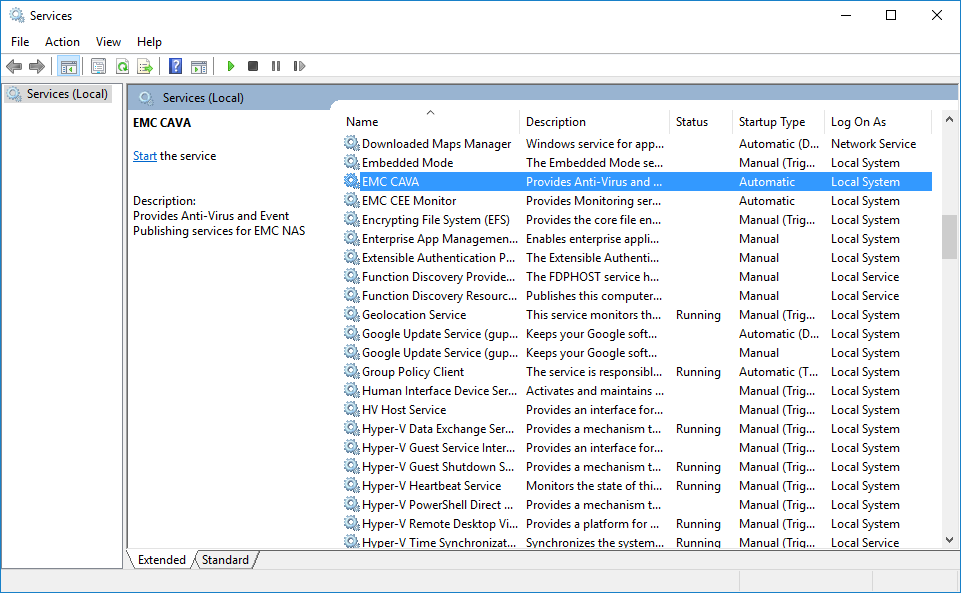
- Double-click EMC CAVA.
The EMC CAVA Properties (Local Computer) dialog appears. - Click the Log On tab.
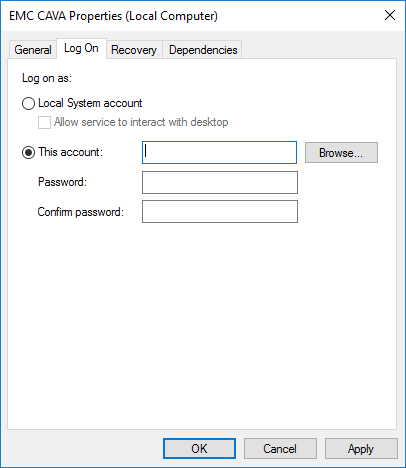
- Enter the account name and password, and then click OK.
A Services dialog appears, confirming that log-on rights have been granted. - Click OK.
- Restart the EMC CAVA service:
- Select the EMC CAVA service.
- Click the Restart link. (If the service is not already running, click the Start link instead.)
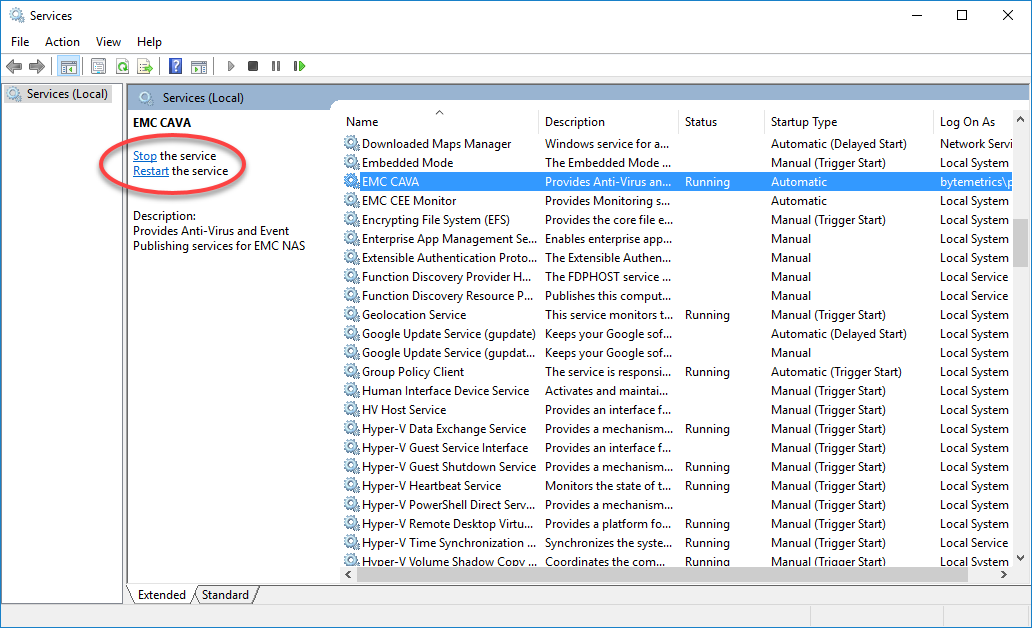
- Close the Services manager window.
Task 5. Installing Erlang on the CEE Server
- Download and stage the 64-bit Erlang installer on the CEE server.
- If deploying for use with Isilon, we require v20.3 of Erlang. Erlang v20.3 can be found here: http://erlang.org/download/otp_win64_20.3.exe.
- If deploying for use with Unity or VNX, we support v20.3 or newer versions of Erlang (such as v24.1.7). Note that CEE v8.9.1 requires the latest Erlang v24.1.7. Erlang v24.1.7 can be found here: https://github.com/erlang/otp/releases/download/OTP-24.1.7/otp_win64_24.1.7.exe
- Install the Erlang software:
- Run the Erlang installer as an administrator.
The Erlang Setup wizard appears. The Choose Components page is displayed. - Do not make any changes to the default selections.
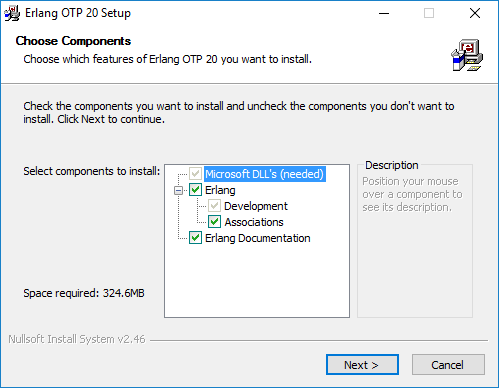
- Click Next.
The Choose Installation Location page appears. - Accept the default location by clicking Next.
The Choose Start Menu Folder page appears. - Do not make any changes to the default location.
- Click Install.
If the system does not have the correct C++ runtime installed, the Microsoft Visual C++ installer dialog appears.
Continue with Step 2g if the dialog appears; otherwise, skip to step 2i. - Click the checkbox to agree to the license terms and condition, and then click Install.
After the Visual C++ installation is completed, the dialog displays a message confirming the success of the installation. - Click Close to close the confirmation dialog.
The Erlang Setup wizard displays a status dialog while installing Erlang. - Click Close when the installation has completed.
- Run the Erlang installer as an administrator.
Task 6. Installing and Configuring RabbitMQ Server on the CEE Server
Download and stage the 64-bit RabbitMQ Server installer on the CEE server.
If deploying for use with Isilon, we require v3.7.4 of RabbitMQ. RabbitMQ v3.7.4 can be found here: https://github.com/rabbitmq/rabbitmq-server/releases/download/v3.7.4/rabbitmq-server-3.7.4.exe.
- If deploying for use with Unity or VNX, we support v3.7.4 and newer versions of RabbitMQ (such as v3.9.11). Note that CEE v8.9.1 requires the latest RabbitMQ v3.9.11. RabbitMQ v3.9.11 can be found here: https://github.com/rabbitmq/rabbitmq-server/releases/download/v3.9.11/rabbitmq-server-3.9.11.exe.
- Install the RabbitMQ Server software:
- Run the RabbitMQ Server installer as an administrator.
The RabbitMQ Server Setup wizard appears. The Choose Components page is displayed. - Do not make any changes to the default selections.

- Click Next.
The Choose Install Location page appears. - Accept the default location by clicking Install.
The Setup wizard displays a status dialog while installing RabbitMQ Server. - Click Next when the installation is complete.
- Click Finish to close the setup wizard.
- Run the RabbitMQ Server installer as an administrator.
- Enable the RabbitMQ Server management plugin:
- Open a command prompt as an administrator.
- In the command prompt window, change to the directory that the RabbitMQ Server is installed (typically C:\Program Files\RabbitMQ Server\rabbitmq_server-X.X.X\sbin, where X.X.X is the version number).
Enter the following command in the command prompt window:
rabbitmq-plugins enable rabbitmq_managementThe command prompt window displays confirmations that the plug-ins have been configured and enabled.
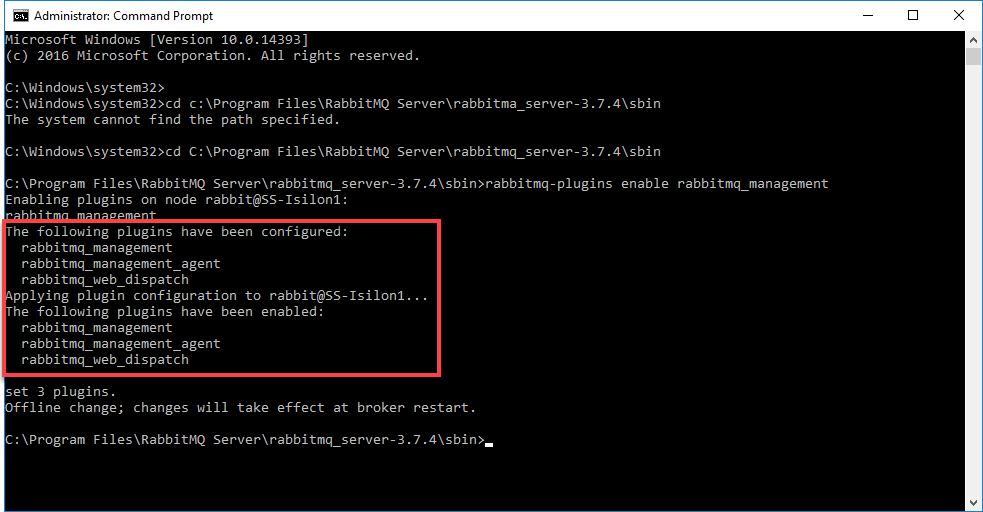
Close the command prompt window.
Restart the RabbitMQ service:
Reopen the Services manager as an administrator.
- Select the Rabbit MQ service.
- Click the Restart link.
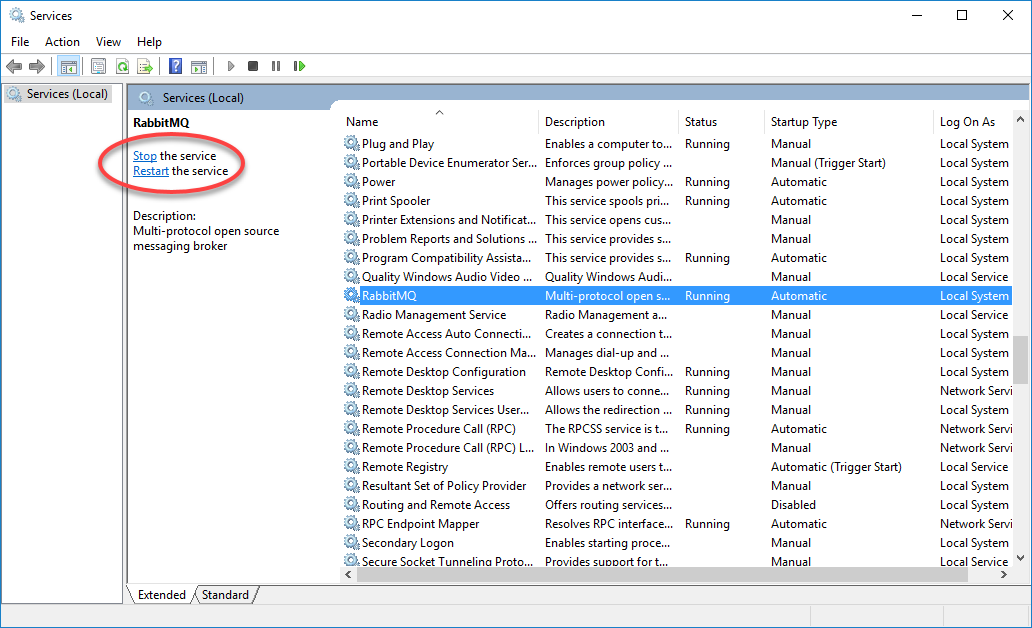
- Close the Services manager.
- Enable the RabbitMQ Server to receive messages:
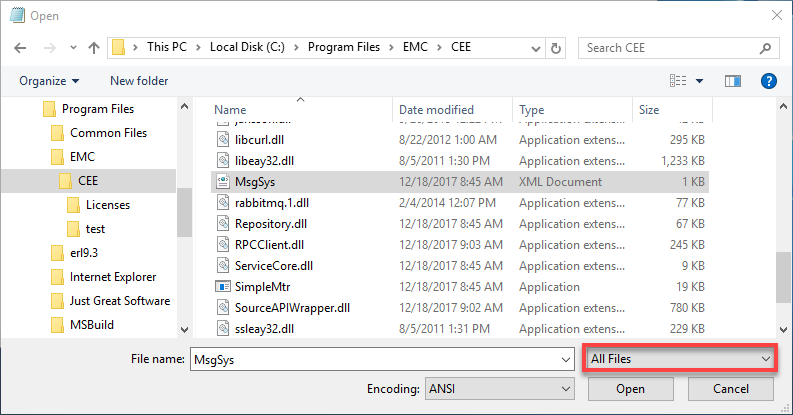
- Open Notepad as an administrator.
Open the file MsgSys.xml in Notepad.
This file should be located in the installation directory of CEE framework (for example, C:\Program Files\EMC\CEE).Tip
To locate the MsgSys.xml file, change the file filter drop-down list from Text Document (.txt)* to All Files; otherwise, only text files will be displayed in the Open dialog.
The MsgSys.xml file is displayed in a Notepad window.
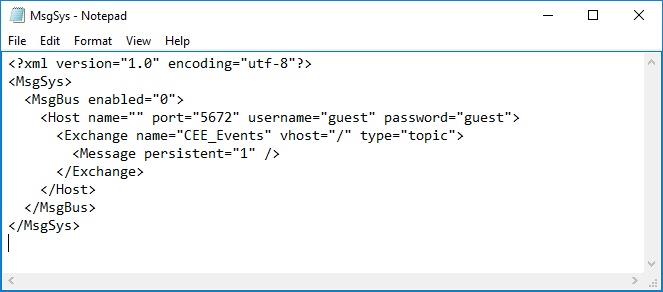
Make the following changes to the file:
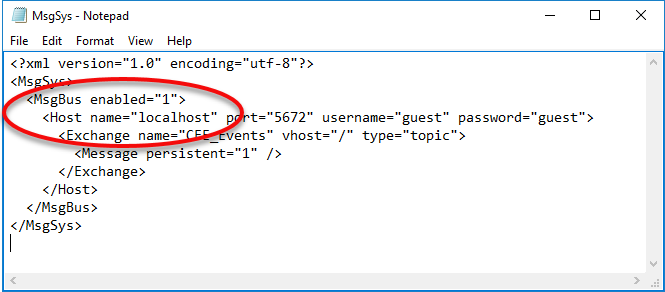
Find the following line:
<MsgBus enabled="0">
and set MsgBus enabled to "1".
Find the following line and set Host name to "localhost" :
<Host name="" port="5672" username="guest" password="guest">
The file now appears as follows:
Save your changes to MsgSys.xml, and then close the file.
- Ensure that the RabbitMQ Service is installed and running:
- Reopen the Services manager as an administrator.
- Find the service named RabbitMQ.
- Confirm that the service is running.
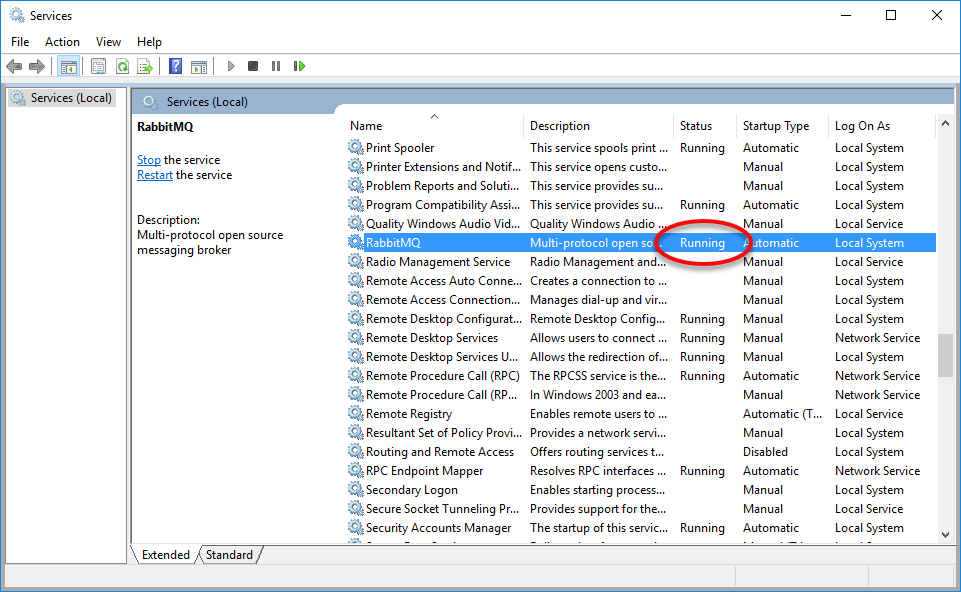
- Close the Services manager.