Purpose of this Guide
The purpose of this guide is to familiarize you with the Edge Caching feature. It will introduce you to the feature set, UI, and workflows of Edge Caching, and step you through setting up and running a job that uses Edge Caching.
This guide assumes general familiarity with using PeerGFS. You should be comfortable with creating and running file collaboration and/or file synchronization jobs. This guide focuses on Edge Caching, not on the broader capabilities of PeerGFS. See the PeerGFS User Guide for your version of PeerGFS for more information about other features and settings.
If you are not familiar with creating and running file collaboration and/or file synchronization jobs, please discuss this with your Peer Software point-of-contact.
Edge Caching was introduced in PeerGFS v5.0 as Dynamic Storage Utilization and was renamed in PeerGFS v5.2.
Introduction to Edge Caching
The Edge Caching feature allows you to save storage space on edge storage devices (for example, storage devices used in branch offices) where only a small subset of files are used on a frequent basis. Files that are used less frequently are replaced with stub files on the edge storage device so that it appears to have a complete set of files. When a user accesses a stub file, Edge Caching retrieves the full version of the file from a master storage device. The benefit of using Edge Caching is that it allows you to efficiently utilize storage capacity on edge devices while preserving fast access performance on files that are used most often.
Edge Caching offers flexible edge storage management with:
-
The ability to assign an amount or percentage of available storage to be used on the edge storage device.
-
Dynamic adjustments of the time periods used to determine whether to stub or rehydrate a file, allowing Edge Caching to keep the assigned storage space as full as possible (best experience for the end user).
-
Direct integration with our file collaboration and synchronization job types.
-
Point-to-point data transfer capability between one edge and one or more masters.
-
The flexibility to mix and match master and edge roles across different jobs.
-
The ability to pin files or folders to always be local or always be stubbed on the edge storage device.
-
Alerting, to ensure you stay ahead of potential storage capacity limits.
Important Concepts
A master participant has a complete set of hydrated files and no stub files. An edge participant contains a subset of the complete, hydrated files on a master participant, while the rest of the files are stub files that don't take up any space. Users can retrieve stubbed files directly from a master participant as needed. The goal of Edge Caching is to keep as much as possible cached locally on edge participants for rapid access.
Every edge participant must have at least one master participant assigned to it. When a stub file needs to be rehydrated, Edge Caching will retrieve the file from a master participant.
User-defined business rules (volume and utilization policies) manage the storage capacity on edge devices. Edge Caching scans edge participants on a set basis (typically at least once daily) and uses these policies to determine whether adjustments are needed, i.e., whether to stub files to free up space or to rehydrate files. This ensures that the storage capacity is being used at optimum efficiency.
Glossary of Edge Caching Terms
This glossary is provided to help you understand some of the core terminology used in conjunction with Edge Caching.
|
Edge participant |
A subset of the files stored on a master participant are physically stored on an edge participant; the rest of the files on an edge participant are stub files that take up minimal space but can be rehydrated as needed. |
|
Local file |
A file that is fully available without network access to a master participant; all of its bytes are present (stored locally) on the participant. |
|
Master Data Service |
A service that handles requests from edge participants for files on a master participant. The Master Data Service is installed on the Peer Agent server as part of the Peer Agent installation process. |
|
Master participant |
A master participant always has a complete set of files for the job. None of its files are stubbed; they are always stored physically on that device. |
|
Pinning filter |
A filter that specifies whether specific files or files in a particular directory are always stubbed or always local on the edge participant. A pinning filter similar is to a utilization policy—it can be applied to multiple jobs. If there is a conflict between a pinning filter and utilization policy (where, for example, you might have something set to be always stubbed), the pinning filter will take precedence. |
|
Rehydrated file |
A file that was stubbed but has been fully reconstituted on the edge participant. |
|
Stub file |
A file that appears to the user to be stored on the local disk and immediately available for use but is actually held either in part or entirely on a different storage medium. |
|
Temporary storage space |
Space that is used to temporarily store the content of stub files that are being rehydrated. |
|
Utilization policy |
A policy that defines when a file should be stubbed versus fully hydrated across all volumes of this edge participant. Parameters are based on the size of the files to be potentially stubbed and when they were last accessed and modified. A utilization policy enables you to balance getting the best performance while keeping the cache as full as possible. |
|
Volume policy |
A policy that specifies how much of the available space on the volume monitored by the Agent/edge participant to be assigned for local (hydrated) files. |
Requirements
-
The requirements for PeerGFS (including both Edge Caching and enterprise NAS support) can be found here.
-
It is important to note that all our support enterprise NAS platforms can be used as master participants but only Windows File Servers can be used as edge participants.
-
We strongly recommend having at least two master participants for every job that uses Edge Caching. If one of the master participants goes down, another master participant can take over and serve data to the edges.
Create a Job that Uses Edge Caching
The process for creating a job remains essentially the same; the primary change occurs when creating participants, where you must designate a participant as a master or edge participant. See the following sections for instructions on how to create a job that utilizes Edge Caching.
-
Create and name the job
-
Create the job participants
-
Create Edge Caching email alerts
- Getting Started with Edge Caching | GettingStartedwithEdgeCaching ApplyEdgeCachingemailalerts
Create and name the job
-
Open Peer Management Center.
-
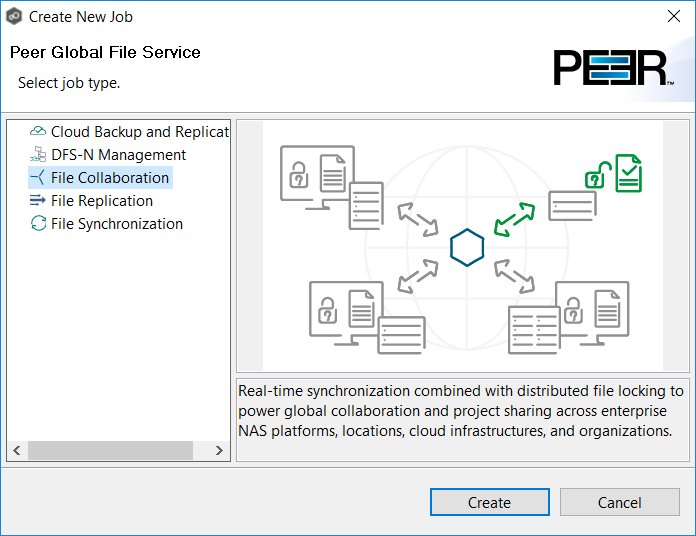
From the File menu, select New Job.
-
Click File Collaboration or File Synchronization, and then click Create.
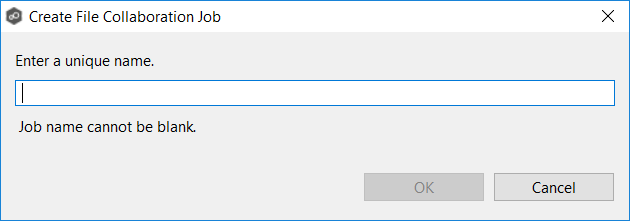
-
Enter a name for the job and click OK.
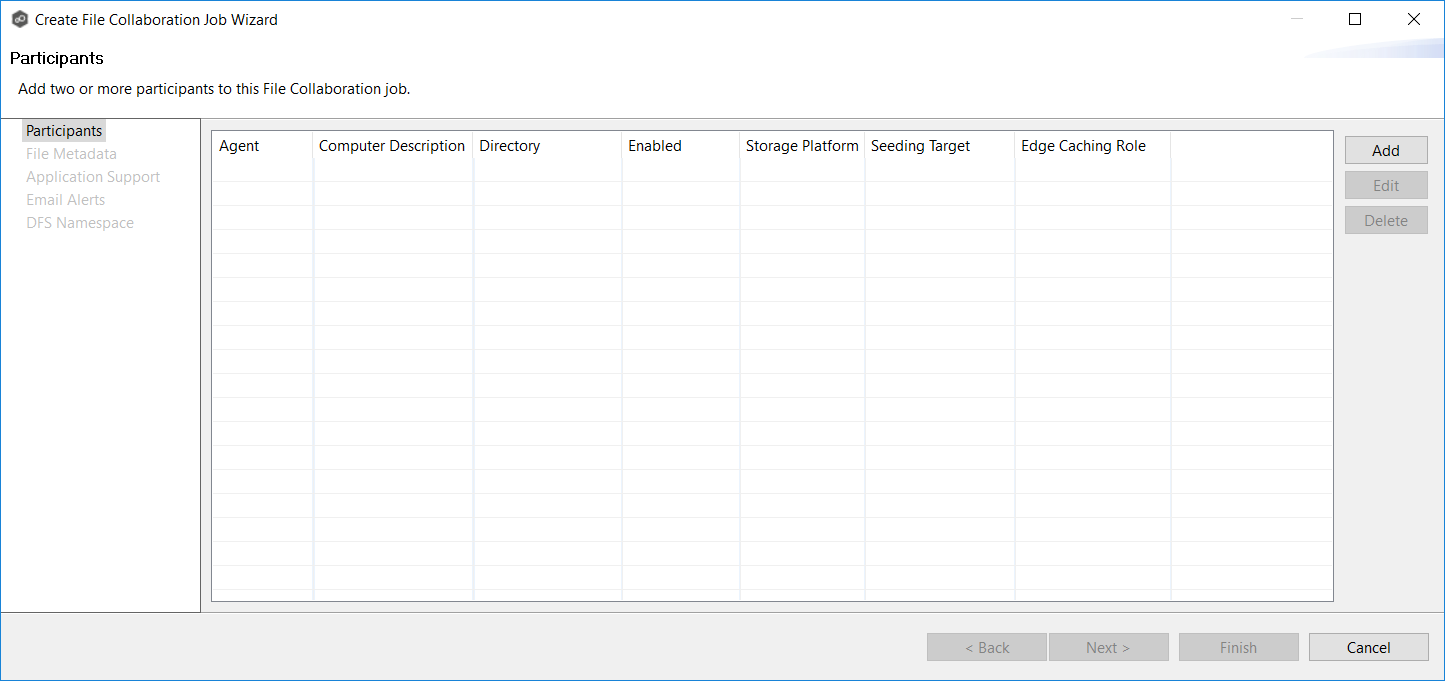
Create the job participants
You are now ready to create the job participants. A participant can be designated as either a master or edge participant.
To effectively deploy Edge Caching, we recommend that the job has at least three participants. At least two of those should be master participants, so that if one master participant goes offline, the other master participant can continue to serve as source for files for the edge participant.
Create a master participant
-
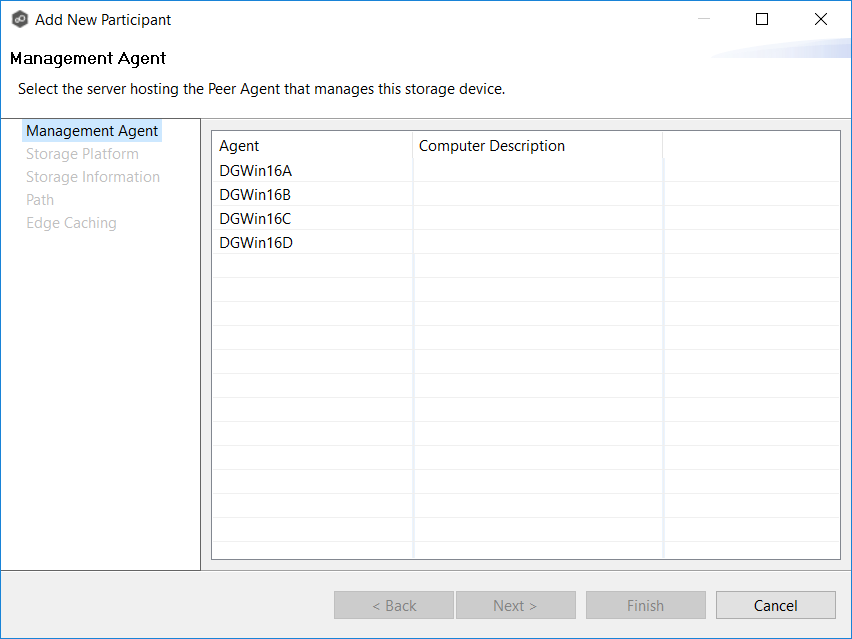
Click the Add button.
-
Select an Agent, and then click Next.
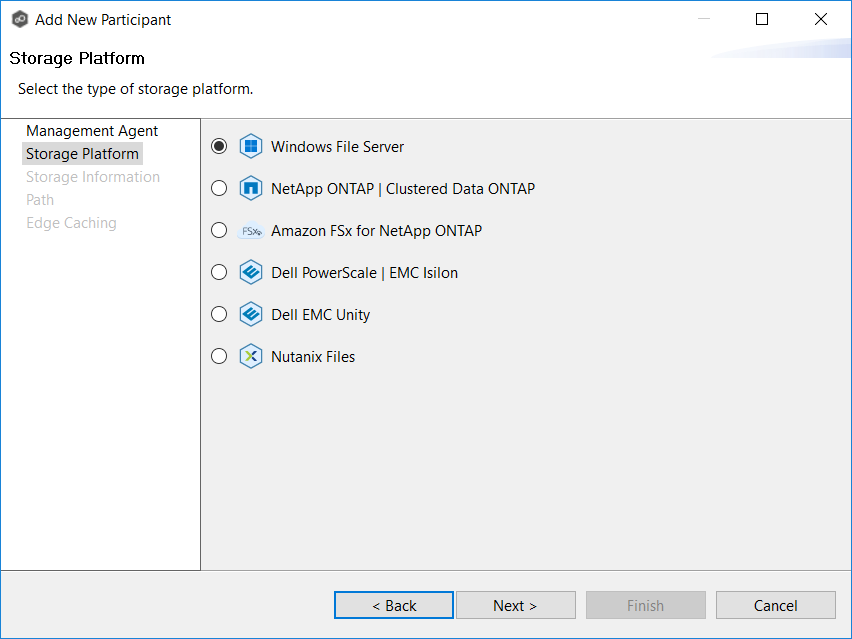
-
Select a storage platform, and then click Next.
A master participant can be any type of supported storage device.
-
If you selected Windows File Server, click Next on the Storage Information page. If you selected any other type of storage platform, select existing credentials or enter new credentials.
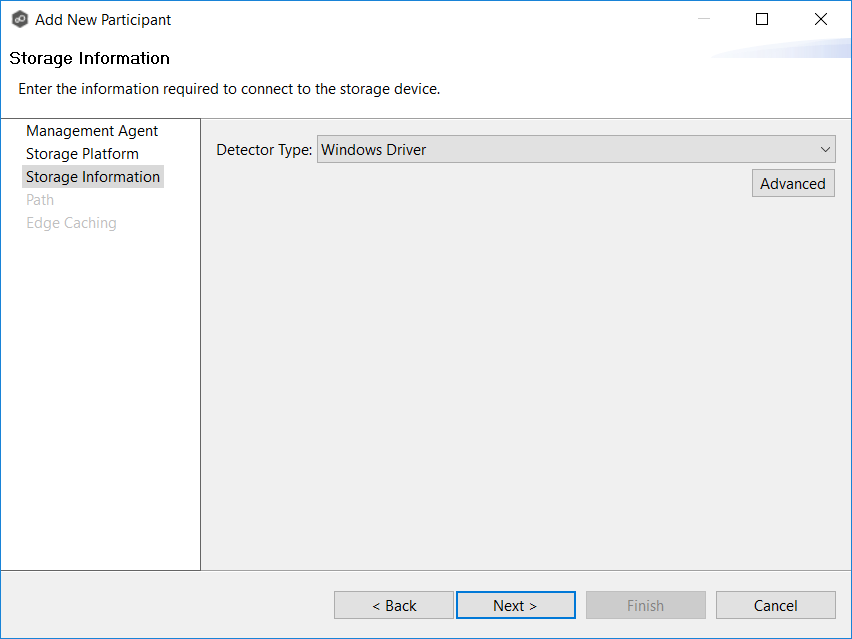
-
Click Next.
-
On the Path page, enter the path to the watch set.
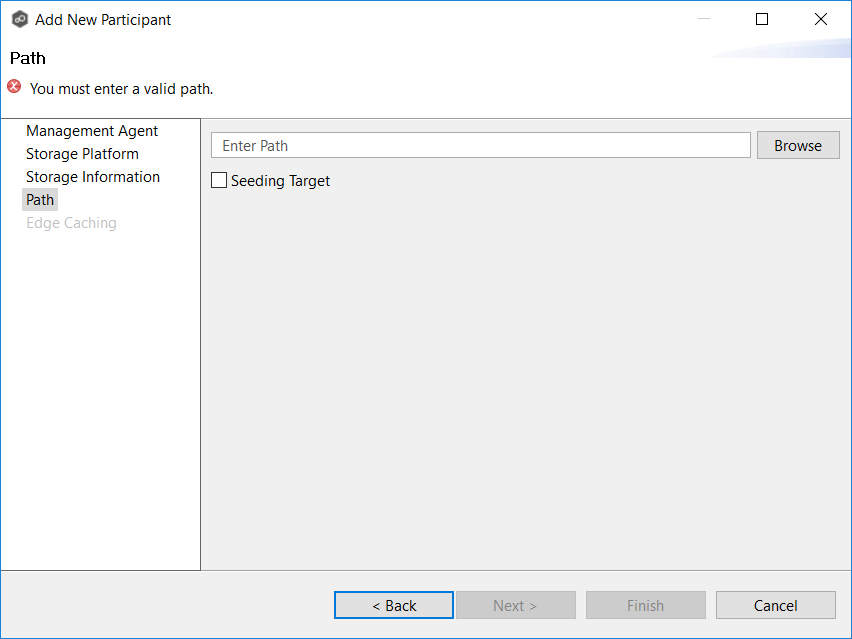
-
Select Seeding Target if you want this participant to be a seeding target, and then click OK.
You must have at least one master participant that is not a seeding target. -
Click Next.
-
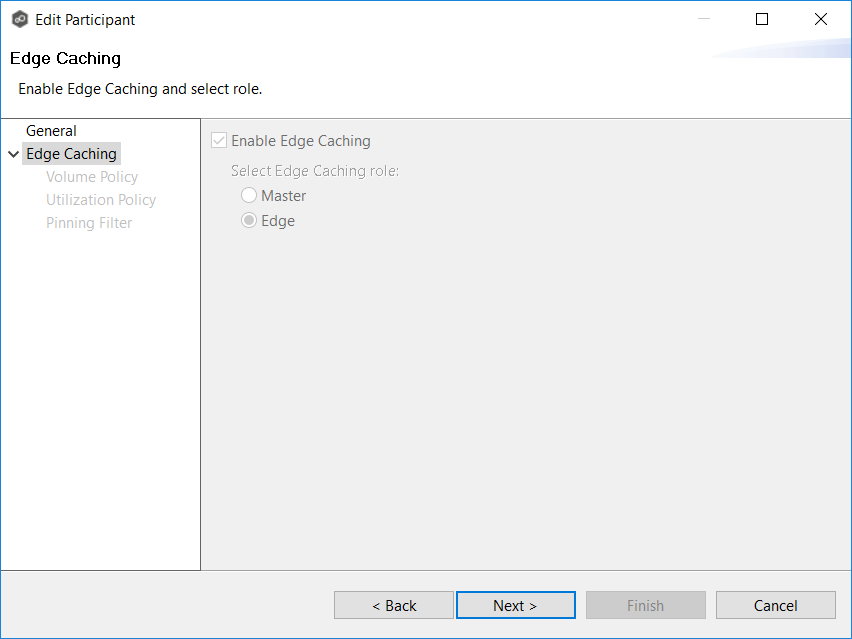
Select the Enable Edge Caching checkbox.
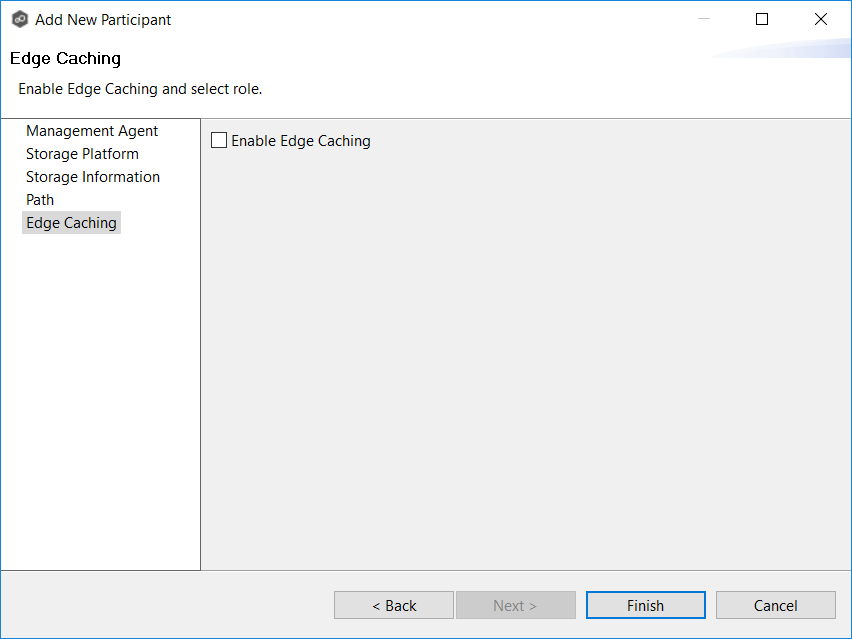
The Master role is selected by default. If this Agent is configured to work with a storage platform other than Windows File Server, the Master role will be the only available option.

-
Click Next.
The Master Data Service page appears. The Master Data Service handles requests for rehydrating stubbed files. If the Agent you selected is already being used as a master participant in another job utilizing Edge Caching, then the existing parameters for the Master Data Service will be displayed. You can edit the values by clicking Edit Master Data Service. Any modifications you make will be applied to every other job that uses this Agent as a master participant.
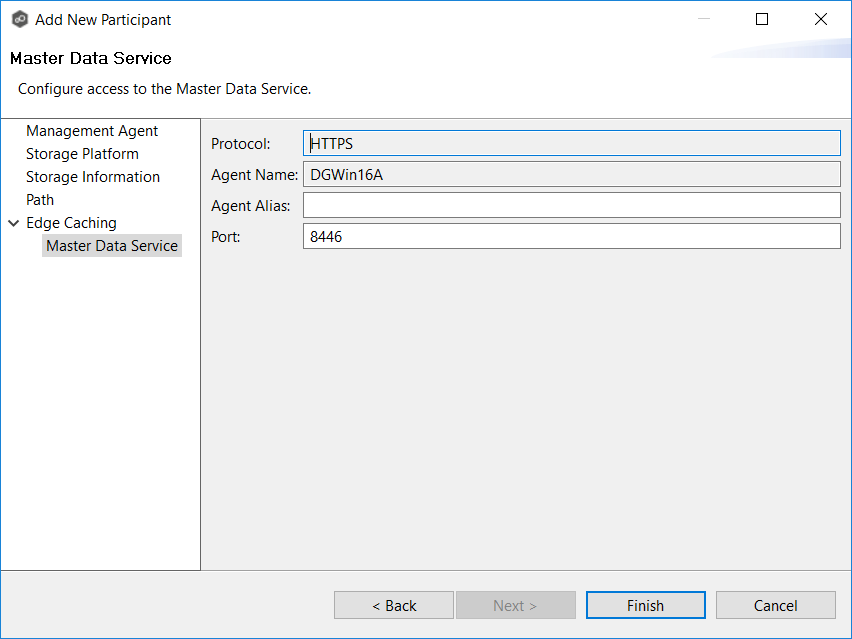
-
(Optional) Enter a value in the Agent Alias field.
This is an optional field. A value is required for Agent Alias only if edge participants will be unable to resolve the Agent Name of this master participant. For example, if the master participant's Windows server is named "Server1.Lab.local" but the edge participant can't resolve "Server1.Lab.local" to an IP because the edge is not on the domain at all. The value for Agent Alias can be the hostname, FDQN, or IP address of the server on which the Agent is installed. If a value is entered, it will be used by the edge service on edge participants to connect with this master data service. If no value is entered, the name of the Agent server will be used. -
(Optional) If necessary, modify the port number of the server that the Agent is installed on.
-
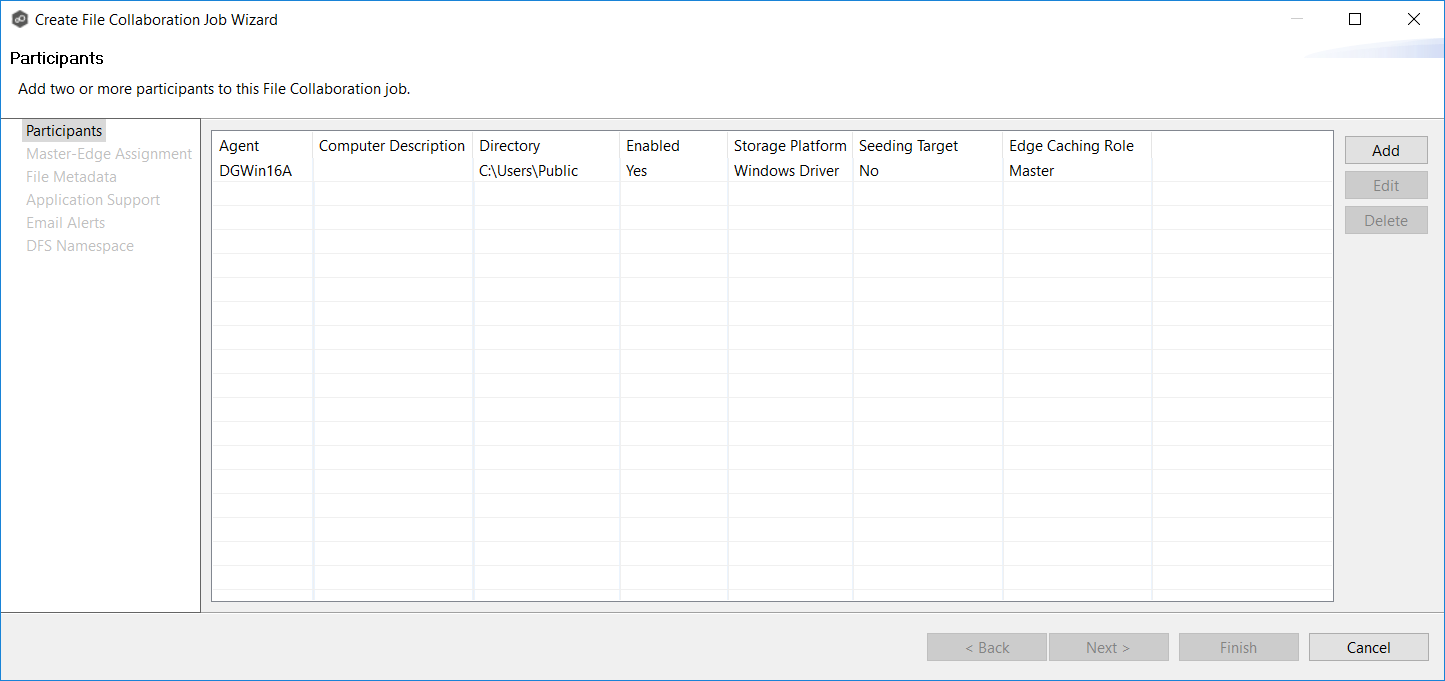
Click Finish.
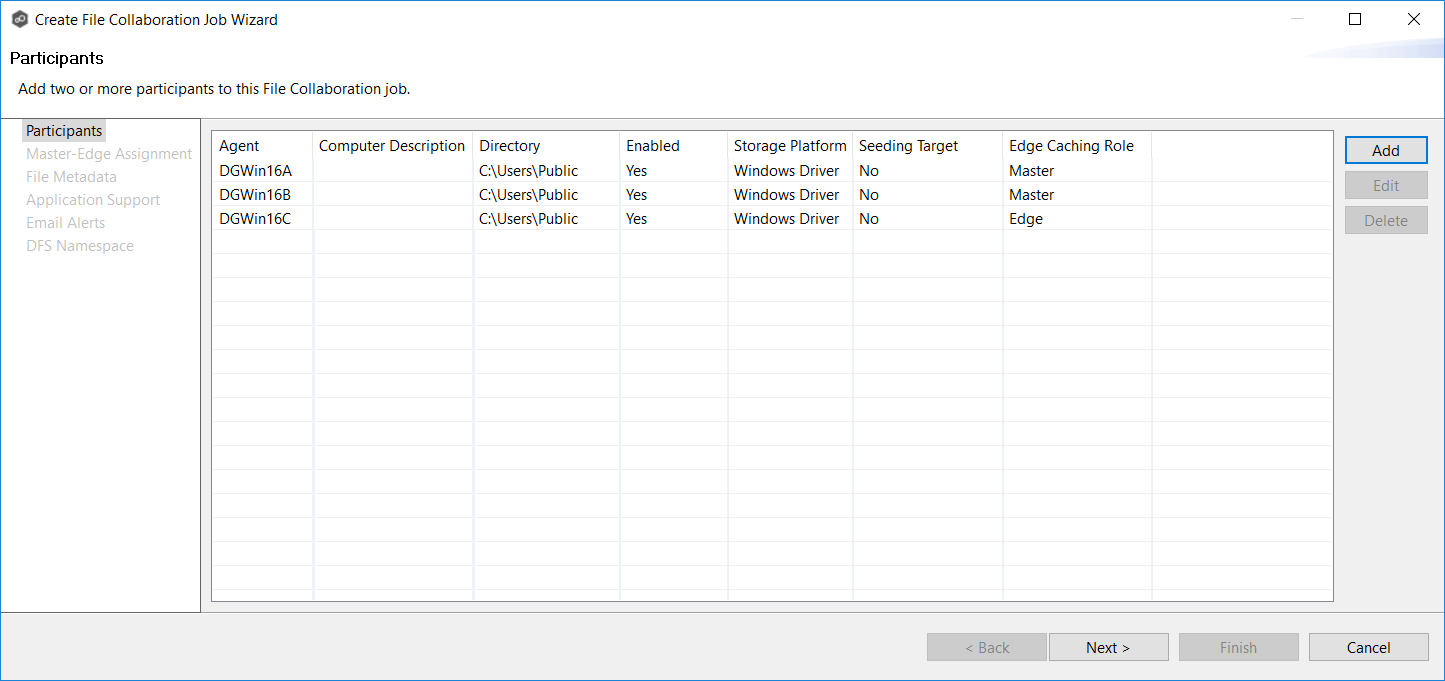
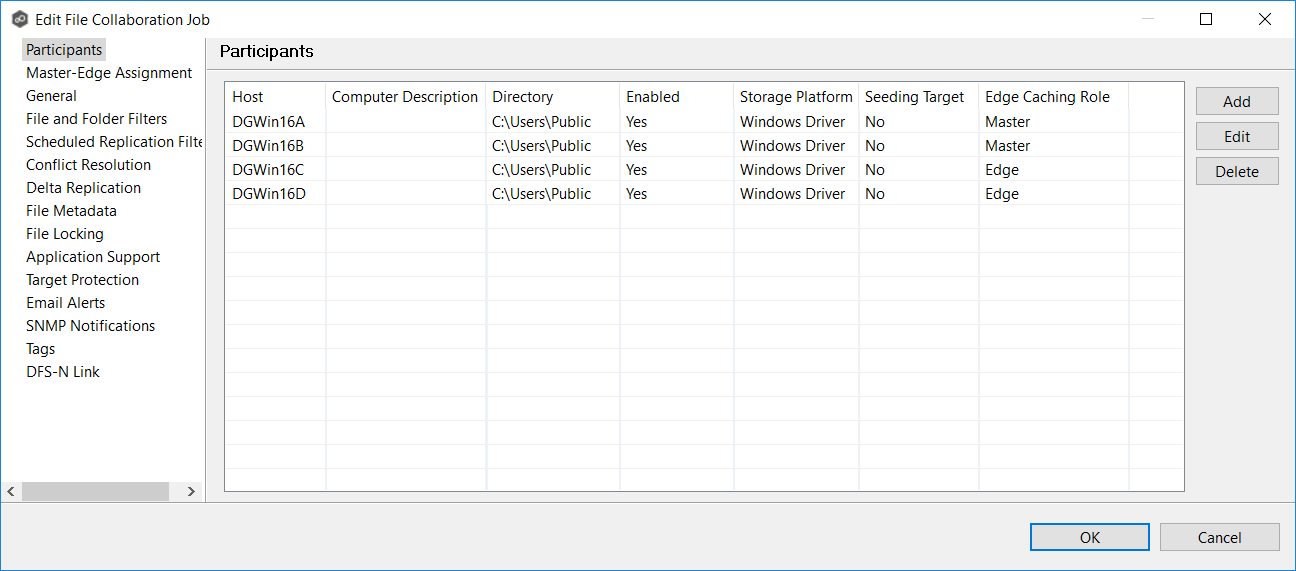
The Participants page appears; the participant has been added to the Participants table.
-
Repeat the steps in the Getting Started with Edge Caching | GettingStartedwithEdgeCaching Createamasterparticipant section to add additional master participants. We recommend having multiple master participants.
Create an edge participant
-
Click the Add button.
-
Select an Agent, and then click Next.
-
Select Windows Files Server as the storage platform, and then click Next.
For an edge participant, the storage platform must be Windows Files Server. -
Click Next on the Storage Information page.
-
Click Next.
-
On the Path page, enter the path to the watch set.
-
Select Seeding Target if you want this participant to be a seeding target, and then click OK.
-
Select the Enable Edge Caching checkbox, and then select Edge.
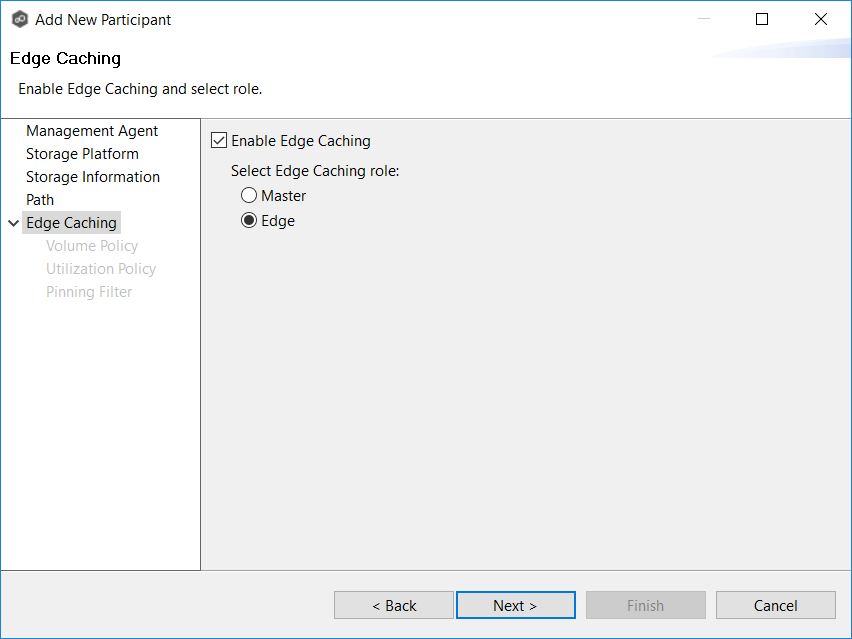
-
Click Next.
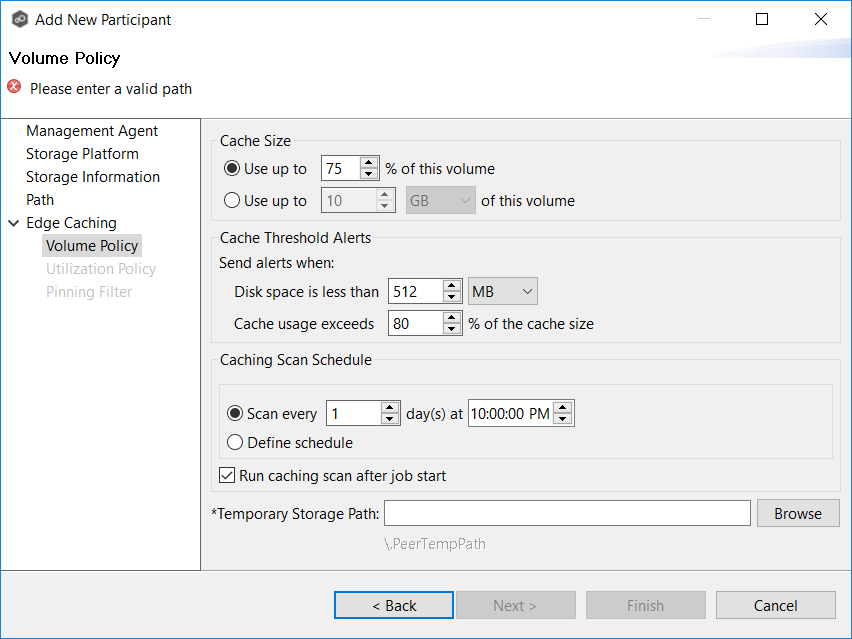
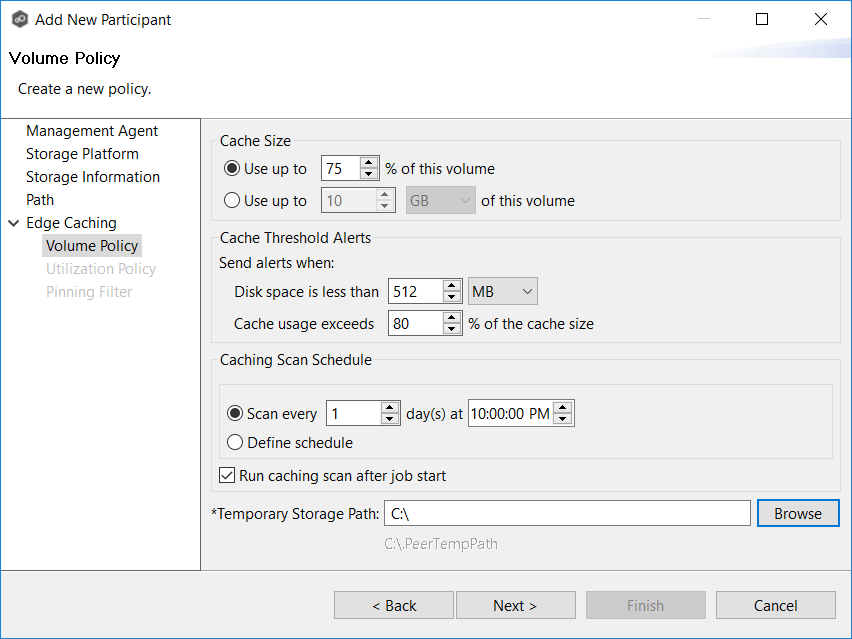
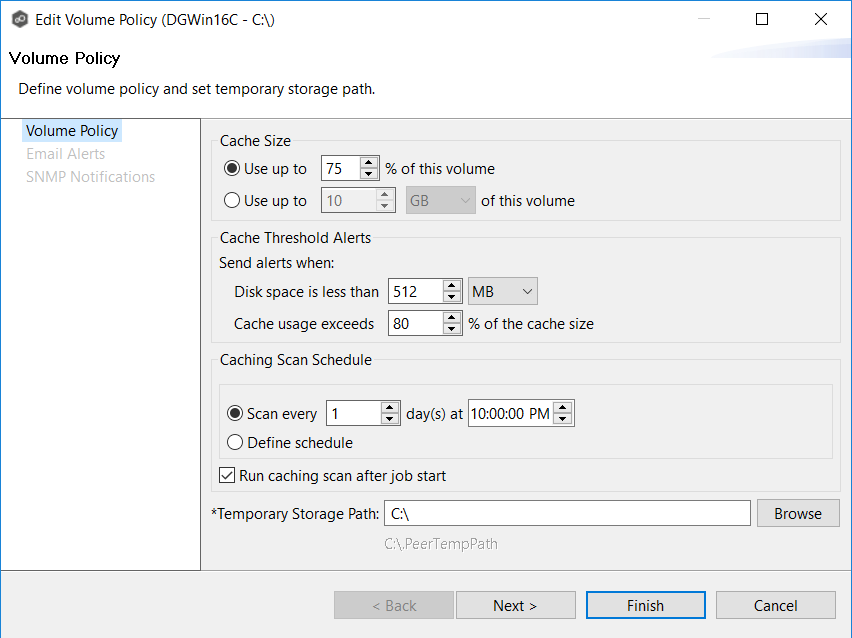
The Volume Policy page appears.
Create a volume policy
If the Agent you selected is already being used as an edge participant in another job utilizing Edge Caching, the existing volume policy will be displayed on this page. You can edit the existing volume policy; however, be aware that any modifications to the volume policy will be applied to every other job that uses this Agent as an edge participant and "touches" the same volume.
-
In the Cache Size section, choose one of the options for setting the cache size: either as a percentage of the volume disk space (default option) or as a fixed size.
We recommend using the default option, which is to use up to 75% of the volume. For example, if an edge participant is monitoring a 1 TB disk space volume and the volume policy dictates a 75% cache usage, the edge participant may locally store up to 750 GB of fully hydrated files from the monitored volume. For best performance, it's recommended to exclusively dedicate this cache to Edge Caching on the specified volume.
-
In the Cache Threshold Alerts section, set the threshold values for receiving automatic alerts regarding free disk space and cache usage.
Peer Management Center will automatically display alerts in the Alerts tab when:
• The amount of free disk space on the volume falls below the specified value. For example, if a 1 TB volume has 500 MB of free space and the threshold is set to 512 MB, an alert will be sent.
• Cache usage on the volume exceeds the specified percentage of the cache size. For example, if the cache size is set to 80%, equivalent to 750 GB, Edge Caching will start sending alerts when it has used 600 GB. -
For Caching Scan Schedule, set the frequency that the volume should be scanned to optimize the balance of fully hydrated vs stubbed files. This scan can be run daily at a specified time or you can define a more customized schedule.
-
Select the Run caching scan after job start checkbox if you want to start hydrating files immediately after starting a job. Otherwise, files will be rehydrated per the caching scan schedule or when they are accessed by users.
-
In the Temporary Storage Path field, enter the root drive of the path specified on the Path page (e.g., C:\).
A subfolder named .PeerTempPath will be created at the specified location, serving as temporary storage of the content of stub files as they are are being rehydrated.
-
Click Next.
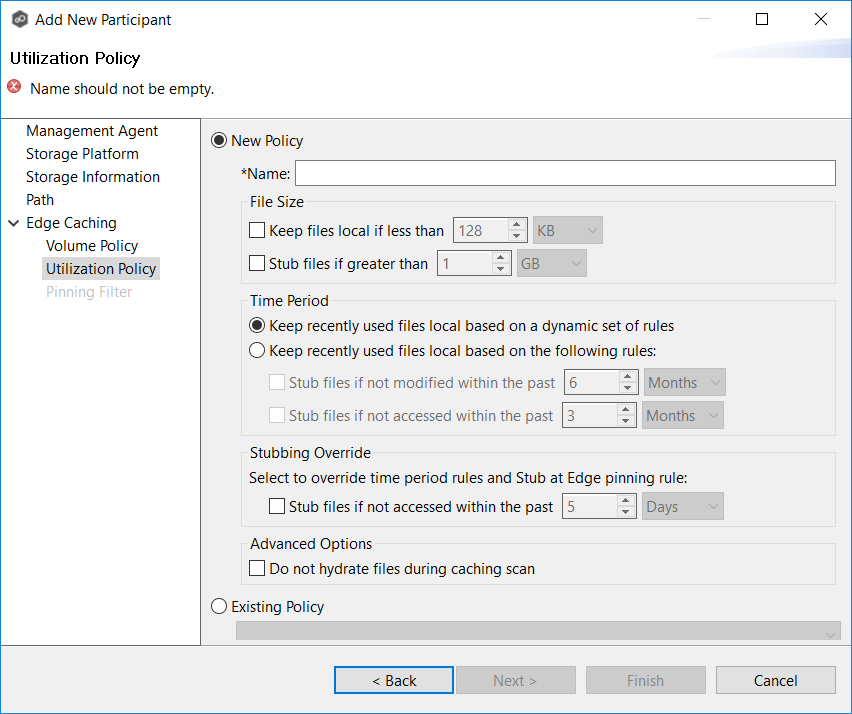
The Utilization Policy page appears.
Create a utilization policy
-
You can create a new policy or select an existing policy:
• If you select Existing Policy, click Next and continue with Step 6.
• If you select New Policy, enter a name for the policy.
-
(Optional) In the File Size section, select one or both options to configure Edge Caching based on file size.
-
(Optional) In the Time Period section, select one of the options to configure Edge Caching based on file timestamps.
-
To modify the Stubbing Override and Advanced Options sections, see the PeerGFS User Guide for instructions.
-
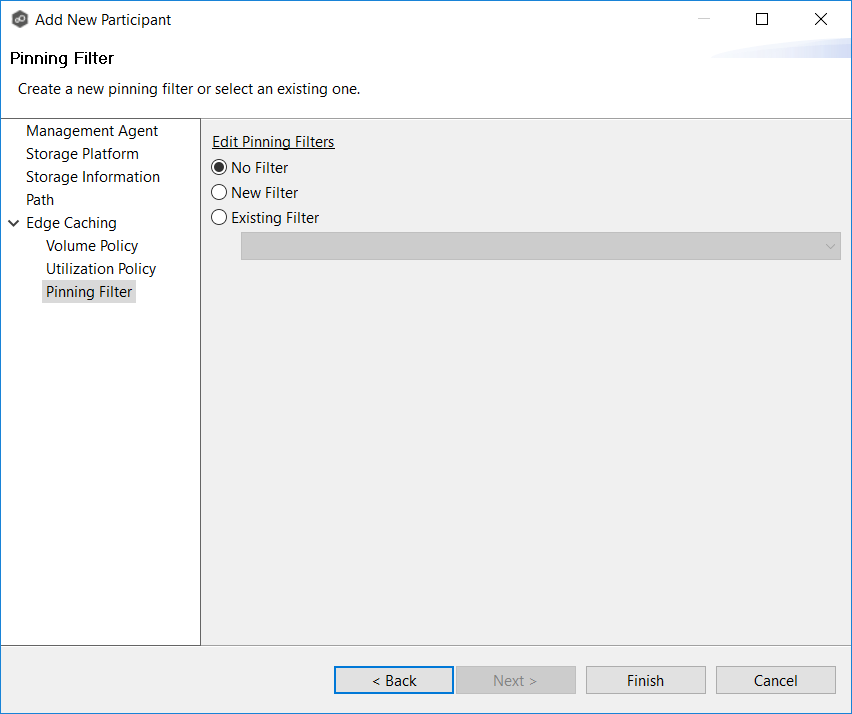
If you want to create a pinning filter, see the PeerGFS User Guide for instructions.
-
Click Finish.
The Participants page appears; the participant has been added to the Participants table.
-
Repeat the steps in the Getting Started with Edge Caching | GettingStartedwithEdgeCaching Createanedgeparticipant section to add additional edge participants.
-
Click Next.
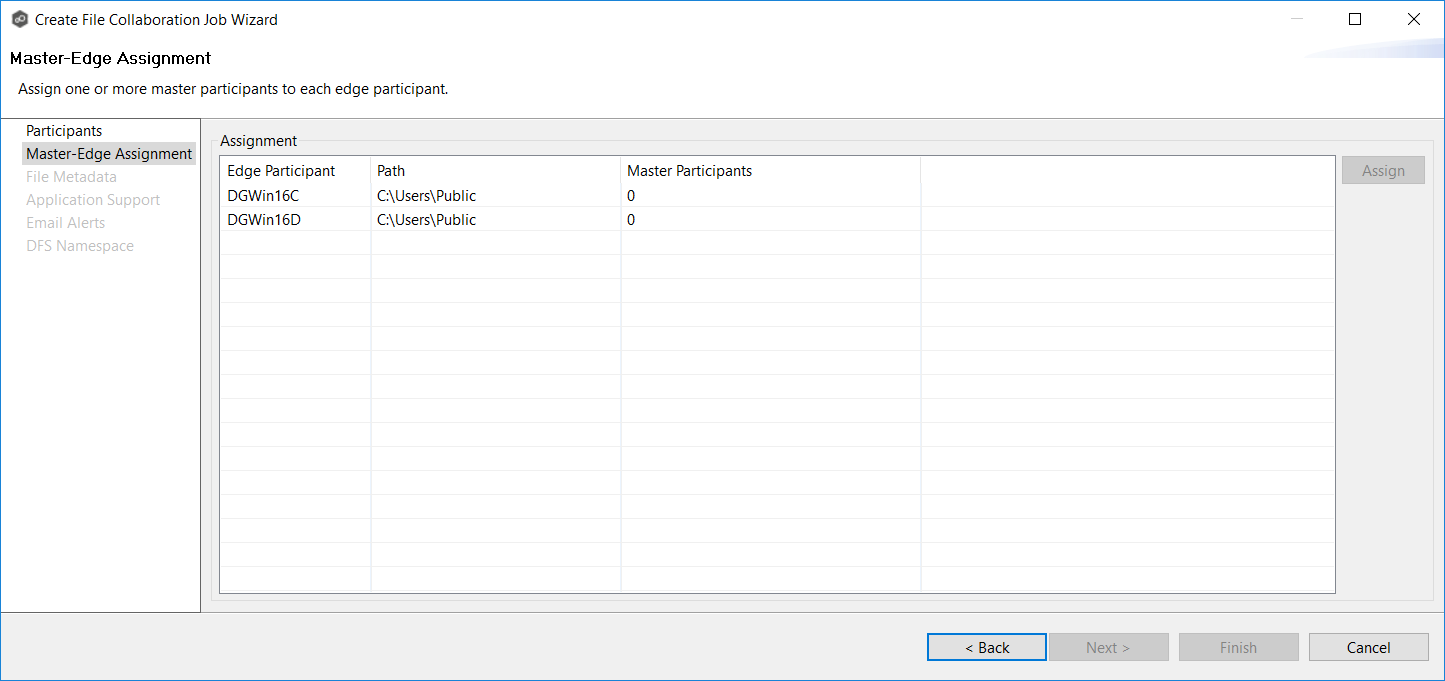
The Master-Edge Assignment page appears.
Assign master participants to edge participants
For each edge participant, assign at least one master participant to it and set the failover order. Edge Caching will use the master participants when reading or rehydrating a stub file on the edge participant.
-
Select an edge participant in the Master Configuration table, and then click Assign.
-
In the Select Master Participants dialog, select one or more master participants.
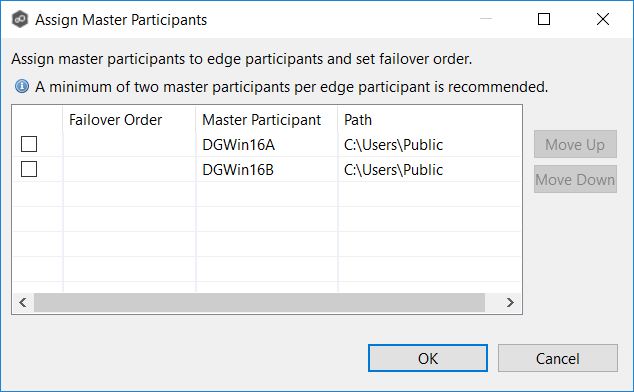
-
Use the Move Up and Move Down buttons to set the failover order.
-
Click OK.
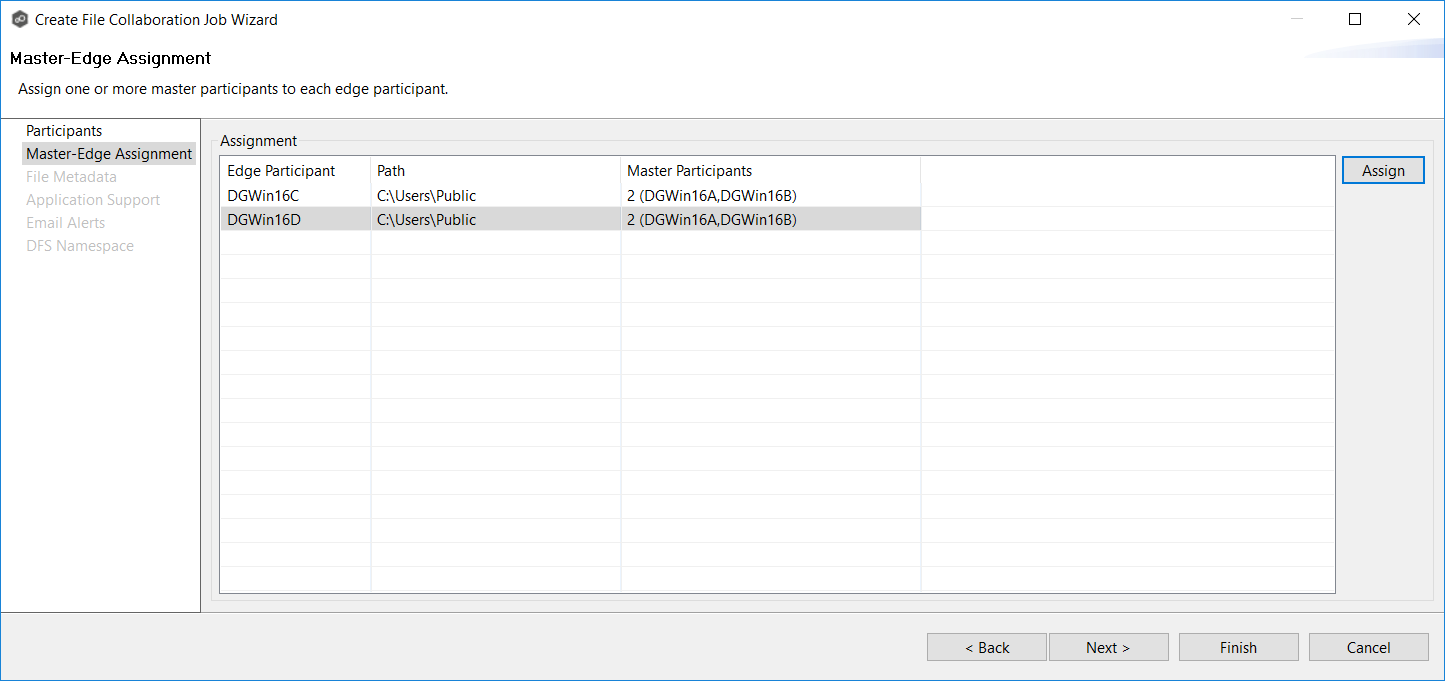
-
Repeat for each edge participant.
-
Click Next to continue with the rest of the wizard or click Finish.
Create Edge Caching email alerts
After creating a Edge Caching-enabled job, we recommend creating Edge Caching email alerts that flag you to potential or actual problems that allow you stay ahead of potential storage capacity limits. For example, cache utilization specifies the maximum percentage of the cache to be allocated to fully hydrated files. When the maximum percentage is reached, you will receive an alert.
To create a Edge Caching email alert:
-
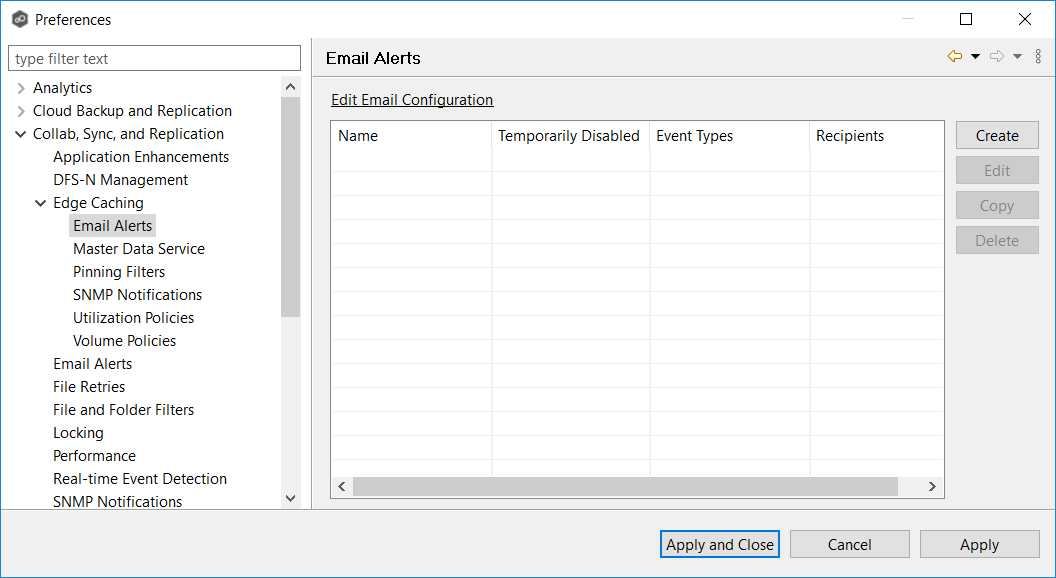
Select Preferences from the Window menu.
-
Expand Collab, Sync, and Replication in the navigation tree, and then select and expand Edge Caching.
-
Select Email Alerts in the navigation tree, and then click Create.
-
Enter a name for the alert.
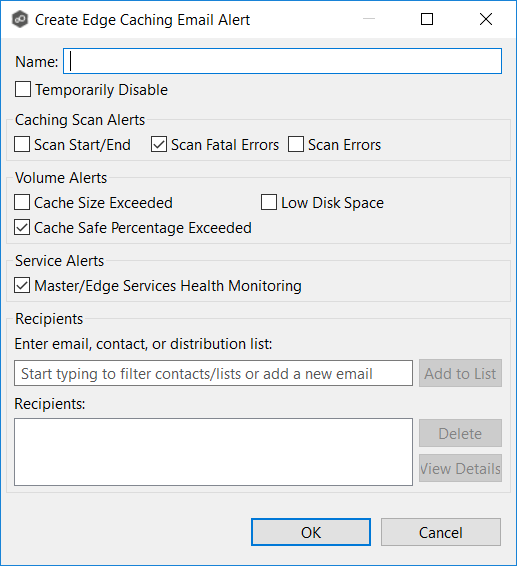
-
Select the caching scan events to be alerted.
-
Select the volume event types to be alerted.
-
Select Master/Edge Services Health Monitoring if you want to be alerted if either the Peer Master Data Service or the Peer Edge Service goes down.
-
Enter alert recipients, and then click Add to List.
-
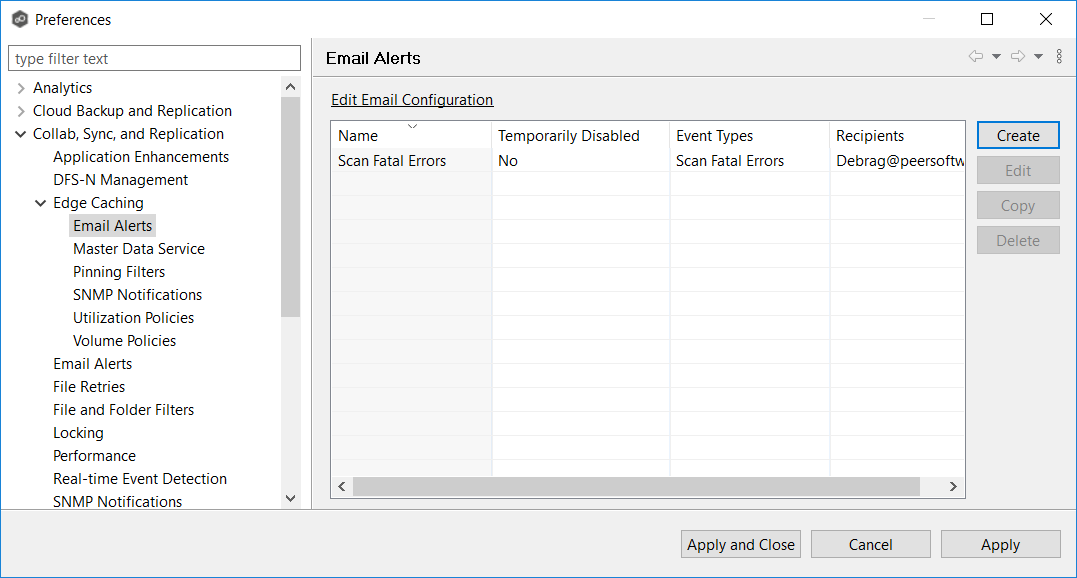
Click OK to close the dialog.
The new email alert can now be applied to Edge Caching-enabled jobs.
-
Click Apply and Close or Apply.
You can now apply email alerts to a job utilizing Edge Caching.
Apply Edge Caching email alerts
After creating an email alert, you will need to edit the job to apply the alert to the job. Specifically, you will need to edit the volume policy for a participant.
-
In the Jobs view, right-click the job for which you want to apply alerts and select Edit Job.
The Edit Job wizard opens.
-
Select a participant in the Participants table.
-
Click the Edit button.
The Edit Participant page appears.
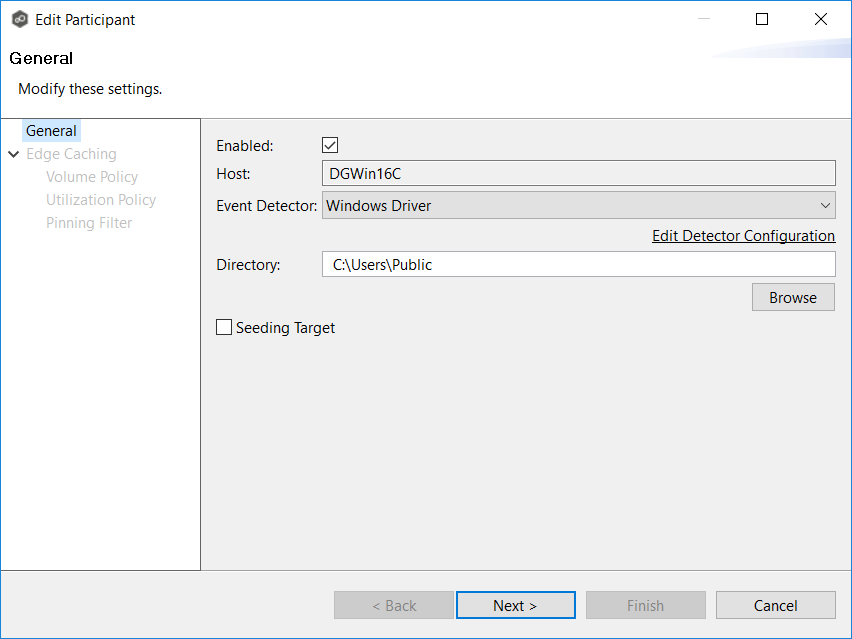
-
Click Next.
The Edge Caching page appears.
-
Click Next.
The Volume Policy page appears.

-
On the Volume Policy page, click the Edit Volume Policy link.
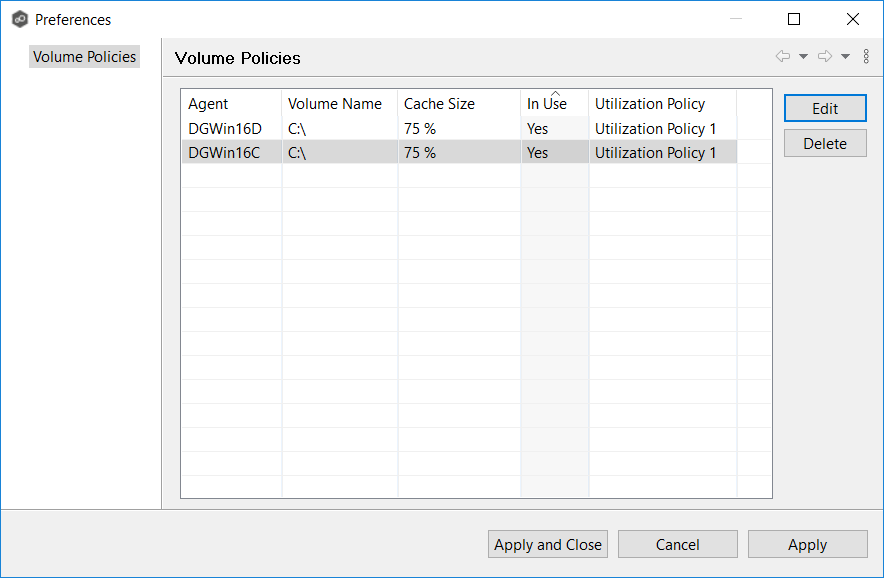
The Volume Policies page appears.
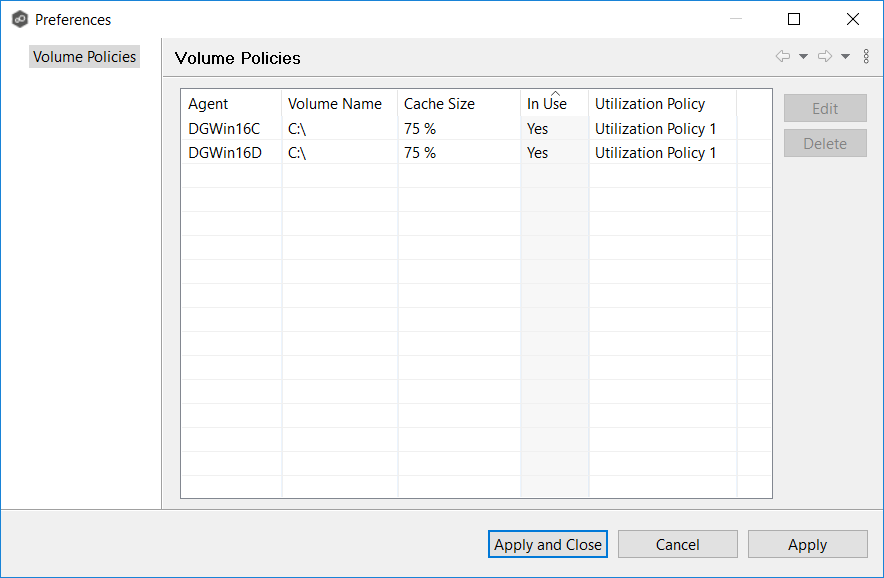
-
In the Volume Policies table, select the participant that you selected in Step 2, and then click the Edit button.
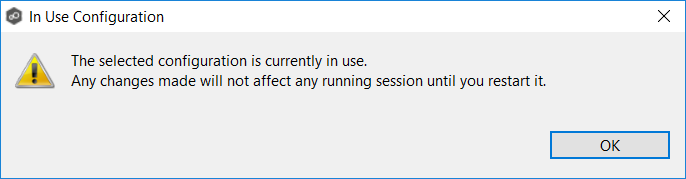
-
Click OK in the In Use Configuration dialog that appears.
The Edit Volume Policy page appears.
-
Click Next.
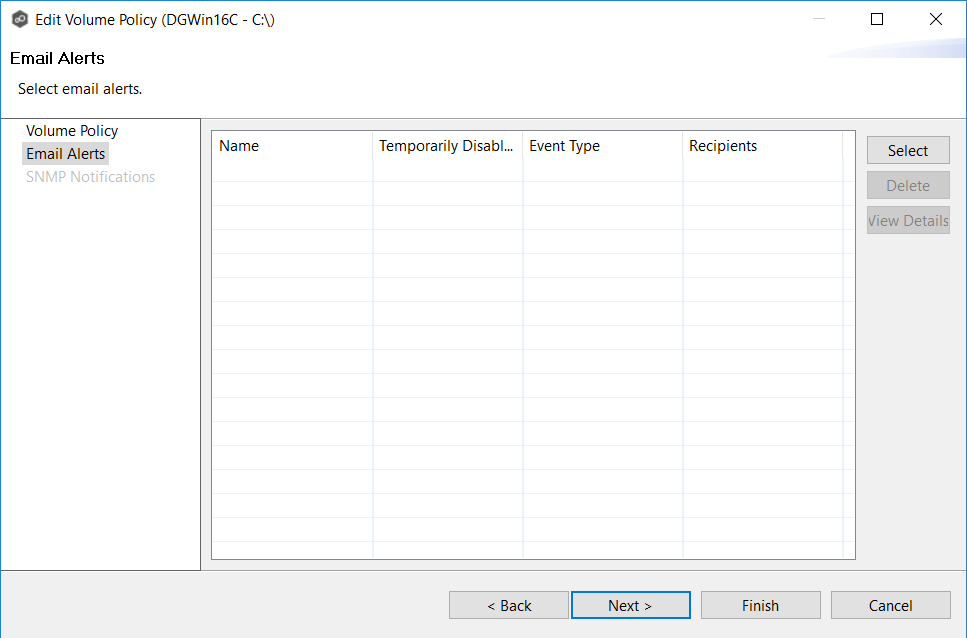
The Email Alerts page appears. The table on this page lists any email alerts already applied.
-
Click the Select button.
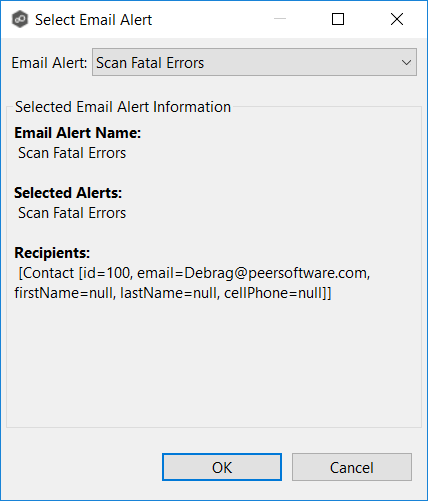
The Select Email Alert page appears.
-
Select an alert from the Email Alert dropdown, and then click OK.
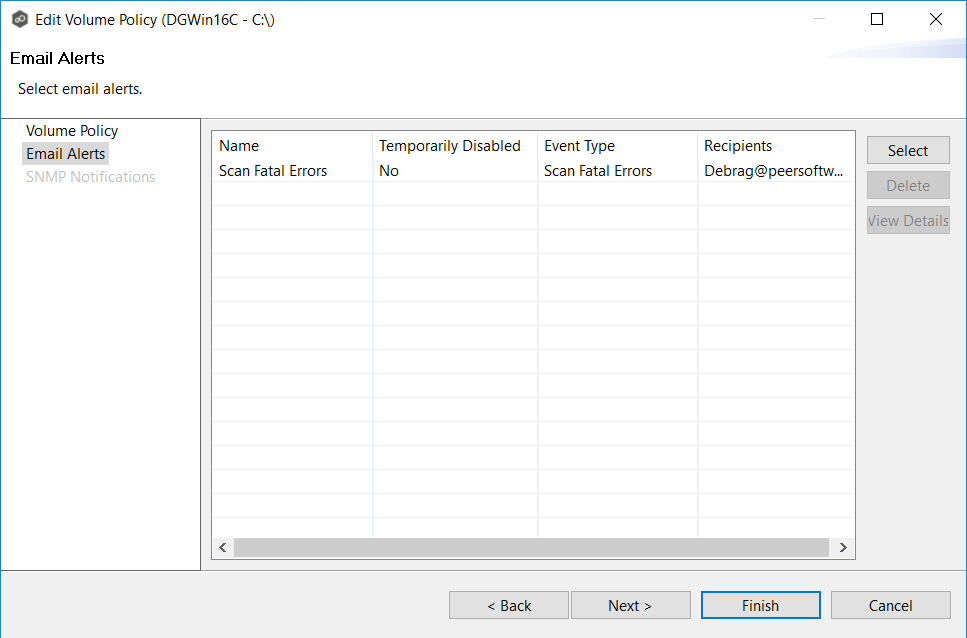
The selected alert appears in the table.
-
Add additional alerts if desired.
-
Click Finish.
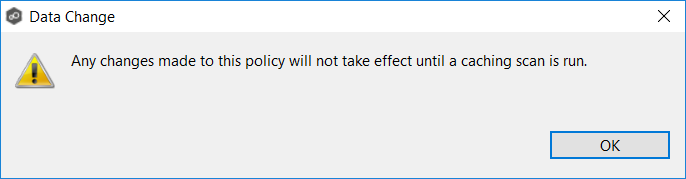
-
Click OK in the Data Change dialog.
-
Click Apply and Close in the Volume Policies page.
-
Click Finish in the Volume Policy page.

-
Click Next. The Utilization Policy page appears.
-
Click Next. The Pinning Filter page appears.
-
Click Finish.
-
Click OK to close the Edit Job wizard.
Get Feedback on Your Edge Caching Jobs
-
Determine the State of a File on an Edge Participant
-
View Edge Caching Job Statistics
-
Examine Application-Specific Interaction with Edge Caching
-
Test Stubbing and Rehydration
Determine the State of a File on an Edge Participant
You can determine whether a file is a stub on the edge participant in one of two ways:
Method 1
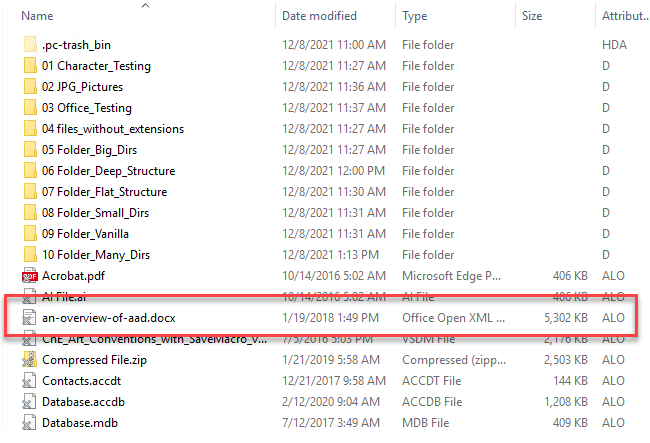
Look for the offline X in the bottom left corner of the file icon, (as seen on the the left-hand file in the below example). The offline X should disappear.

Method 2
Display the Attributes column in Windows Explorer and look for the L and O attributes.
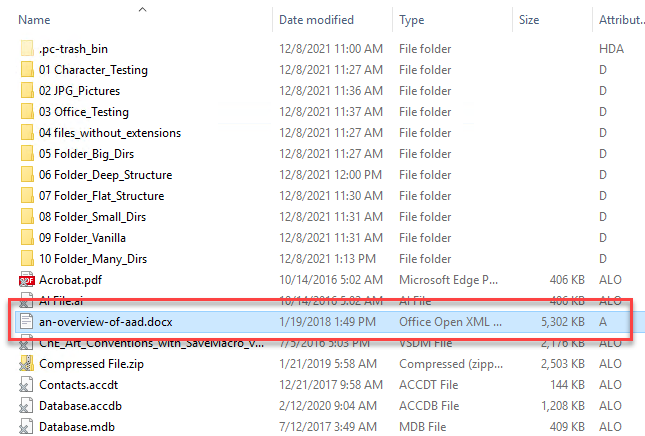
If you open that file on a client system that is using SMB to access the edge participant, it will be automatically rehydrated with file data pulled from one of the master participants. The offline X should disappear, as should the L and O attribute attributes.
L and O attributes
No L and O attributes
View Edge Caching Job Statistics
You can get feedback about how Edge Caching is performing in your environment. To view Edge Caching job statistics, you must start Edge Caching-enabled jobs. When a Edge Caching job starts:
-
Connectivity to all Agents and other file storage devices is checked.
-
The real-time monitoring engine is initialized.
-
A background scan is kicked off to ensure all file servers are in sync with another.
-
If an edge participant is new to a job, the initial data will be replicated to that participant as stub files.
-
Once the initial background scan is complete, a cache optimization scan will be run on each edge participant.
-
In the Jobs view, right-click one or more of your Edge Caching jobs, and then select Start.
-
Double-click on a specific job in the Jobs view to see its runtime information and statistics.
-
Double-click on the File Collaboration or File Synchronization job type in the Jobs view, and then click the Edge Caching tab to see details about how Edge Caching is performing in your environment. Note that it may take some time for statistics to be displayed after starting a job for the first time.
Examine Application-Specific Interaction
We recommend that you test Edge Caching's interaction with your other applications. For example, some applications may not like having their files stubbed or may not like the additional time it takes from the time the application tries to open a stub file to when Edge Caching is able to get full file data from a master (an application may be used to opening a 1 GB file locally within a few seconds).
To discover any potential compatibility issues between Edge Caching and your line of business applications, we suggest that you:
-
Make a list of the key applications that you and your end users use in production.
-
For each available application, perform a series of normal operations (create, open, modify, etc.) against new and legacy files:
-
-
All operations performed against new files should be replicated to and fully available on all participants.
-
Opens of older files may take longer on the edge participants as the Edge service receives file data from the Master Data service over the network.
-
All testing should be performed against both master and edge participants from a client system that is not hosting a Peer Agent. Client systems can be running client versions of Windows or the PMC server can be used as a client system.
Test Stubbing and Rehydration
Purpose
We recommend that in addition to testing application compatibility with Edge Caching, you also test stubbing and rehydration to ensure that your network can handle the additional traffic required to rehydrate files from a master.
Data to Test
Testing of the stubbing and rehydration functionality is best done with older data (1 year or older). That said, if the amount of local data on an edge participant does not fill its assigned cache size, Edge Caching will dynamically rehydrate older files to ensure a better end user experience.
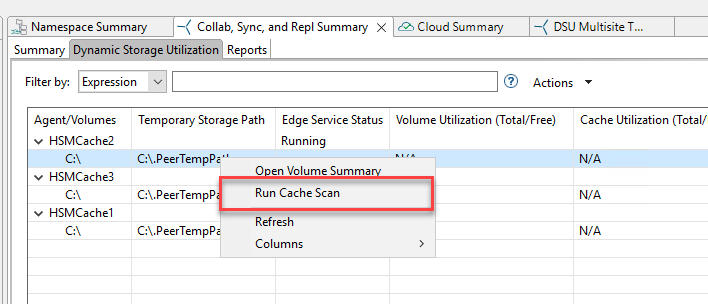
Test Process
By default, Edge Caching will perform a nightly cache optimization scan of all files on each edge participant to determine if they should be stubbed or rehydrated. To force the cache scan to run, right-click on a volume in the Edge Caching tab of the Collab, Sync, and Repl Summary view and click Run Cache Scan.