
Purpose of this Guide
Welcome to the Getting Started with Multi-Protocol for PeerGFS guide. This document introduces PeerGFS’s multi-protocol functionality, explaining how it enables synchronization and replication of data between storage devices using SMB and NFS protocols. It covers key concepts, configuration steps, and best practices for setting up and managing a multi-protocol environment.
This guide assumes you are already familiar with installing and using PeerGFS. It focuses specifically on multi-protocol support and does not cover the broader capabilities of PeerGFS. If you need installation guidance, consult your Peer Software point of contact. For additional features and settings, refer to the PeerGFS User Guide.
The guide is designed to provide a clear, step-by-step approach to configuring PeerGFS for SMB and NFS integration:
-
Introducing Multi-Protocol with PeerGFS – Explains how PeerGFS replicates data using both SMB (Windows clients) and NFS (Linux clients).
-
Setting Up Access Permissions on Your Storage Device – Covers the required permissions for SMB and NFS to ensure proper connectivity.
-
Setting Up Storage Configurations – Guides you through configuring storage connectivity before creating a PeerGFS job.
-
Setting Up SMB Access for Linux Agents – Explains how to configure SMB (file sharing) access so Peer Agents running on Linux can connect to Windows-based shares.
-
Setting Up a Multi-Protocol Job – Provides detailed steps for creating file synchronization, file replication, and file collaboration jobs that use multi-protocol.
-
Understanding SMB and NFS Interactions – Highlights key differences between SMB and NFS, including file name case sensitivity and mixed permissions behavior.
-
Understanding File Locking Support – Describes how file collaboration jobs rely on file locking and explains why this behavior is supported only for clients accessing files over SMB.
-
Troubleshooting Common Issues – Offers solutions for common issues encountered when using PeerGFS in a multi-protocol environment.
Consult the PeerGFS Environmental Requirements and relevant storage prerequisites to ensure that your environment meets the necessary requirements.
Introducing Multi-Protocol with PeerGFS
PeerGFS enables replication of data between NAS devices by monitoring SMB and NFS activity in real-time and triggering a Peer Agent to perform the replication. The multi-protocol functionality allows a single Peer Agent to receive notifications for both Windows and Linux client activity. PeerGFS maintains metadata integrity by using NFS for data transfers and a combination of NFS and SMB for permissions, offering a robust solution for managing data across heterogeneous environments.
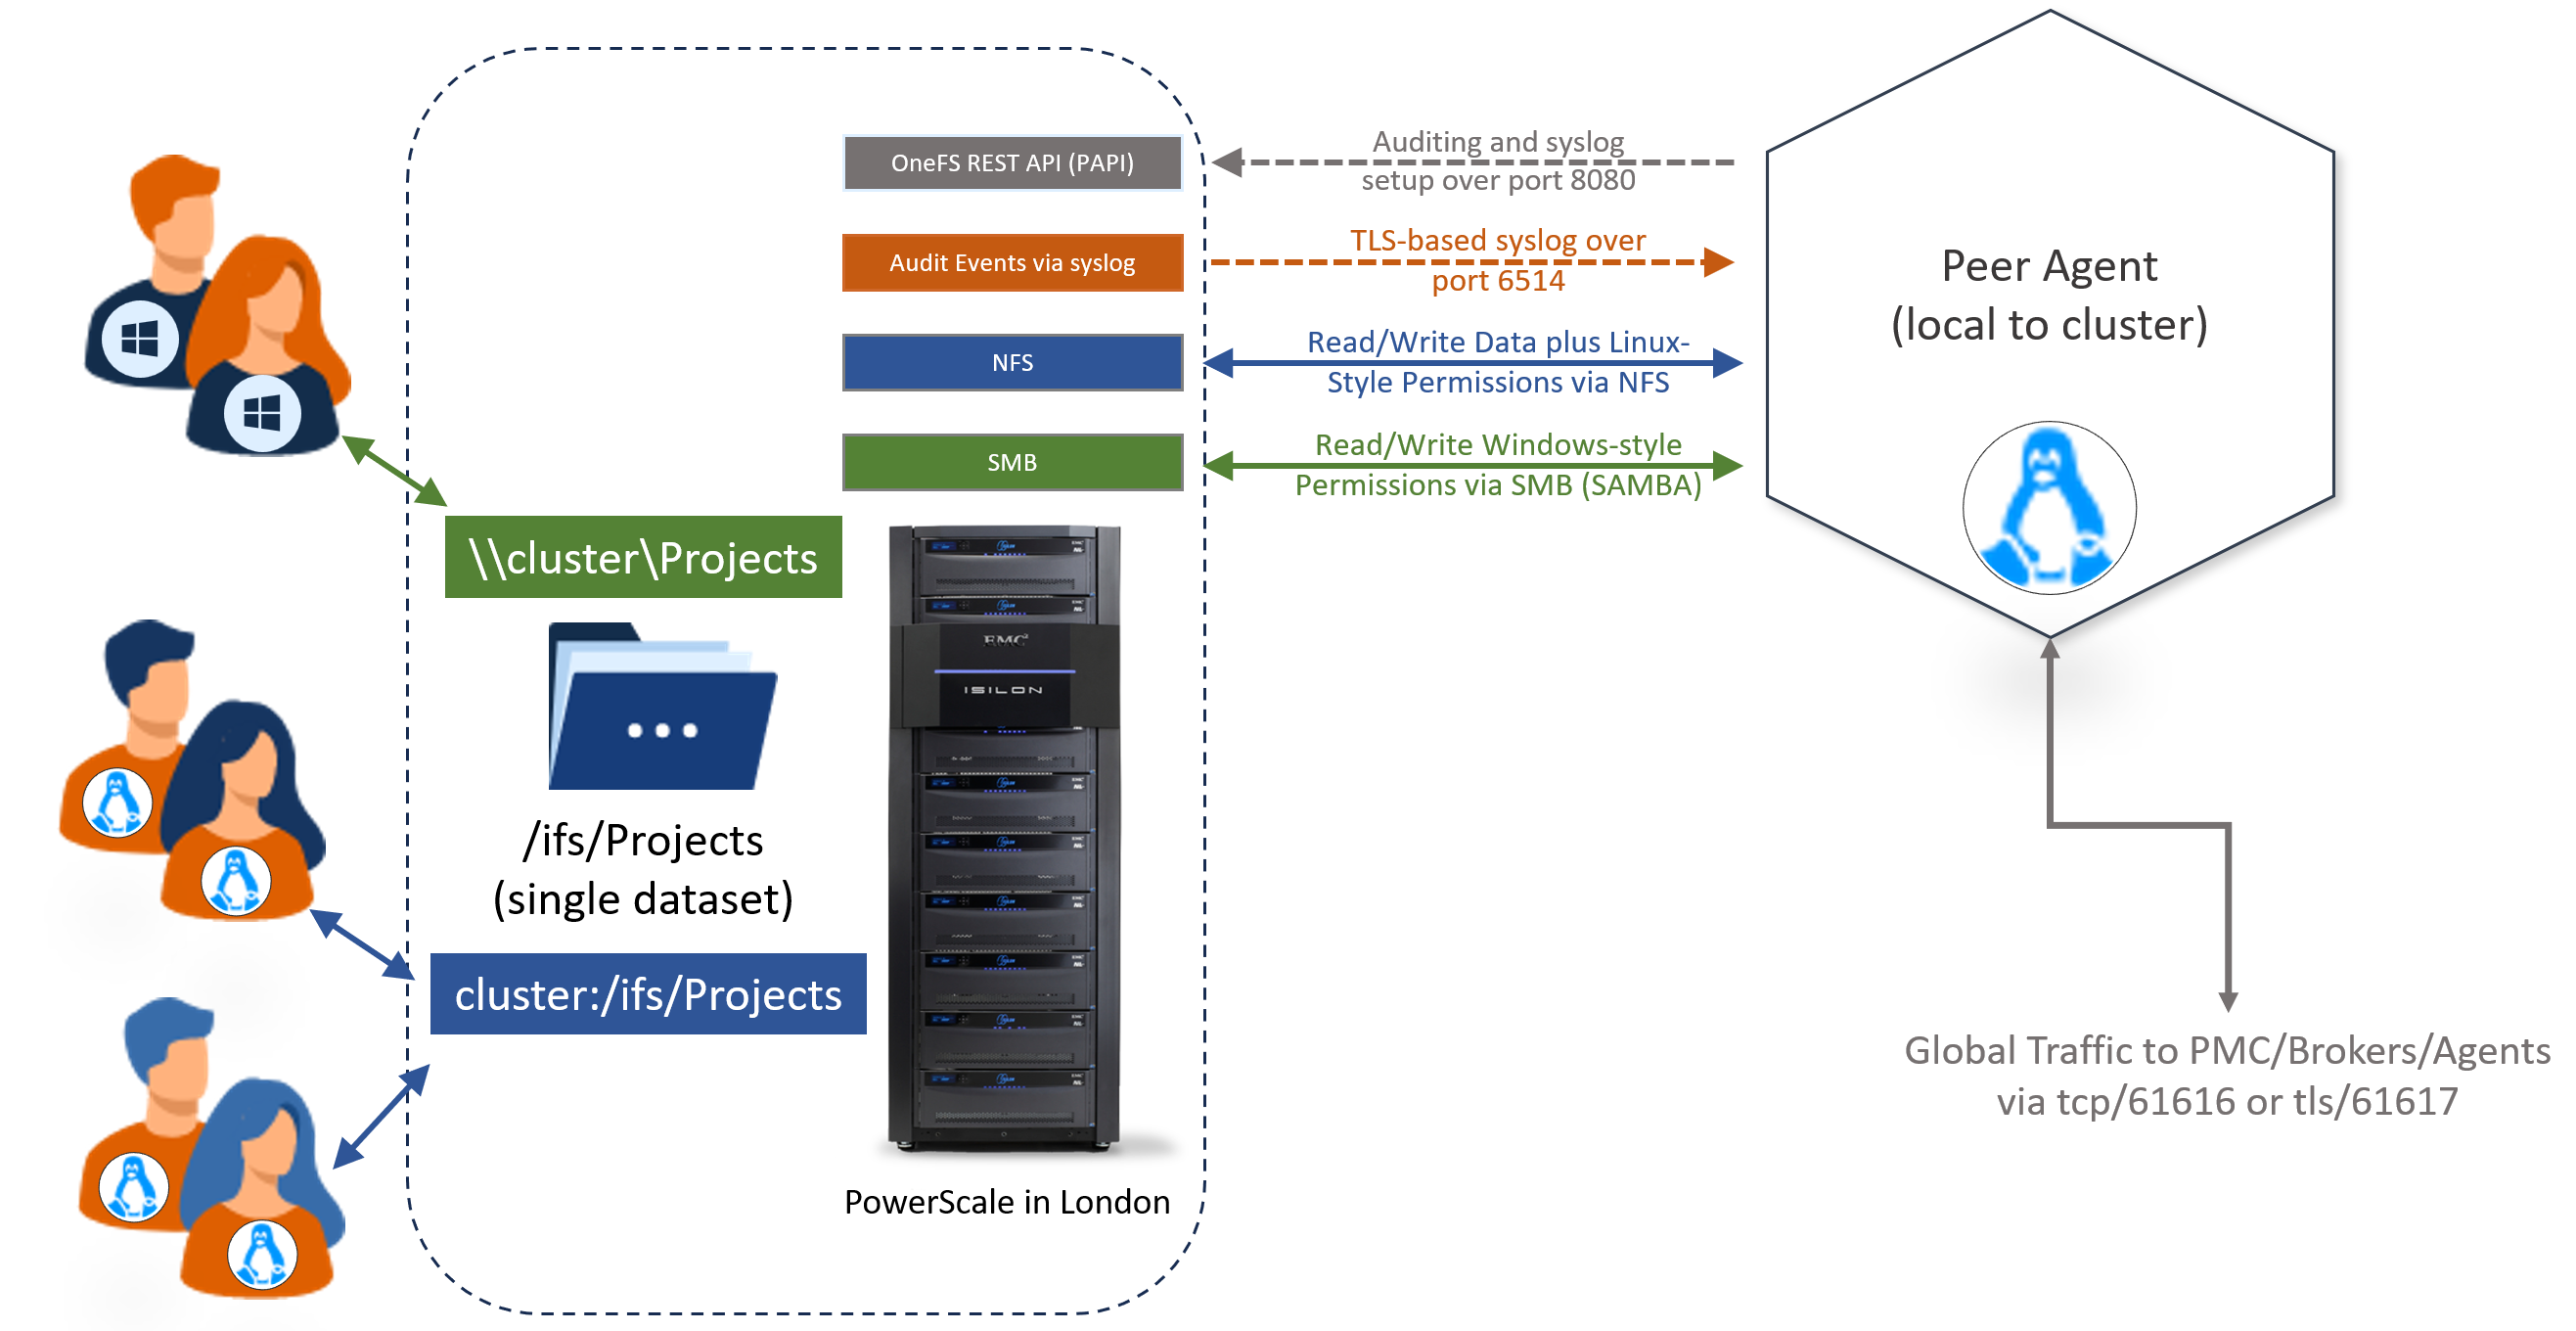
Multi-protocol support is beneficial in environments that require the ability to access and modify files from both Windows and Linux systems. Examples include:
-
Applications write data via NFS but end users use Windows clients to process the data generated by the applications.
-
Organizations have both Windows and Linux clients working with the same data.
Setting Up Access Permissions on Your Storage Device
Before configuring storage in PeerGFS, ensure that your storage device grants the necessary permissions for Peer Agents to read and write data. Proper permissions are critical for file replication, file synchronization, and file collaboration jobs, and are especially important when configuring multi-protocol support. The guidance below applies to both SMB and NFS storage, regardless of vendor.
Failure to configure permissions correctly may result in errors during job validation.
SMB Access: Setting Up SMB Permissions and Shares
Skip this section if you do not need to transfer Windows-style permissions.
To support the transfer of Windows-style permissions, Peer Agents must access your data through one or more SMB shares. Follow the steps Granting SMB Share Permissions and Creating a Root SMB Admin Share to configure access.
What is SMB Access?
SMB (Server Message Block) allows systems to access shared files and directories over a network. In PeerGFS, SMB access enables Linux-based Peer Agents to interact with Windows-based shares for data operations.
Granting SMB Share Permissions
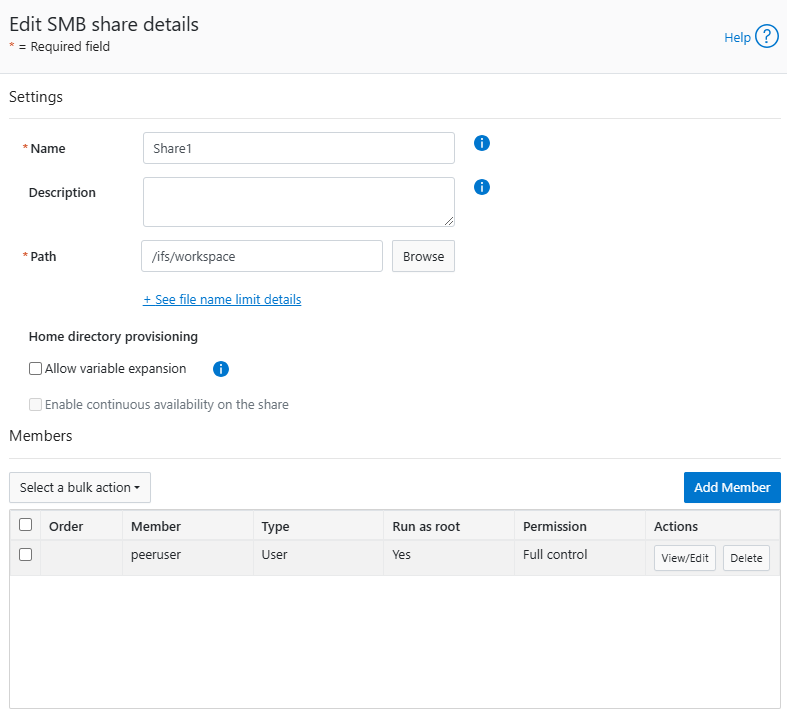
Grant the Peer Agent's user account full read/write access, including the ability to:
-
Modify file permissions
-
Change metadata
For Dell PowerScale, the account must have root-level access.
Example: On a Dell PowerScale share named Share1, the user peeruser is given root-level access. The user can be local or from a Windows domain.
Creating a Root SMB Admin Share (optional)
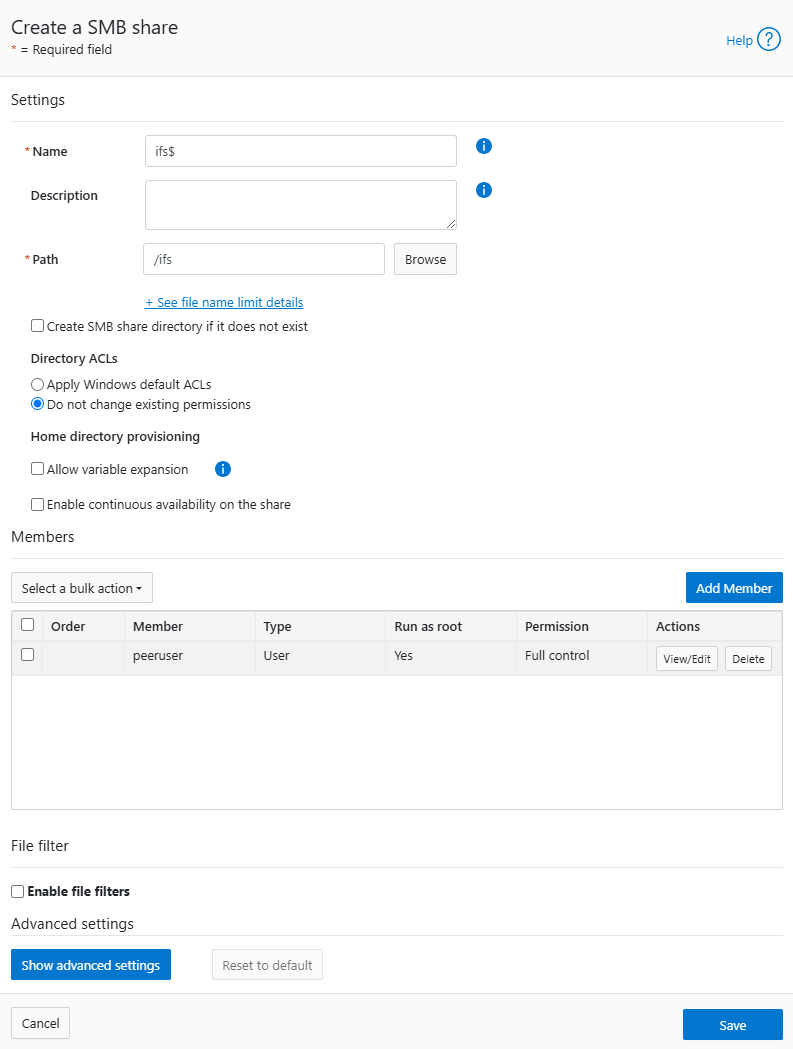
If you are using NetApp or Dell PowerScale, you may choose to configure a root-level SMB admin share to simplify access and enable Peer Agents to write Windows-style permissions. Using an admin share allows a single SMB path to support multiple jobs, reducing configuration complexity.
An SMB admin share may grant the Peer Agent access to more data than necessary.
Storage platform options:
-
NetApp: A predefined admin share (e.g.,
C$) is available and can be configured for use by Peer Agents. -
Dell PowerScale: No admin share exists by default; you must create one manually.
Example: Admin share creation on Dell PowerScale
NFS Access: Configuring NFS Permissions and Shares
When a Peer Agent connects to an NFS export, it mounts the export as the root user. Because many systems enable root squash to limit the root user's access over NFS, it's important to configure NFS exports to ensure the Peer Agent can function correctly.
Choose one of the following approaches:
-
Disable root squash
This grants full access to the Peer Agent’s root user, allowing it to read, write, and modify files as needed. -
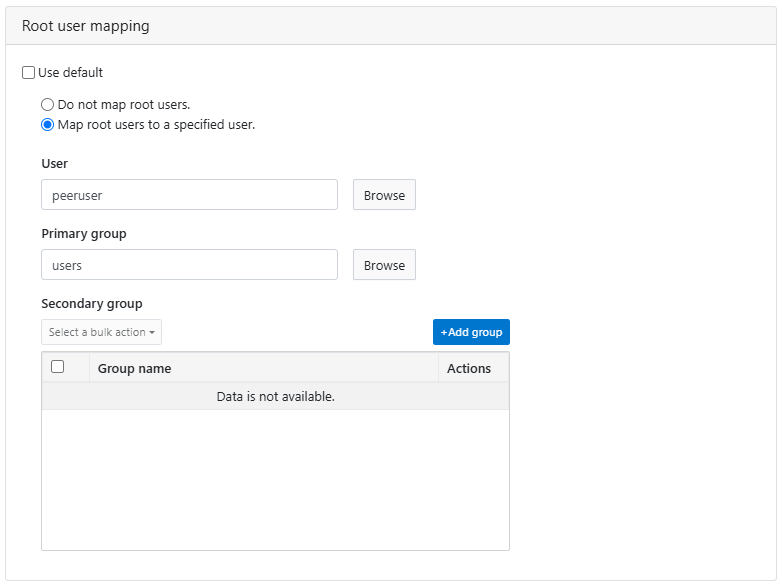
Map the root user to another user with full access
If you prefer not to disable root squash:-
Map the root user to a named user who has full read/write access to the export, or
-
Ensure the anonymous user (often
nfsnobody) has full access if the root user is being mapped anonymously.
-
If the mapped user—either named or anonymous—does not have full access, Peer Agent operations will fail.
Optional: Use NFS v4 ACLs
For more granular control, NFS v4 Access Control Lists (ACLs) can be configured. These ACLs allow permission management similar to NTFS.
ACLs are not available in NFS v3 or earlier.
Example: Root user mapping on Dell PowerScale
Configuring Storage Platform Settings in PeerGFS
While the Create Job wizard allows you to configure storage platform settings during job creation, setting them up beforehand can streamline the process and minimize potential issues.
To configure storage platform settings in PeerGFS:
-
Open Peer Management Center.
-
Select Open Preferences from the Tools menu.
-
Expand Storage Configuration in the navigation tree, and then select Storage Platforms.
-
Expand Storage Platforms.
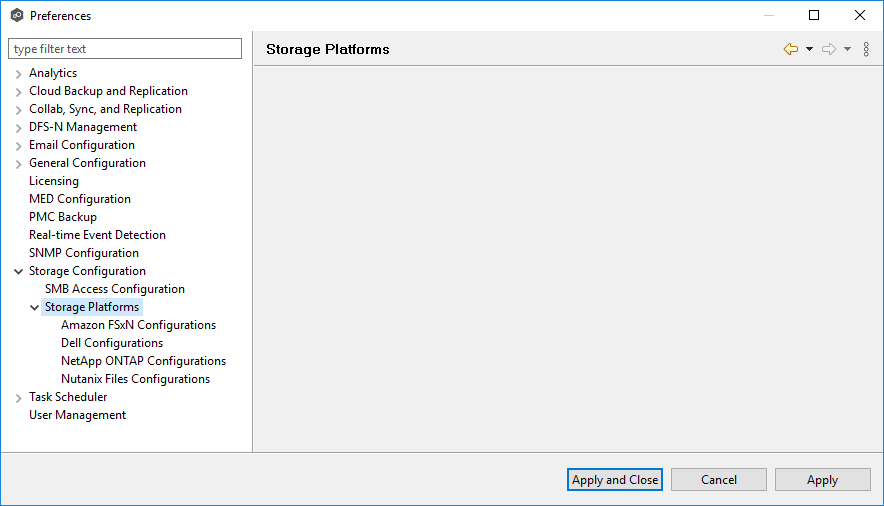
-
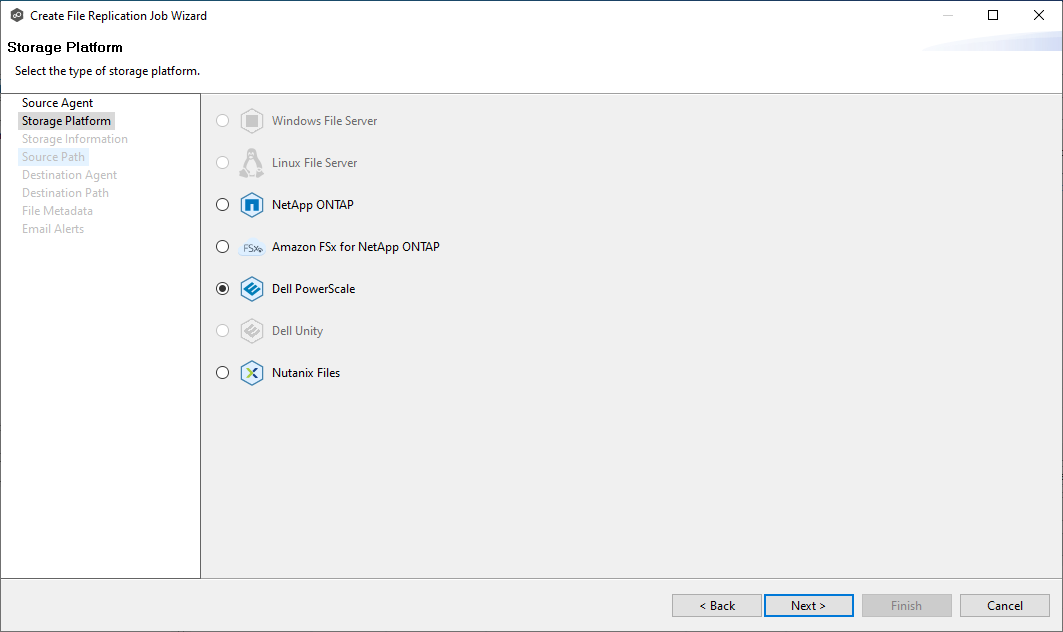
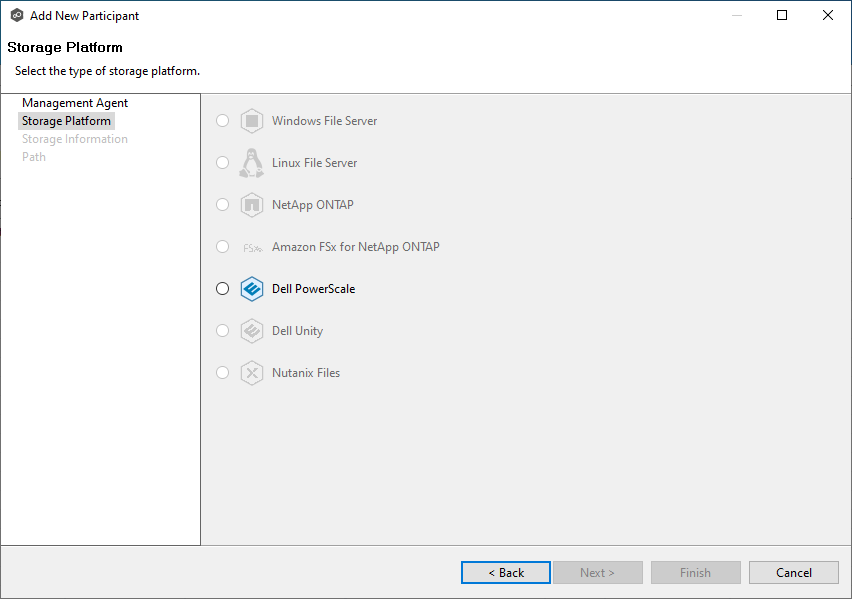
Select the appropriate storage platform type.
-
Enter the required values. For more information, see Storage Platform in the Preferences section of the PeerGFS User Guide.
-
Click Apply and Close to save the configuration.
Setting Up SMB Access for Linux Agents
Note: If Windows-style permissions do not need to be transferred, skip this section.
To transfer Windows-style permissions for a multi-protocol job, the Peer Agent must connect to the SMB share using the configured credentials.
To configure SMB access:
-
Open Peer Management Center.
-
Select Open Preferences from the Tools menu.
-
Expand Storage Configuration in the navigation tree, and then select SMB Access Configuration.
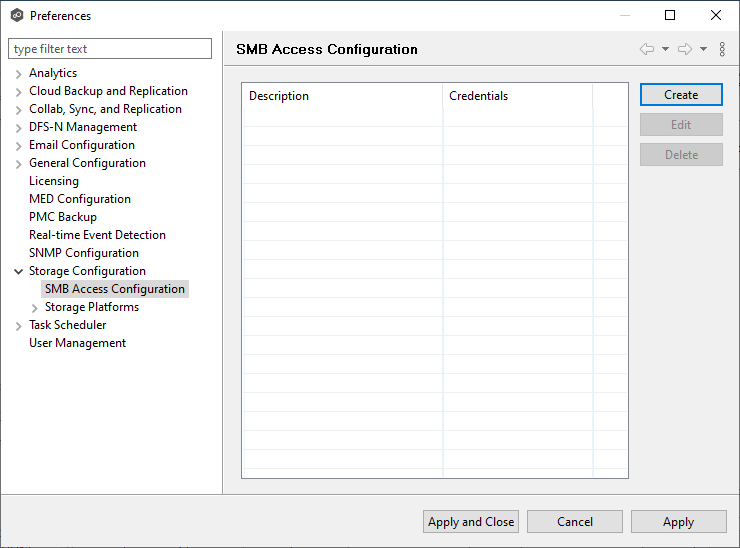
-
Click Create to add a new SMB access configuration.
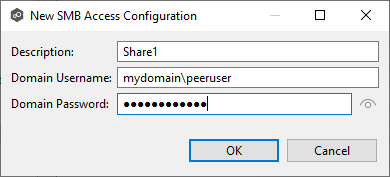
-
Enter the required values:
-
Description - A unique description for this configuration, specific to the selected Agent.
-
Domain Username - The user name to be used. For non-domain users, this should be in the format
host\username. -
Domain Password - The password associated with the domain user name.
-
-
Click OK.
-
Create additional access configurations if needed:
-
If different shares require different credentials, create multiple entries with the appropriate credentials for each share. This ensures each SMB share is accessible with the correct permissions.
-
If a single credential set can access all shares, only one entry is needed. This simplifies setup, but ensure the credentials have the necessary access for all intended shares.
-
Setting Up a Multi-Protocol Job
This section guides you through setting up a multi-protocol job in PeerGFS.
PeerGFS supports multi-protocol file synchronization and file replication jobs across a variety of storage platforms. Because storage systems handle file locking differently, multi-protocol file collaboration jobs are supported only on Dell PowerScale. For more information, see the File Locking Support in File Collaboration Jobs section.
Creating a File Synchronization Job
-
Open Peer Management Center.
-
In the Jobs view, right-click File Synchronization, and then select Create File Synchronization Job.
-
Name the job, and then click OK.
-
Select Multi-Protocol (SMB and NFS) in the Protocol dropdown to configure the job for multi-protocol environments.
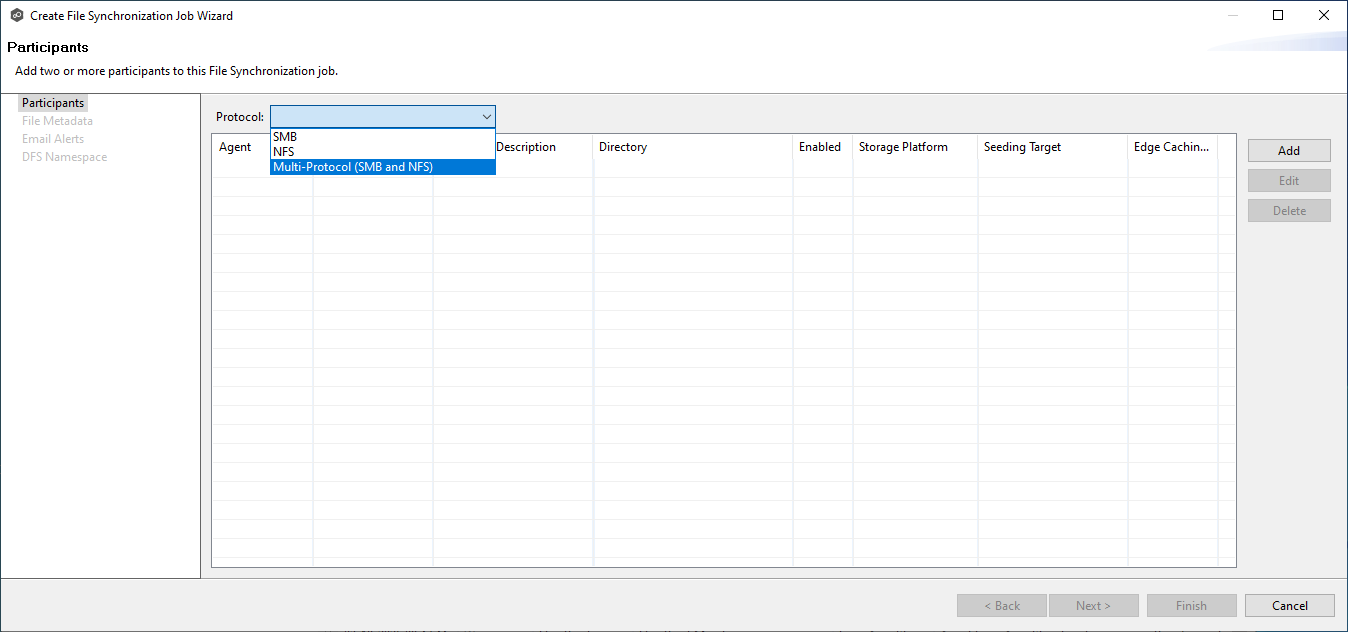
-
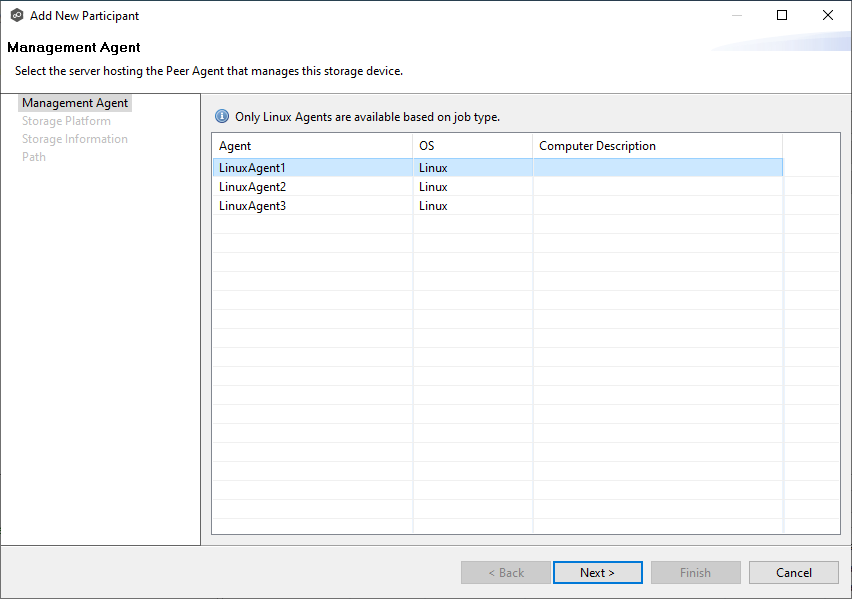
Click Add to configure the first participant:
-
Select the Management Agent.
-
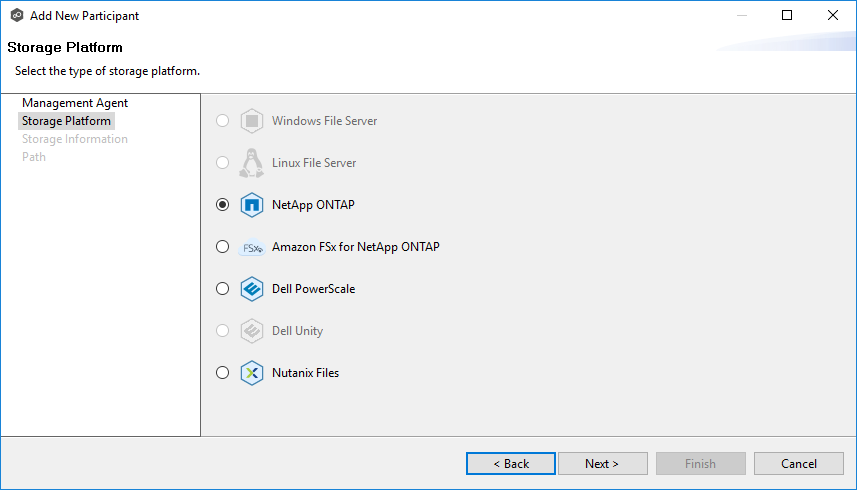
Select the storage platform for this Agent.
-
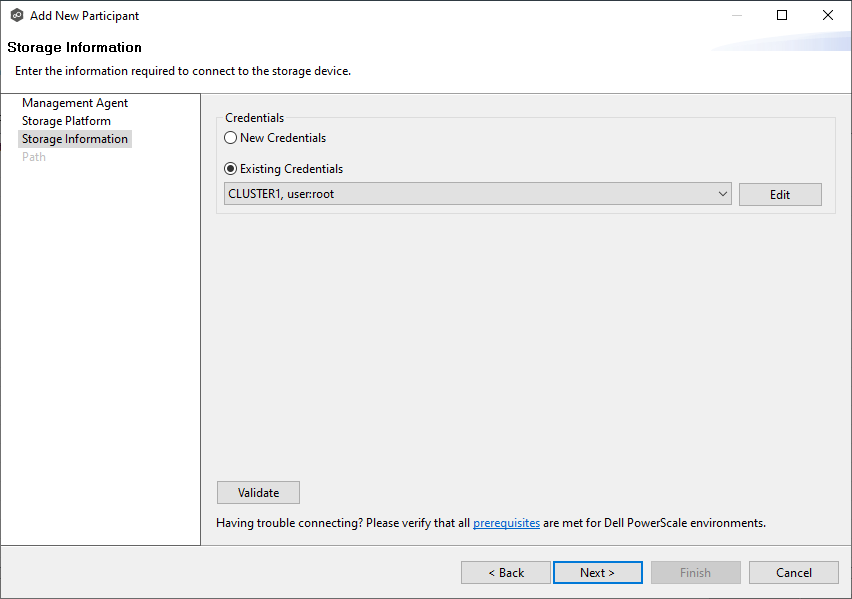
Select or create the storage credentials.
-
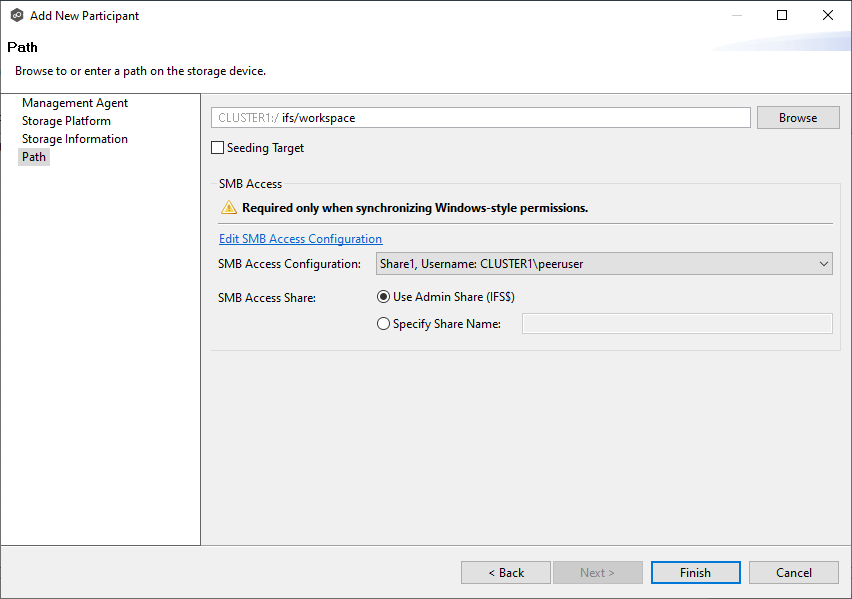
Specify the NFS export path, SMB access configuration, and SMB access share for this Agent to use, and then click Finish to complete this participant setup.
-
-
Repeat Step 4 for additional participants.
-
After adding all participants, click Next to continue configuring the job.
-
Configure the security settings as needed:
-
If you selected Windows-style permissions or Mixed permissions for Security Style, SMB access must be configured.
-
If it has not been previously configured, you can do so during the validation process.
Note: Mixed permissions is available for Dell PowerScale only.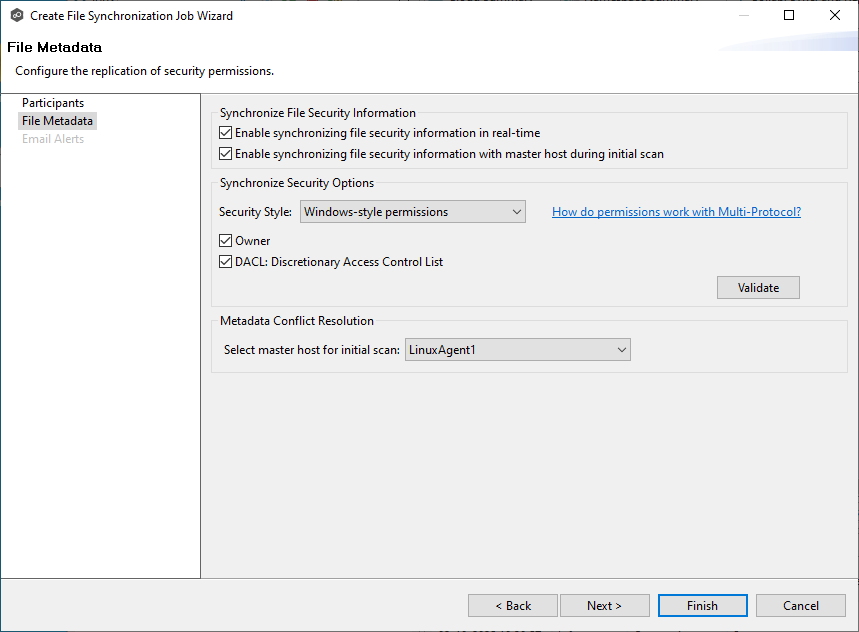
-
-
Click the Validate button to confirm the Peer Agent can access the required data.
-
Select a master host, if required.
-
Click Finish to complete the job creation.
Creating a File Replication Job
-
Open Peer Management Center.
-
In the Jobs view, right-click File Replication, and then select Create File Replication Job.
-
Name the job, and then click OK.
-
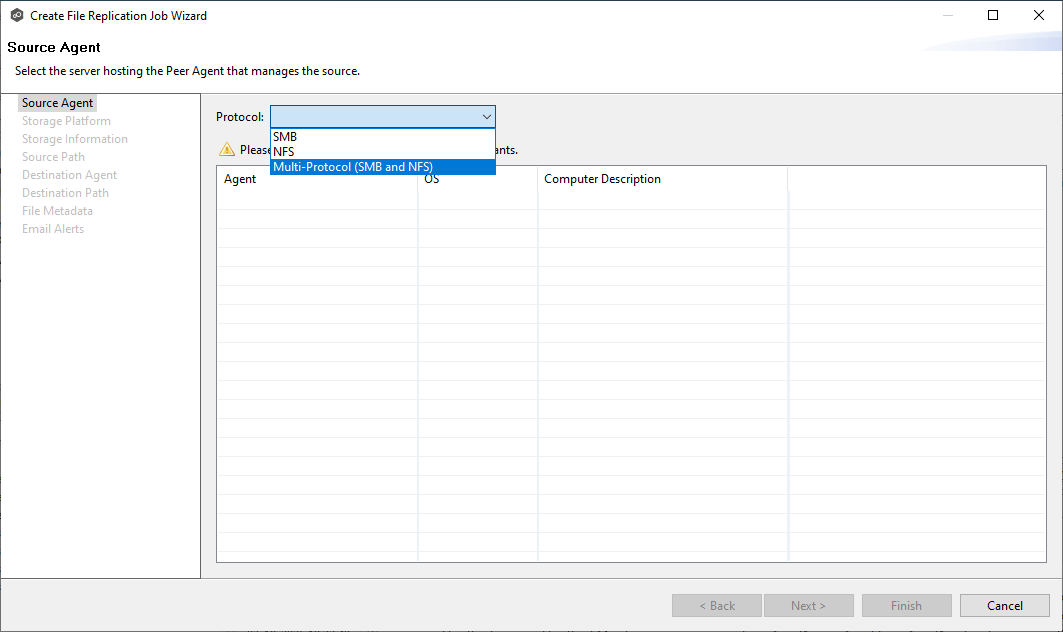
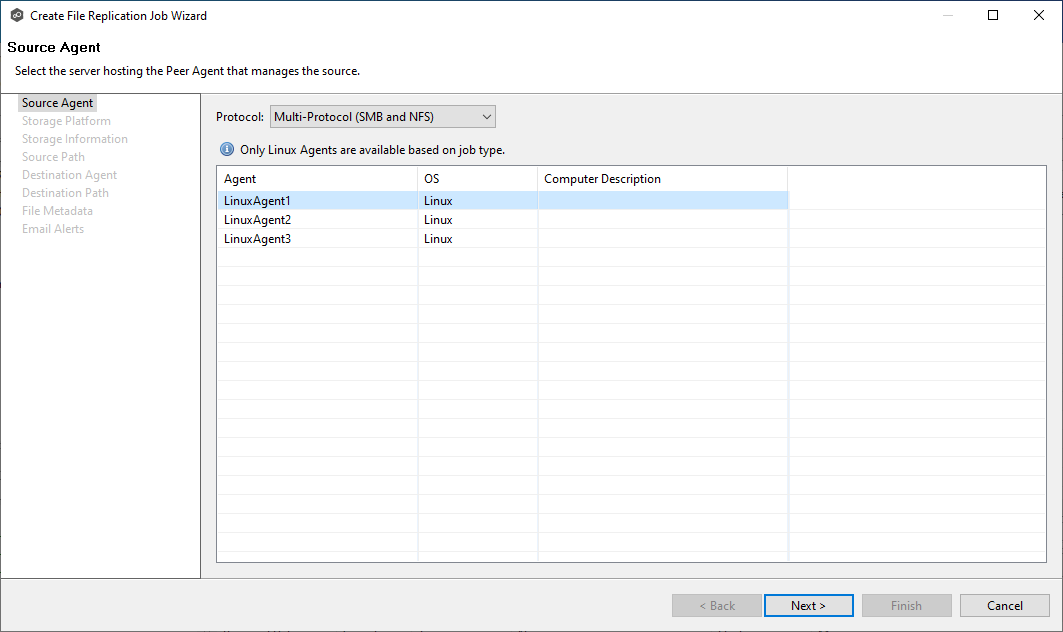
Select Multi-Protocol (SMB and NFS) in the Protocol dropdown to configure the job for multi-protocol environments.
-
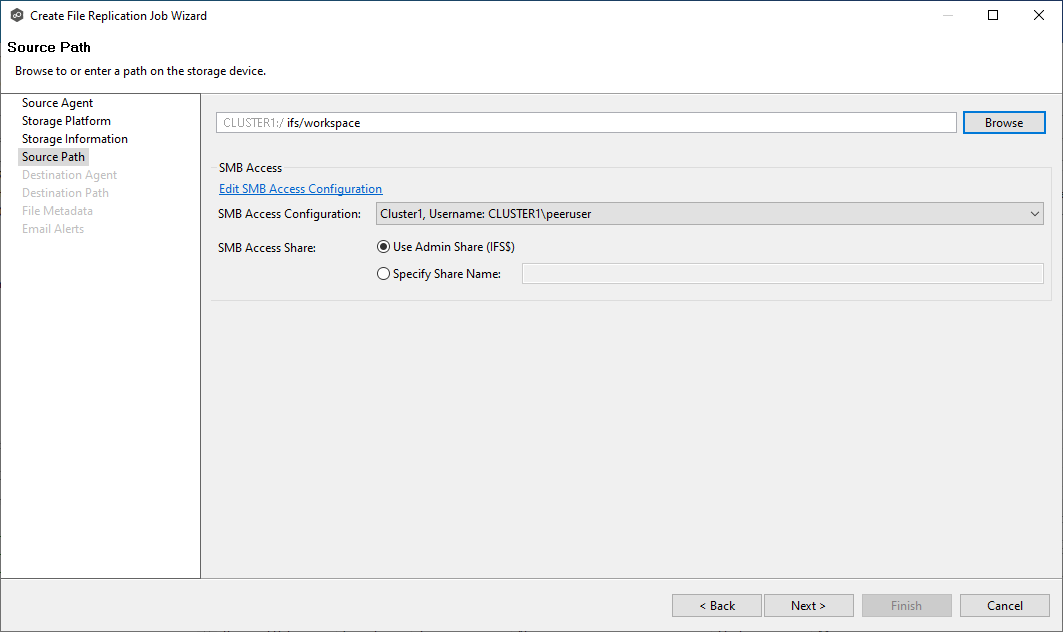
Configure the Source Agent:
-
Select the Agent for the source data.
-
Select the storage platform for this Agent.
-
Select or create the storage credentials.

-
Specify the NFS export path, SMB access configuration, SMB access share for this Agent to use, and then click Finish to complete this participant setup.
-
-
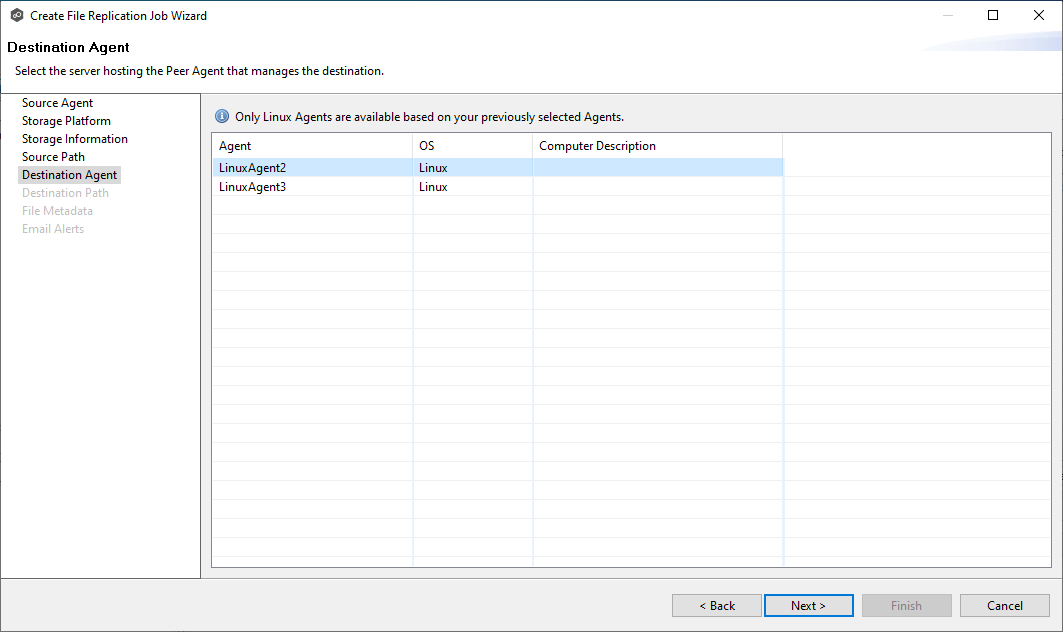
Configure the Destination Agent:
-
Select the Agent that will connect to the destination data.
-
Specify the NFS export location in NFS Path.
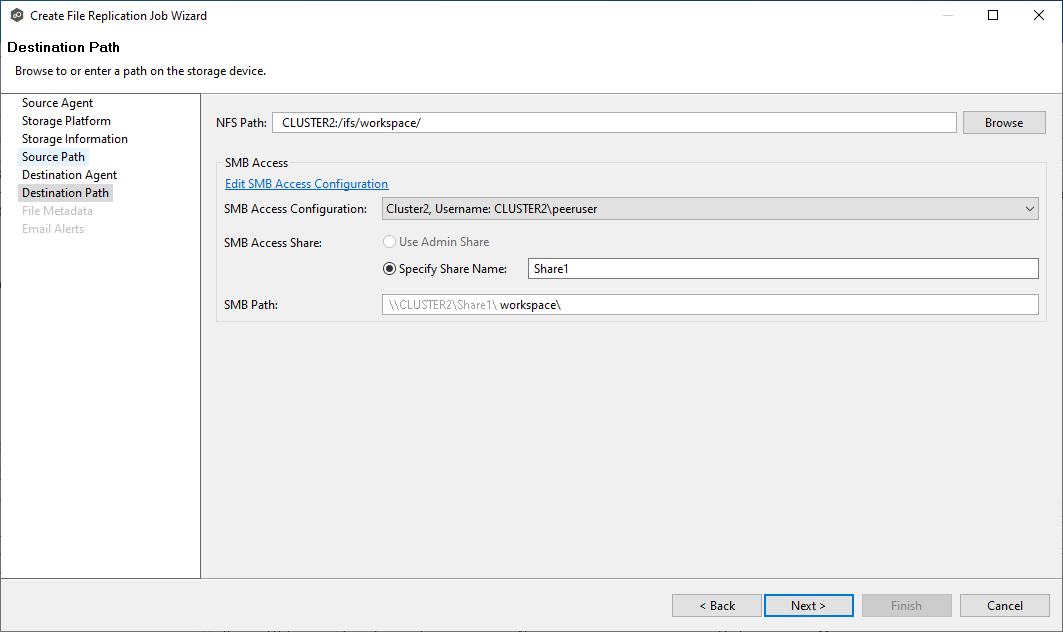
-
Select the SMB access configuration from the drop-down or click Edit SMB Access Configuration to create a new one..
-
Specify the destination share name for SMB Access Share.
-
Specify the SMB path. Leave this blank if replicating to the root of the share.
The SMB Path field is a UNC path that points to the same data on the destination file server as the NFS Path, but uses the SMB protocol. It combines the following elements:-
File Server Name or IP: Automatically populated with the name of the server from the NFS Path field.
-
SMB Access Share: Automatically populated with your selected SMB access share.
-
A relative path under the SMB Access Share: Depending on the configuration of your file server, this relative path may not be necessary.
-
-
-
Click Next to continue configuring the job.
-
Configure the security settings as needed.
-
If you select Windows-style permissions or Mixed permissions for Security Style, SMB access must be configured as described previously. If it has not been configured, you can do so during the validation process.
Note: Mixed permissions is available for Dell PowerScale only.
-
-
Click the Validate button to confirm the Peer Agent can access the required data.
-
Select a master host, if required.
-
Click Finish to complete the job creation.
Creating a File Collaboration Job
-
Open Peer Management Center.
-
In the Jobs view, right-click File Collaboration, and then select Create File Collaboration Job.
-
Name the job, and then click OK.
-
Select Multi-Protocol (SMB and NFS) in the Protocol dropdown to configure the job for multi-protocol environments.
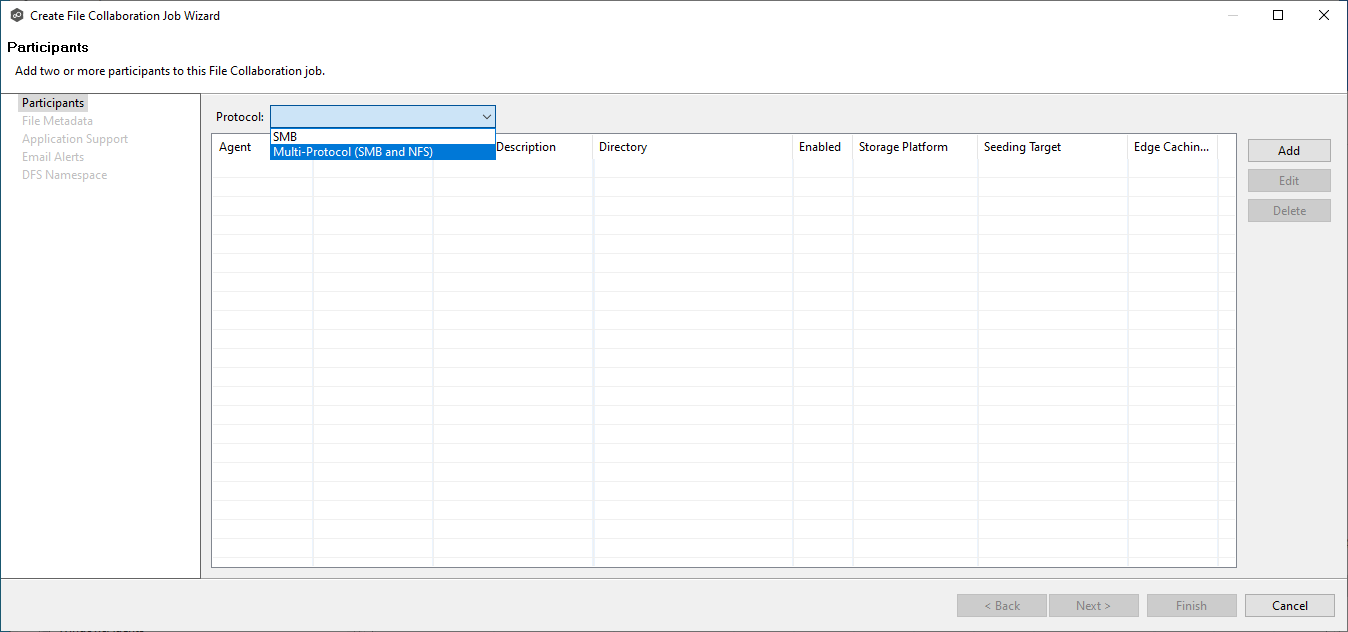
-
Click Add to configure the first participant:
-
Select the Management Agent.
-
Select the storage platform for this Agent.
-
Select or create the storage credentials.
-
Specify the NFS export path, SMB access configuration, and SMB access share for this Agent to use, and then click Finish.
-
-
Repeat Step 4 for to add more participants.
-
After adding all participants, click Next to continue configuring the job.
-
Configure the security settings as needed.
-
If you selected Windows-style permissions or Mixed permissions for Security Style, SMB access must be configured. If it has not been configured, you can do so during the validation process.
Note: Mixed permissions is available for Dell PowerScale only.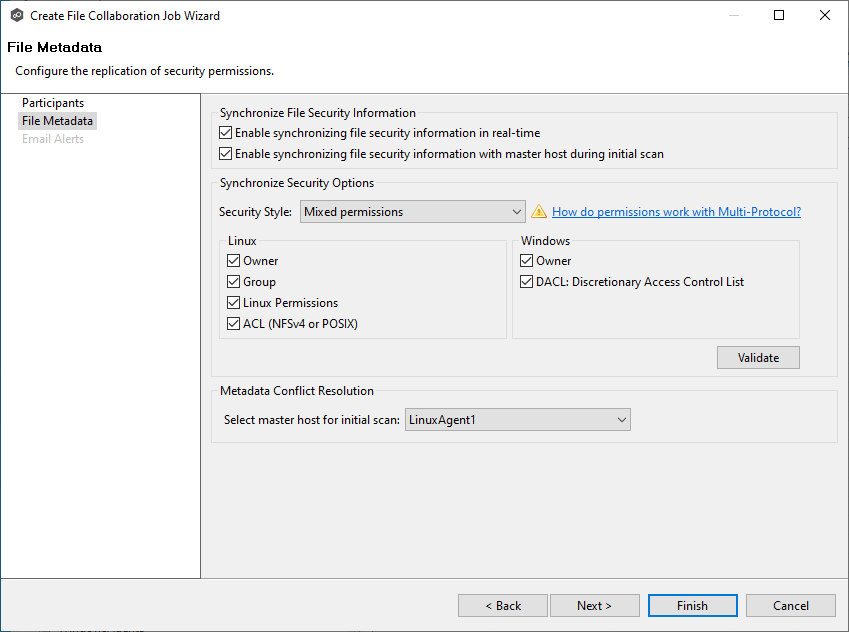
-
-
Click the Validate button to confirm the Peer Agent can access the required data.
-
Click Finish to complete the job creation.
Understanding SMB and NFS Interactions
When transferring data between NAS devices, the Peer Agent uses NFS to preserve filenames are correctly, as NFS is case-sensitive, while SMB is not. For file permissions and metadata, the Peer Agent uses SMB to copy Windows-style permissions and NFS to copy Linux-style permissions. The following explains how this affects interactions between NFS and SMB.
-
File Name Differences Between SMB and NFS
-
NFS supports case-sensitive file names, so files like
report.txtandReport.txtcan coexist as distinct files. SMB, being case-insensitive, would consider both file names identical, resulting in an error if both were created. -
Special characters (e.g.,
\ / : * ? < > |) are permitted in NFS but not in SMB. -
Storage vendor implementations may handle conflicts differently—refrain from using unsupported file names.
-
Note: While PeerGFS uses NFS to transfer files with case-sensitive names or special characters, these files may not behave or be displayed as expected when accessed through SMB. Potential issues include:
-
File names being altered or normalized (e.g., case differences may be ignored).
-
Special characters may be stripped, replaced, or cause errors.
-
Files may not be visible or accessible as originally transferred via NFS, due to SMB's limitations.
-
Mixing Linux and Windows Permissions
-
Peer Software defines mixed permissions as files that simultaneously have both Linux (NFS) and Windows (SMB) permissions.
-
Dell PowerScale is the only storage vendor that fully supports this feature. Contact Peer Software for more details.
-
Note: If a storage platform does not support mixing Windows and Linux permissions, the outcome will depend on its configuration, and you may not achieve the results you want. Each storage manufacturer supported by Peer Software handles files created with NFS names unsupported by SMB differently. For this reason, it is highly recommended to avoid these scenarios.
File Locking Support in File Collaboration Jobs
File collaboration jobs in PeerGFS rely on file locking to detect when files are opened and closed, ensuring that access is properly coordinated across storage devices and clients. However, file locking behavior differs significantly between SMB and NFS.
Unlike SMB, file locking in NFS is considered advisory, meaning the protocol does not enforce locks at the system level. Instead, it relies on client applications to voluntarily check for and honor locks. As a result, even if one application requests a lock on a file via NFS, another client can still access or modify the file unless it also checks for the lock.
In contrast, SMB uses mandatory locking, where the system actively enforces locks to prevent conflicts. Because NFS locking is not consistently enforced and varies by application and storage vendor, PeerGFS only supports file collaboration locking behavior for clients accessing files via SMB.
Note: This limitation may affect Linux applications that depend on NFS file locking being enforced by the storage device. Ensure that collaboration workloads use SMB clients for reliable file locking behavior.
Troubleshooting Common Issues
If issues arise during configuration or job execution, refer to the following troubleshooting tips:
Job Validation Issues
|
Issue |
Possible Cause |
Solution |
|---|---|---|
|
SMB access share is not configured |
No SMB access share configured for the given Agent |
Create or select an SMB configuration in the storage platform settings. |
|
Permission denied when mounting CIFS share |
Incorrect credentials |
Update the SMB credentials in the SMB access configuration. Change user settings on the storage device. |
|
Failed to set ACLs on SMB path |
Incorrect user permissions on the storage device |
Ensure that the user has full read/write access on the storage device (root-level access required for PowerScale). |
Job Execution Failures
|
Issue |
Possible Cause |
Solution |
|---|---|---|
|
Warnings when trying to set Linux ACLs |
Mismatch in NFS export settings |
Ensure all storage devices allow the same NFS version (v3 or v4). |
|
Failed to set ACLs on SMB path |
Incorrect user permissions on storage device |
Ensure the SMB Access user has full read/write access on the storage device (root-level access required for PowerScale). |
|
Linux files created with root ownership |
No root squash or mapping set on the storage device |
Configure root squash or mapping on the storage device. |
|
Error |
The file on which the permission error is occurring was created on the PowerScale using a user on a client that is set to “Run as Root”. |
Create the file with a user on a client that is not set to “Run as Root”. |