
Overview
PeerGFS employs TLS encryption to secure data transmission between the PMC, Agents, and brokers, as well as for accessing the PMC web user interface. TLS utilizes keys and certificates to authenticate hosts and encrypt data. The deployment of PeerGFS includes default certificates. If preferred, you can update these certificates with new ones that are either self-signed or signed by a Certificate Authority (CA).
This article provides step-by-step instructions for replacing and, if desired, generating new keys and certificates.
Using Self-Signed Certificates
Replacing Broker Certificates
Upon initial installation, each PeerGFS broker is equipped with a self-signed private key, enabling Agents to establish an encrypted TLS connection. You can update these keys with new ones that are either self-signed or signed by a Certificate Authority (CA). Follow the instructions below to replace with self-signed keys and certificates.
As of PeerGFS v5.2, changing the default TLS certificates for broker communication is supported, and this change will persist even after software updates. In versions prior to PeerGFS v5.2, changes to certificates might be overwritten during software updates.
Task 1: Generate Broker Keys
To generate a new self-signed certificate and private key pair on a broker (including the PMC):
-
Navigate to the tools directory using PowerShell on the broker server.
-
Run the script
GenLocalKey.ps1, and follow the prompts to generate the new private key and certificate pair.
On completion, details of the certificate location are displayed. For example:
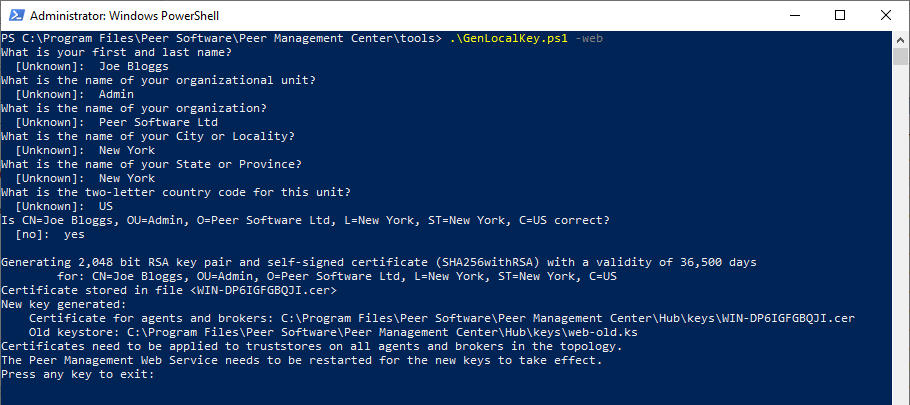
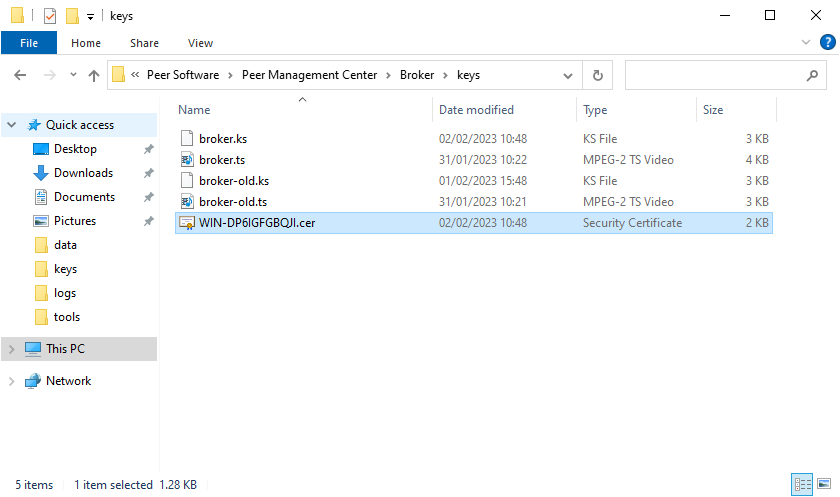
If the window is accidentally closed, the certificate will be located in the Broker/keys directory within the installation folder.
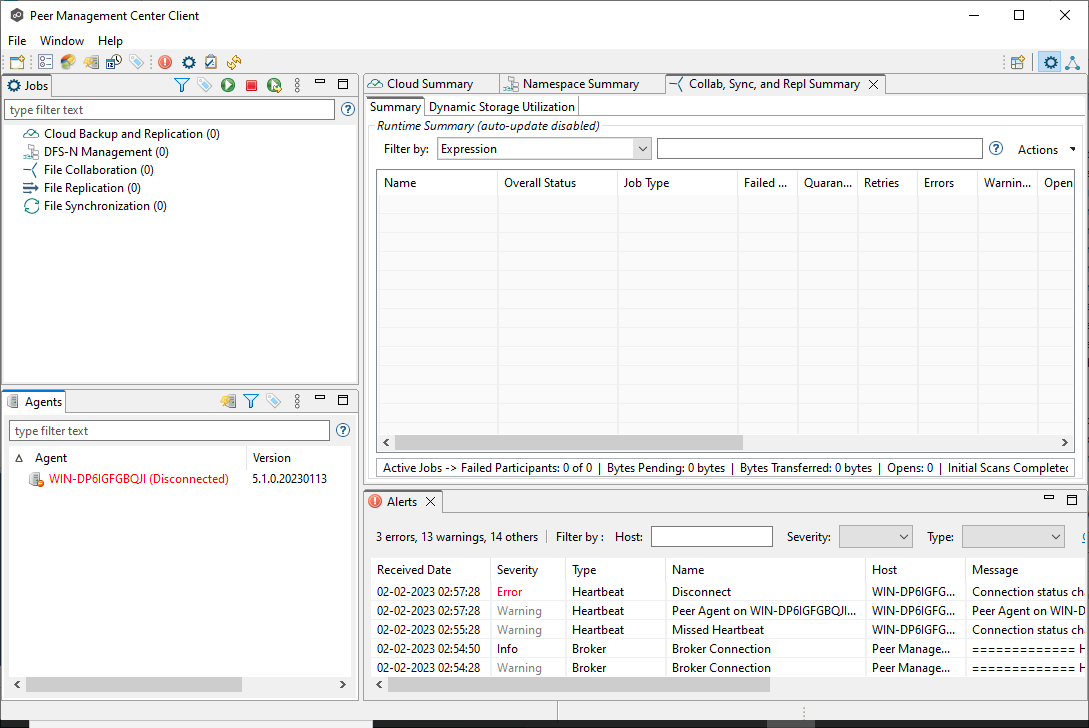
To enable the usage of the newly created certificate, the Peer Management Broker Service needs to be restarted. However, for minimal disruption, this should be done after the certificate has been distributed in Task 2. If you restart a broker at this point, Agents will be disconnected since the new certificate has not yet been applied.
If at any point something goes wrong, you can revert to the previously used keystore, which is saved as Broker/keys/broker-old.ks.
To revert to the previously used keystore:
-
Remove the new Broker/keys/broker.ks.
-
Rename Broker/keys/broker-old.ks to Broker/keys/broker.ks.
-
Restart the Peer Management Broker Service.
Task 2: Upload Certificates to Agents and Remote Brokers
After generating the certificate in Task 1, you need to upload the certificates to the appropriate locations using the ImportRemoteCert.ps1 script. You'll need to pass the saved certificate file and the hostname as parameters to the script, where the hostname is also the filename.
To upload the certificate:
-
Copy the generated certificate to the desired connecting machine (Agent or secondary brokers).
-
Ensure your certificate file is named after the hostname. For instance, if your hostname is example-host, the certificate file should be named example-host.cer.
-
Ensure you have the necessary permissions to run the
ImportRemoteCert.ps1script and import the certificate. -
Using PowerShell, navigate to the tools folder in the root of the PeerGFS installation directory.
-
Run the
ImportRemoteCert.ps1script with the following commands, substituting <hostname> with your actual host name.PowerShell# Define the hostname and certificate file path $hostname = "example-host" $certificateFilePath = "$hostname.cer" # Run the ImportRemoteCert.ps1 script .\ImportRemoteCert.ps1 -CertificatePath $certificateFilePath -Hostname $hostnameMake sure the
ImportRemoteCert.ps1script is in the current directory or provide the full path to it. Adjust the$hostnameand$certificateFilePathvariables according to your actual hostname and certificate file. For example:

-
Apply the certificate update based on the component you're updating:
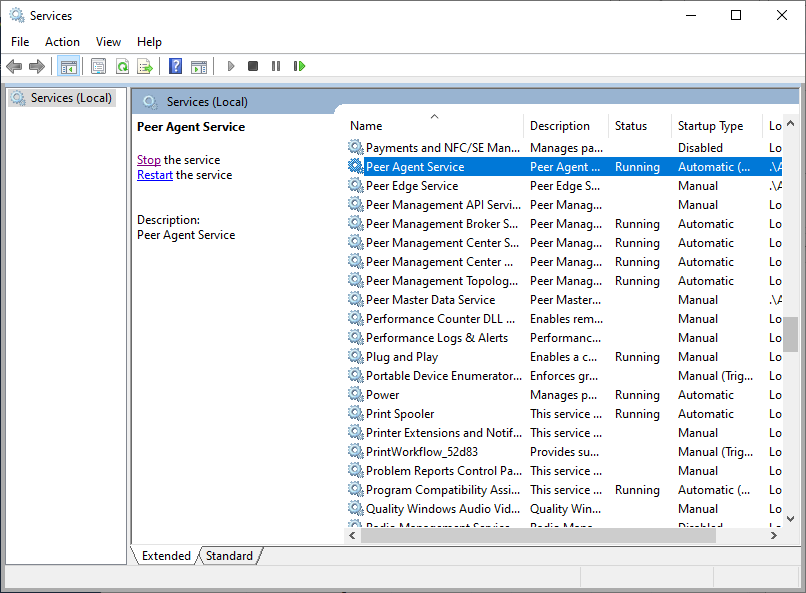
• If you are updating an Agent, estart the Peer Agent Service (as shown below).
• If you are updatinga broker, restart the Peer Management Broker Service.
When all services have been restarted, the Agent will connect using the new key and certificate and come online.
Troubleshooting
If at any point something goes wrong, you can revert to the previously used truststore:
-
Agent truststore (client.ts) is saved as keys/client-old.ts.
-
Broker truststore (broker.ts) is saved as Broker/keys/broker-old.ts
To revert to the previously used Agent truststore:
-
Remove the new keys/client.ts.
-
Rename keys/client-old.ts to keys/client.ts.
-
Restart the Peer Agent Service.
To revert to the previously used broker truststore:
-
Remove the new Broker/keys/broker.ts.
-
Rename Broker/keys/broker-old.ts to Broker/keys/broker.ts.
-
Restart the Peer Management Broker Service.
Replacing a Web Client Certificate
On initial installation, the Peer Management Center's web interface has a default certificate used for TLS authentication. If preferred, you can replace this certificate with one that is either self-signed or signed by a Certificate Authority (CA). Follow the instructions below to replace with a self-signed certificate.
This applies to PeerGFS v5.2 and later. If you are using an earlier version of PeerGFS, see Replace the default web service SSL certificate.
To generate a new key and certificate for the PMC's web interface:
-
Use PowerShell to navigate to the tools directory within the installation folder on the PMC.
-
Run the script GenLocalKey.ps1 passing the argument -web and follow the prompts displayed.
-
Restart the Peer Management Center Web Service to apply the new certificate and private key.
Note: Although this will improve the security of the web UI, it will not stop browsers notifying users of an insecure connection. To remove this notification, follow the process described in the Using Certificate Authority-Signed Certificates section.
Replacing an API Certificate
As of PeerGFS v6.0, the REST API now uses the same TLS certificate as the web UI, streamlining certificate management. In previous versions of PeerGFS, it wasn't possible to change the default API certificate separately.
Using Certificate Authority-Signed Certificates
If you prefer to use certificates signed by a Certificate Authority (CA) rather than self-signed certificates, you can follow these steps to import and use CA-signed certificates. This section assumes you are familiar with the process of signing and managing certificates.
To import a signed private key:
-
Generate a PKCS12 file:.
Use the following example as a guide:openssl
Bashopenssl pkcs12 -export -in broker.crt -inkey broker.key -out broker.p12 -name <Alias/Friendly Name> -CAfile ca.crt -caname rootwhere:
• broker.crt is the signed certificate
• broker.key is the private key
• ca.crt is the CA (root) certificate
• the output file in the example above will be broker.p12.Running this command will prompt you to set a passphrase for the output file. This passphrase must be used; otherwise, the next step will fail.
-
Import the PKCS12 file:
Using the broker.p12 output file, perform Tasks 1 and 2 above, modifying theGenLocalKey.ps1script with the arguments as shown below with the-key,-alias, and-passarguments as shown below: -
For the Web UI: Follow the same process can be for the Web UI by adding the the
-weboption to theGenLocalKey.ps1script. Browsers will also need to have the root certificate imported to ensure that connections to the web UI appear secure.
Related articles