PeerGFS jobs fail to start after initial job due to NetAPP ONTAP v9.15.1 upgrade
Problem
PeerGFS is unable to start more than one job linked to a single SVM after upgrading NetApp ONTAP to v9.15.1.
Cause
In ONTAP v9.15.1 and earlier, a change in NetApp ONTAP's REST API prevents PeerGFS from modifying FPolicy configurations after they have been enabled for an SVM. The first job started in PeerGFS creates and enables the FPolicy configuration without issue. However, any subsequent jobs that attempt to modify the enabled FPolicy configuration cannot start.
This problem did not exist in ONTAP v9.14.1 or earlier versions, or pre-release versions of v9.15.1. Additionally, the issue does not occur when using NetApp’s CLI or legacy ONTAPI, even in v9.15.1.
Workaround
We have confirmed the problem with v9.15.1P1 and v9.15.1P2 and have notified NetApp. We are still waiting for feedback and will update this article once we have received it.
In the meantime, follow these steps to work around this issue:
Open the Peer Management Center (PMC), navigate to the Tools menu, and select Open Preferences.
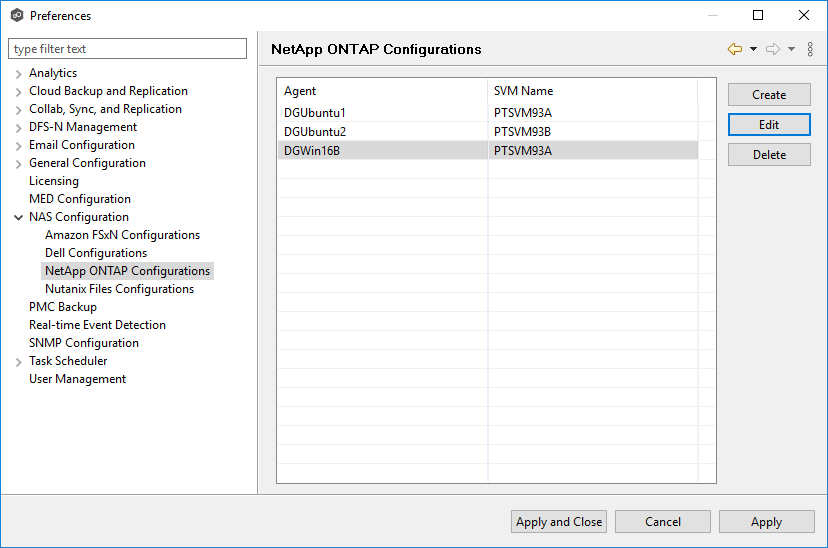
Expand NAS Configuration in the navigation tree, and then select NetApp ONTAP Configurations.
Select an Agent/SVM combination that is impacted by the ONTAP upgrade.

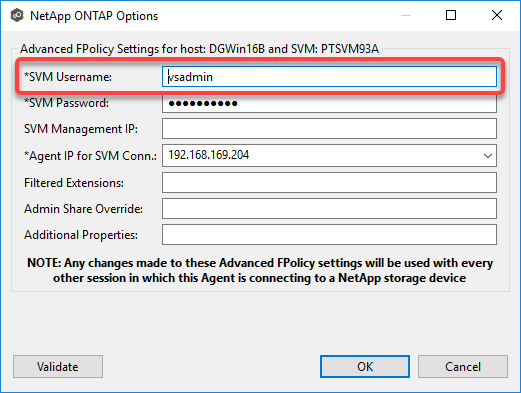
Click Edit to open the configuration details, and locate the SVM Username field to identify the username.

Use an SSH client to connect to the SVM and verify that the username entered in the SVM Username field has ONTAPI access.
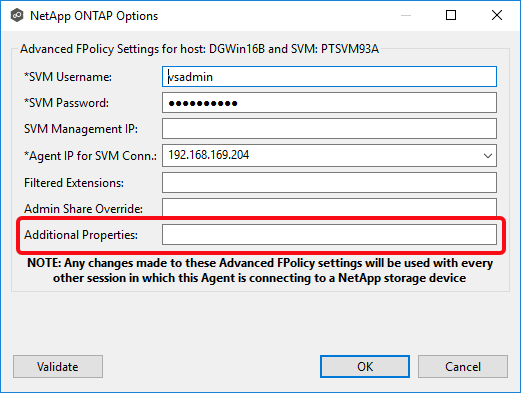
You can add ONTAPI access to your existing user using the following command:CODEsecurity login modify -vserver <SVM Name> -username <User Name> -application ontapi -authentication-method password -role vsadminReturn to the NetApp ONTAP Options dialog, and add the following to the Additional Properties field:
CODEontapApiType=zapi
Click OK to save your change.
Repeat Steps 3-7 for each Agent/SVM combination that is impacted by the ONTAP upgrade.
Click Apply and Close.
Stop all impacted jobs, including any that may have started successfully.
Start the jobs.
📎 Related articles
- Achieving high availability for the PMC through active-passive configuration
- Achieving high availability for the PMC through active-passive configuration (v4.7.0 - v5.1.1)
- Achieving high availability for the PMC through active-passive configuration (v5.2 and later)
- Amazon FSx for NetApp ONTAP Prerequisites
- Does the EOA of NetApp ONTAPI impact PeerGFS?
- Firewall Requirements
- NetApp ONTAP Prerequisites
- Peer Global File Service - Environmental Requirements
- PeerGFS jobs fail to start after initial job due to NetAPP ONTAP v9.15.1 upgrade
- PeerSync - Environmental Requirements
- Prerequisites
