
Applies to PeerGFS v6.1.0 and later
Overview
You can access and manage the PeerGFS API using PowerShell, which provides a robust platform for automation and integration into existing workflows. This article explains how to run the PeerGFS PowerShell Toolkit, configure settings for automation, and use sample scripts to perform API operations. Whether you're creating custom scripts or automating routine tasks, these instructions will help you streamline your use of the PeerGFS API.
The PeerGFS PowerShell Toolkit is a set of specialized PowerShell commands and functions designed specifically for interacting with the PeerGFS system, leveraging PowerShell’s capabilities for automation. It is installed in the Peer Management Center directory, typically located in C:\Program Files\Peer Software\Peer Management Center\tools\powershell.
Initializing the PeerGFS PowerShell Toolkit
Each time you open PowerShell, you must initialize the PeerGFS PowerShell Toolkit to load the necessary module for interacting with the PeerGFS API. To simplify this, we’ve provided the ConfigurePeerGFSToolkit.ps1 script, which you can run to initialize the toolkit.
Follow these steps to initialize the PeerGFS PowerShell Toolkit and load the necessary module for the PeerGFS API
-
Launch PowerShell on the PMC server and navigate to the following directory:
<PMC Installation Directory>\tools\powershell. -
Run the following command in the PowerShell console to load the PowerShell module:
PowerShellPS C:\Program Files\Peer Software\Peer Management Center\tools\powershell> .\ConfigurePeerGFSToolkit.ps1

-
When you run the script, you will be prompted for user ID and password.
-
After loading the PowerShell module, you can begin using the API.
Creating and Using a Configuration File for PowerShell Initialization
When you’re ready to create custom scripts and automate tasks, it’s important to remember that you must initialize the PowerShell Toolkit each time you run PowerShell. The ConfigurePeerGFSToolkit.ps1 script loads the necessary PowerShell module, but to avoid entering your user credentials manually every time, you can use a configuration file (an .ini file) with the script. The .ini file stores your user credentials and ensures they are automatically applied when initializing PowerShell for scripting.
Follow these steps to create a configuration file that eliminates the need for manual input of credentials and server details, and initializes PowerShell automatically when running custom scripts:
-
Create the
settings.inifile:-
Save the file in a secure location, such as an administrator's home directory.
-
If the script will be run by multiple users, save the file in the same directory as the
ConfigurePeerGFSToolkit.ps1script.
-
-
Edit the
settings.inifile, replacing the example values with your actual PMC credentials and server details:[General] username=admin password=password [Network] address=127.0.0.1 port=8442 -
Run the
.\\ConfigurePeerGFSToolkit.ps1script, passing thesettings.inifile as the first parameter in the command. For example:.\ConfigurePeerGFSToolkit.ps1 'C:\Users\Administrator\Documents\settings.ini'This step initializes the PowerShell Toolkit with the credentials and server information from the configuration file. After this, the script can be run again without requiring manual input of credentials or server details.
PowerShell Script Examples
This section demonstrates how to use the PeerGFS API from a PowerShell client. These examples can be adapted to suit your workflow.
-
Use the examples as starting points to customize operations within your workflow.
-
Replace placeholder commands or parameters with values specific to your environment as needed.
Initialize the Toolkit and Show Available Commands
Click to expand...
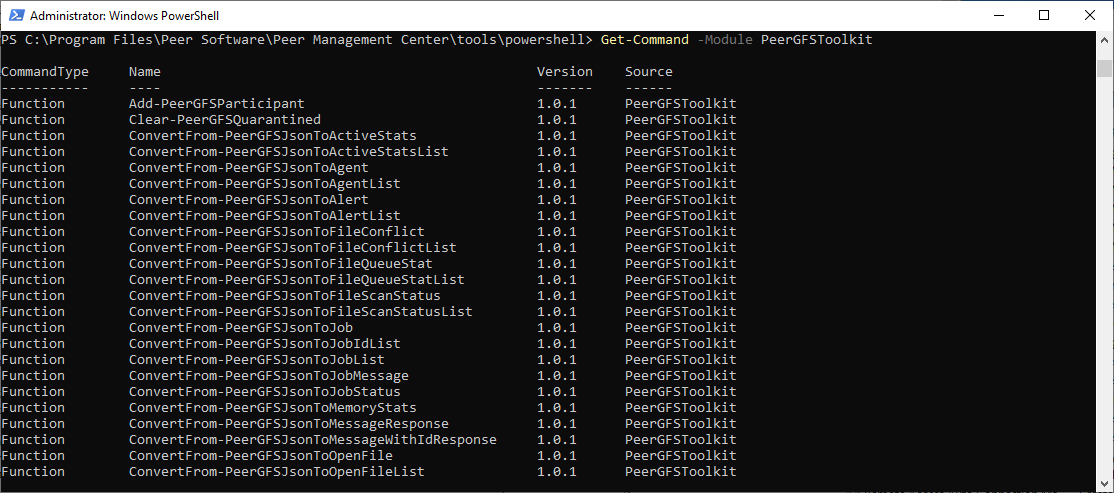
To set up the environment and explore available commands in the PeerGFS Toolkit:
.\ConfigurePeerGFSToolkit.ps1
Get-Command -Module PeerGFSToolkit
General Operations
Click to expand...
The following PowerShell commands allow you to retrieve various operational data from your PeerGFS environment. You can use these commands to list Agents, jobs, files, quarantines, statistics, and more. You can format each operation's output for better readability by using tools like Format-Table or ConvertTo-Json.
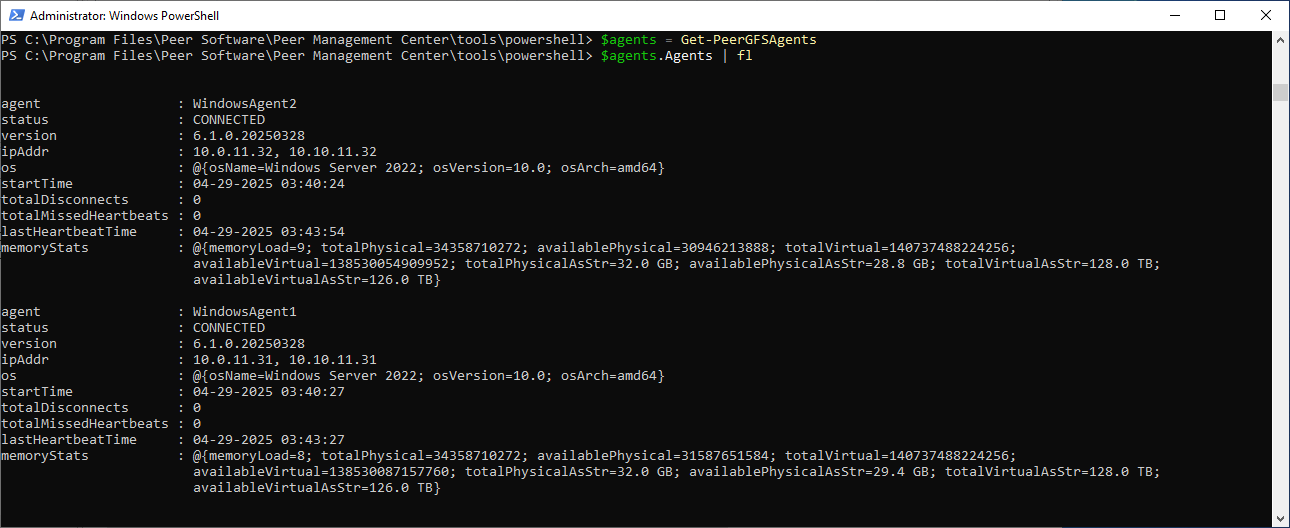
List All Agents
$agents = Get-PeerGFSAgents
$agents.Agents | fl
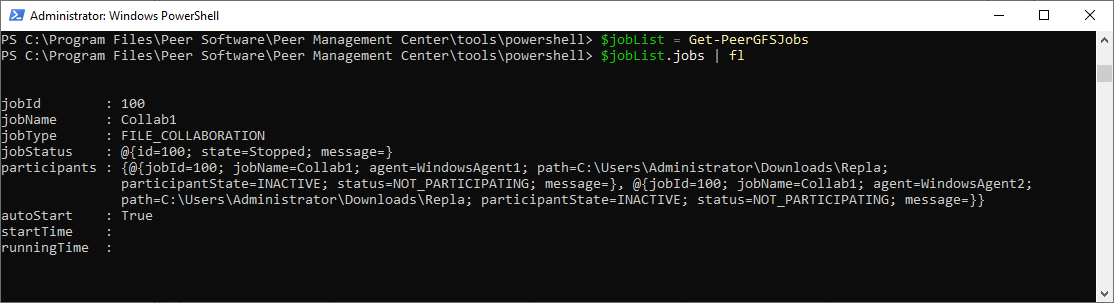
List All Jobs
$jobList = Get-PeerGFSJobs
$jobList.jobs | fl
List All Open Files
$openFiles = Get-PeerGFSOpenFiles
$openFiles.openFiles | ft

List All Quarantines
$quarantines = Get-PeerGFSConflicts -FileConflictTypes QUARANTINED
$quarantines.FileConflicts | ft

List Watch Set Statistics
$watchSetStats = Get-PeerGFSWatchSetStats
$watchSetStats.watchSetStats | ft

List Active Open and Pending Replication Statistics
$activeStats = Get-PeerGFSActiveStats
$activeStats.activeStats | ft

List Queue Statistics
$queueStats = Get-PeerGFSQueueStats
$queueStats.fileQueueStats | ft

List Completed Replication Work Statistics
$replStats = Get-PeerGFSReplicationStats
$replStats.replicationStats | ft

List Scan Status and Statistics
$scanStatus = Get-PeerGFSScanStatus
$scanStatus.fileScanStatuses | ft

List Error Job Alerts
$fatalJobAlerts = Get-PeerGFSFileJobAlerts -Severities ERROR
$fatalJobAlerts.alerts | ft

List Fatal PMC Alerts
$fatalPmcAlerts = Get-PeerGFSPmcAlerts -Severities FATAL
$fatalPmcAlerts.alerts | ft
List Scheduled Task History
$scheduledTasks = Get-PeerGFSScheduledTasks
$scheduledTasks.scheduledTasks | ft
Create a Job
Delete a Job
Click to expand...
Before deleting a job, you need to first retrieve its status, and if the job is currently running, stop it. Deleting a job while it is still running could result in incomplete or corrupted operations. The following steps guide you through retrieving the job status, stopping a job if needed, and safely deleting the job.
Get the Job Status
To view the available jobs and their status, run the following commands:
.\ConfigurePeerGFSToolkit.ps1 'settings.ini'
$job = Get-PeerGFSJobs
$job.jobs | ft
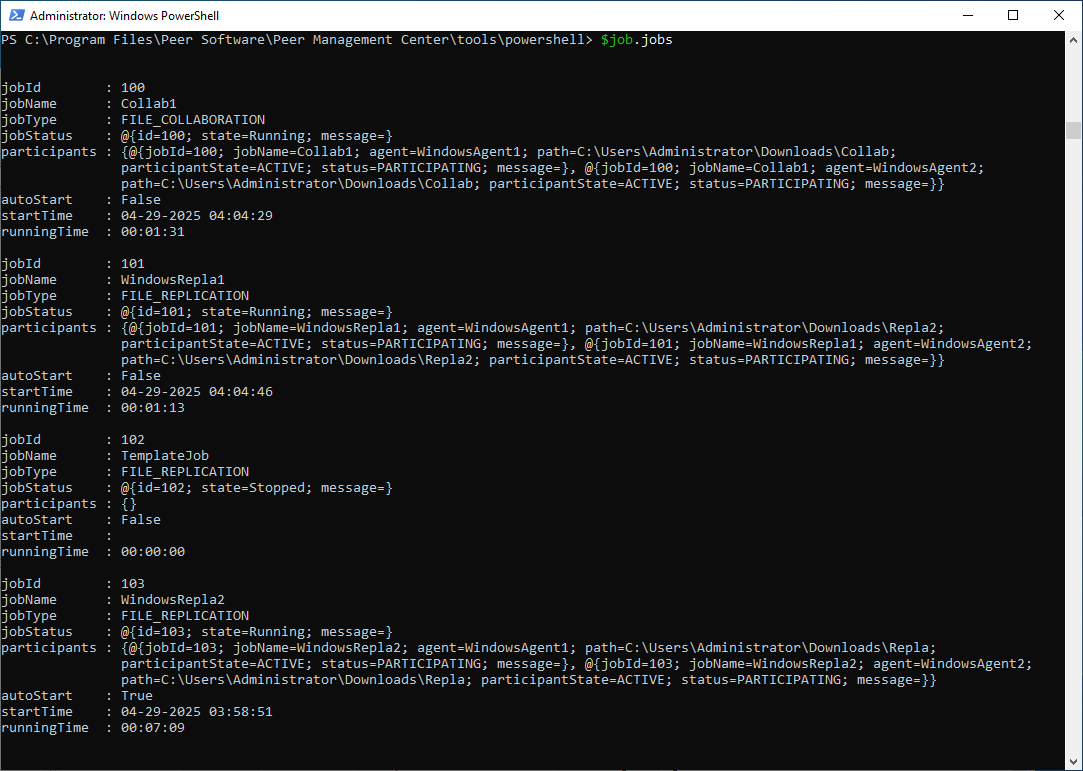
This command will output a table showing job details, including the job ID, name, type, status, and participants. The following is an example of the output:

To see the full status of the jobs, simply output the entire JSON:
$job.jobs
Stop the Job
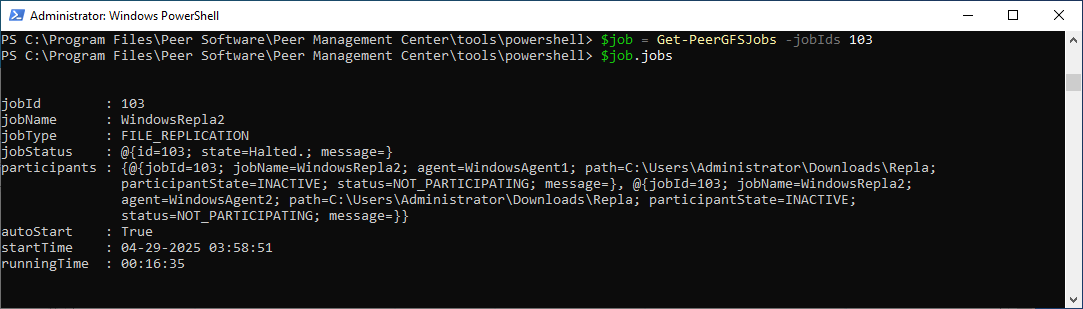
If the job is running, such as job 103 in this example you must stop it before deleting it. Stopping the job ensures a clean deletion and prevents issues with incomplete data removal.
To stop the job, run the following command:
Stop-PeerGFSJob -JobIds 103

After stopping the job, check the job status again to confirm it has been halted:
$job = Get-PeerGFSJobs -jobIds 103
$job.jobs
The job status will return to Halted, as shown below:
Delete the Job
Once the job is halted, you can delete it by running the following command:
Invoke-PeerGFSDeleteJob -jobId 103

Delete a Cloud Backup Job
When deleting a Cloud Backup job, you must specify what data should be deleted—either only the database or all data associated with the job.
To delete only the database, run the following command:
Invoke-PeerGFSDeleteJob -jobId 103 -Options 'cleanup-database'
Alternatively, if you need to delete all data related to the job in the cloud, you can use:
Invoke-PeerGFSDeleteJob" -jobId 103 -Options 'cleanup-all'
If you don't specify an option, you'll see the following error message:
No operation is set. Please use 'cleanup-database' to clean up the database only, or 'cleanup-all' to delete all cloud data related to JOB_NAME.
Start and Stop a Job
Click to expand...
Before starting or stopping a job, it’s important to first check its status. If the job is currently running, stopping it may be necessary to ensure proper execution. The following steps guide you through retrieving the job status, starting or stopping the job as needed, and ensuring that the operation is performed without issues.
Get Job Status
To retrieve the list of available jobs and their status, run the following commands:
.\ConfigurePeerGFSToolkit.ps1 'settings.ini'
$job = Get-PeerGFSJobs
$job.jobs | ft
This will output a table showing the job details, including the job ID, name, type, status, and participants. The following is an example of the output:

To view the full status in JSON format, use:
$job.jobs
This will display detailed job information, including participants and their statuses, start times, and running durations.
Start a Job
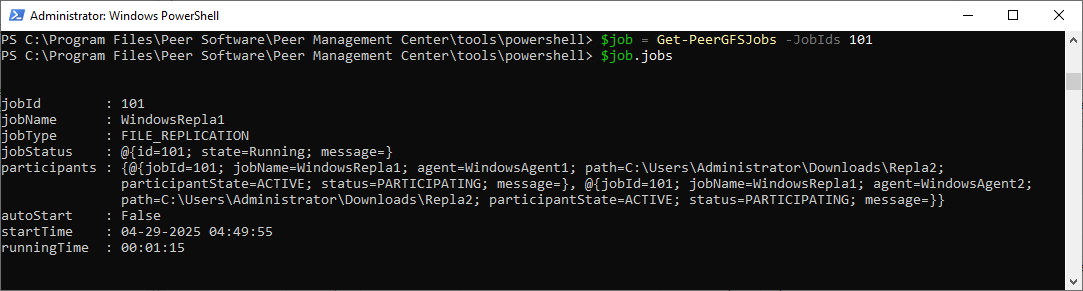
Based on the output above, to start a job, use the following command, replacing 101 with the ID of the job you want to start:
Start-PeerGFSJob -JobID 101

After the job has started, check the status again:
$job = Get-PeerGFSJobs -JobIds 101
$job.jobs
The job status will be updated to Running, as shown below:
Stop a Job
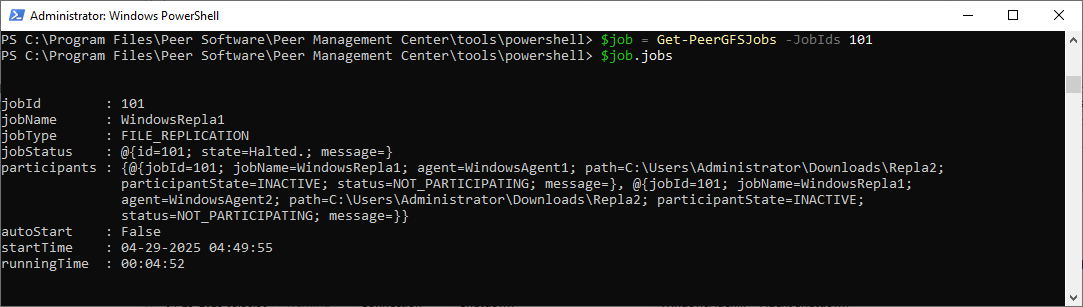
Based on the output above, to stop a job, run the following command, replacing 101 with the ID of the job you wish to stop:
Stop-PeerGFSJob -JobID 101

After stopping the job, check the status again to confirm it has been halted:
$job = Get-PeerGFSJobs -JobIds 101
$job.jobs
The job status will return to Halted, as shown below:
Release Quarantines
Click to expand...
When files are quarantined, you can often script simple solutions—such as prioritizing a specific Agent or always selecting the most recent file version. This can streamline conflict resolution.
Obtain Quarantined Files List
To retrieve a list of quarantined files, run the following commands:
$conflicts = Get-PeerGFSConflicts -FileConflictTypes QUARANTINED
$conflicts.FileConflicts
The output will show quarantined files along with related details, such as:
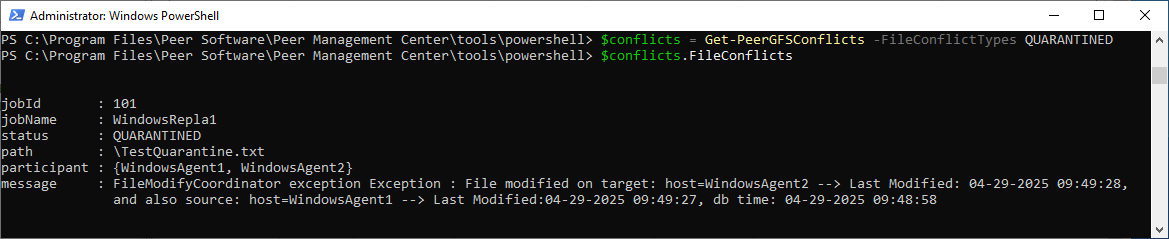
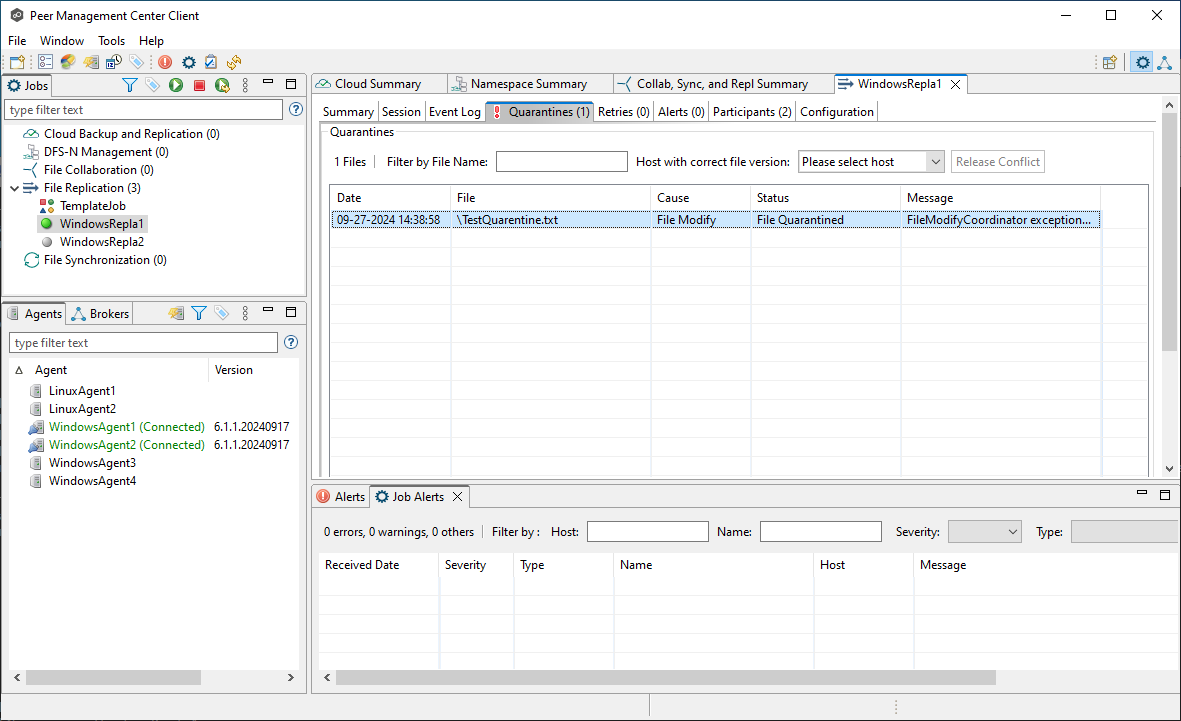
In this case, the file TestQuarantine.txt has a conflict under job ID 101, which matches what is shown in Peer Management Center.
Conflicts can also be retrieved by job ID. If no job ID is provided, a list of all conflicts will be displayed.
Clear File Conflicts
To resolve the conflicts, you can use the list of quarantined files retrieved earlier. For example, to resolve conflicts with the "Last Modified Wins" resolution, run the following command:
Clear-PeerGFSQuarantined -Action LAST_MODIFIED_WINS -FileConflictList $conflicts

Related articles
- Check .pc-trash_bin date stored times for target protection
- Creating a Job Using Bash Scripting
- Creating a Job Using PowerShell Scripting
- Creating a Job Using Scripting
- Does the EOA of NetApp ONTAPI impact PeerGFS?
- Generating Client Code for PeerGFS API with Swagger.io
- Getting Started with the PeerGFS REST API
- Performing API Operations Using Bash
- Performing API Operations Using cURL
- Performing API Operations Using PowerShell
- Scripting Methods for API Operations
- Use PowerShell to connect to the PeerGFS API