
How do I install Health Checker on a remote server?
Health Checker is a standalone service that can be installed on the same server as Peer Management Center or on a separate server.
You will get the most benefit by installing Health Checker on a separate server, where it can actively monitor your replication environment for outages and issues. However, if you want to use Health Checker only to track the time that replication takes, you can install Health Checker directly on the PMC server.
This article describes installing Health Checker on a remote server.
Requirements
While Health Checker is a lightweight application, there are some minimum requirements that must be met to use the tool:
- Windows Server 2012 operating system or later is required.
- Virtual servers running on enterprise-class hypervisors are sufficient if they have a minimum of 2 processor cores, 2 GB of RAM, and 20 GB of free disk space.
- The Health Checker server must have SMB network access to all participating file servers and shares.
- If run as a service, the Health Checker service should be run under a domain user account with the ability to create folders and files on all participating file servers and shares.
- The Health Checker must not be installed on any server that is already running a Peer Agent.
- If you are using the Health Checker to verify that all PeerGFS components are operating properly, it must not be installed on any server that is already running Peer Management Center. However, if you are using the Health Checker only to monitor replication performance, it can be installed on a server that is running the Peer Management Center.
The Health Checker may be run on servers hosting other infrastructure (such as Active Directory domain controllers), provided that the requirements above are met.
Overview of installation process
- Download the Health Checker installer.
- Install Health Checker on the server.
- Run the Health Checker configuration and runtime wizard.
- Schedule a task in Peer Management Center that sends jobs and shares to the Health Checker for it to monitor.
Step-by-step guide
Download the Health Checker Installer
- Download the Health Checker installer: https://downloads.peersoftware.com/hcs/11/HealthChecker_win64.exe
Install Health Checker
- Download and stage the installer on the Windows server from which it will run.
- Run the installer.
The setup wizard appears.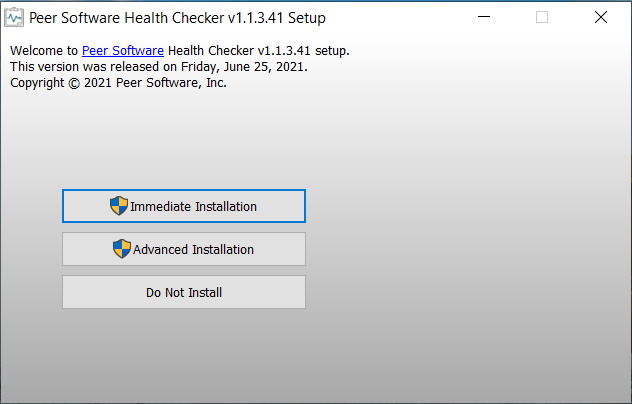
- Choose one of the installation options:
• Select Immediate Installation to install Health Checker into the standard C:\Program Files location while storing application data under the standard C:\ProgramData location.
• Select Advanced Installation if you want to customize the location of the Health Checker and its application data. After specifying the locations, click Proceed.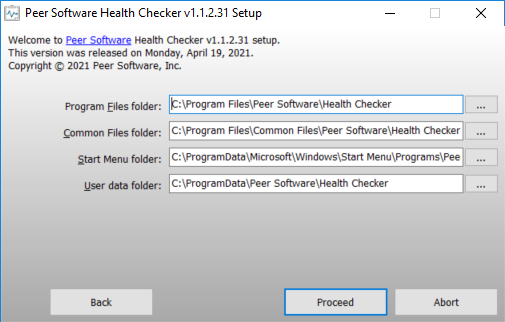
- Once the installation is complete, both the Start Menu folder and the Health Checker configuration and runtime wizard will be opened automatically.
Configure Health Checker
The Health Checker has two components:
- A configuration and runtime wizard. Use this wizard to perform the initial configuration of the Health Checker and to monitor its operations. If you chose the Immediate Installation option, the configuration and runtime wizard is located in the Peer Software\Health Checker folder underneath Program Files; if you chose the Advanced Installation option, the wizard is located in the folder that you specified in the Program Files field.
- A service executable that performs the primary functions of Health Checker.
To configure and run Health Checker:
- If not already open, open the Health Checker configuration and runtime wizard.
The Introduction page describes the basic operation of Health Checker. The operational status of the Health Checker appears in the lower corner. The statuses are Stopped, Waiting, and Running.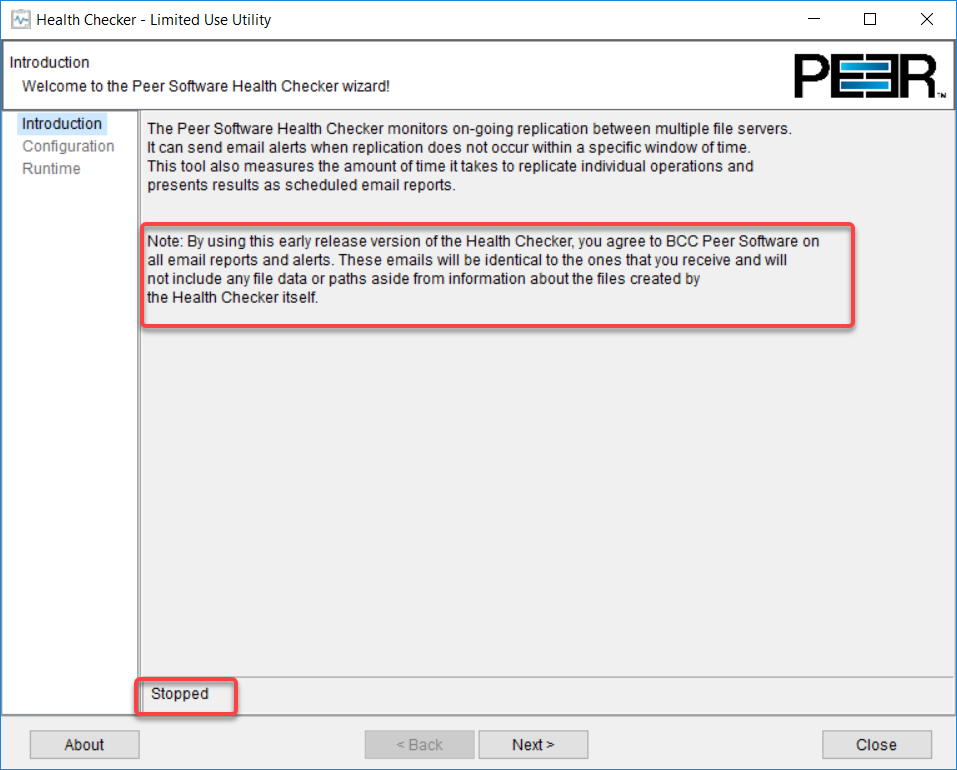
- Click Next to continue.
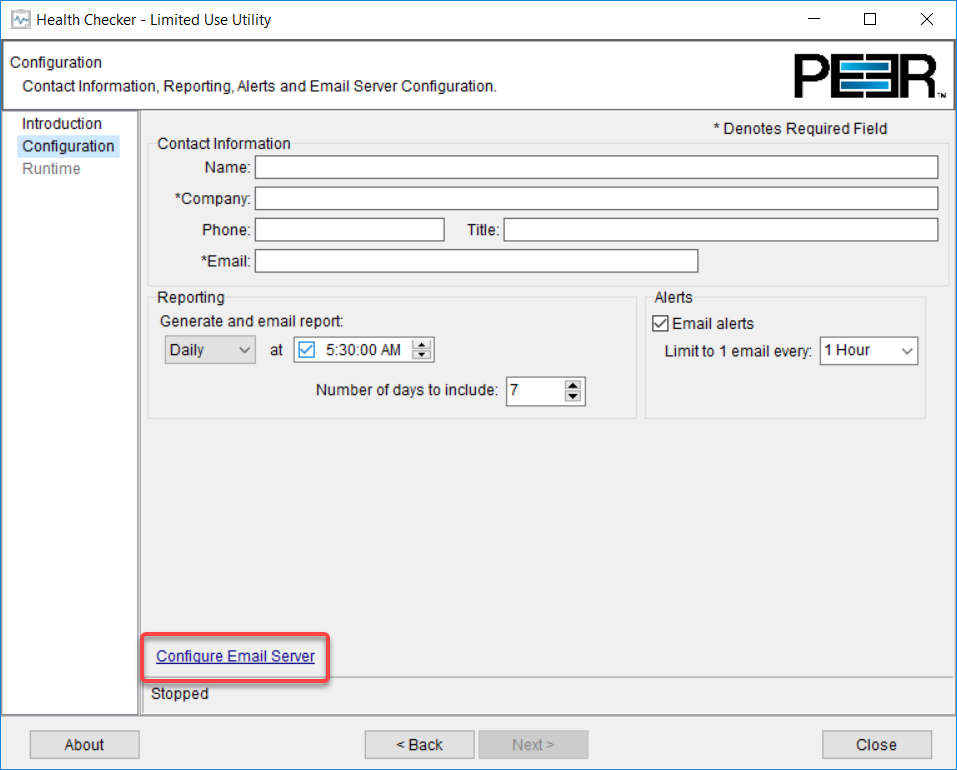
The Configuration page prompts for contact information and offers settings for configuring email reporting and alerts.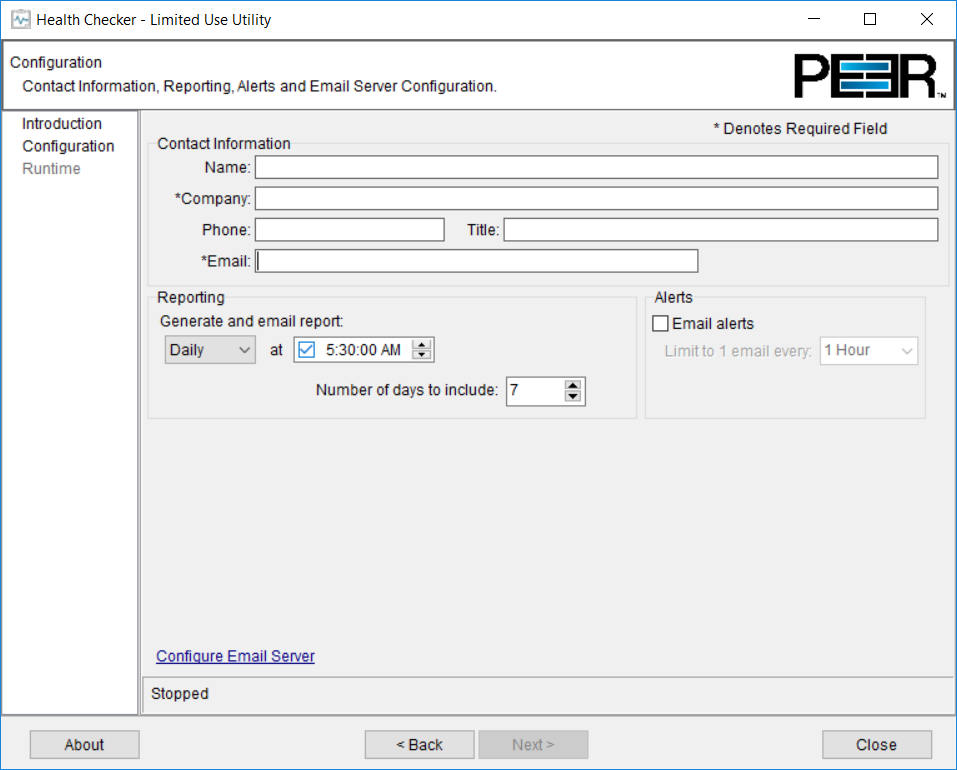
- Enter your contact information in the Contact Information section:
- Name/Phone/Title – (Optional) Enter your name, phone number, and title.
- Company – Enter your company's name.
- Email – Enter one or more email addresses to which the reports and alerts will be sent. Separate addresses with a comma.
- Select report options:
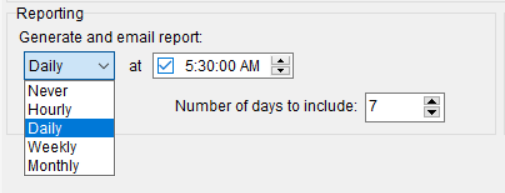
- Generate and email report - Select Never to disable email reporting. Otherwise, select the frequency of reports you would like to receive. Scheduling options will appear or disappear depending on the frequency option you select.
- Number of days to include - Select how many days of statistics will be included when a report is generated and emailed.
- Select alert options:
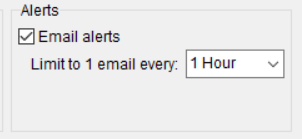
- Email after X failures - Select this box to enable and set the counter to the number of failures (missed checks) that must occur before the Health Checker sends out an email alert. Checks are 60 seconds apart
- Limit to 1 email every - This determines how often to send email alerts. If multiple failures are detected between emails, they will be grouped into the next email that will be sent.
- Click the Configure Email Server link if you don't want to use the built-in Amazon SES server to send email reports and alerts.
If you click this link, the Email Server Configuration dialog appears. Click Use custom email server, enter the appropriate settings, and then click OK.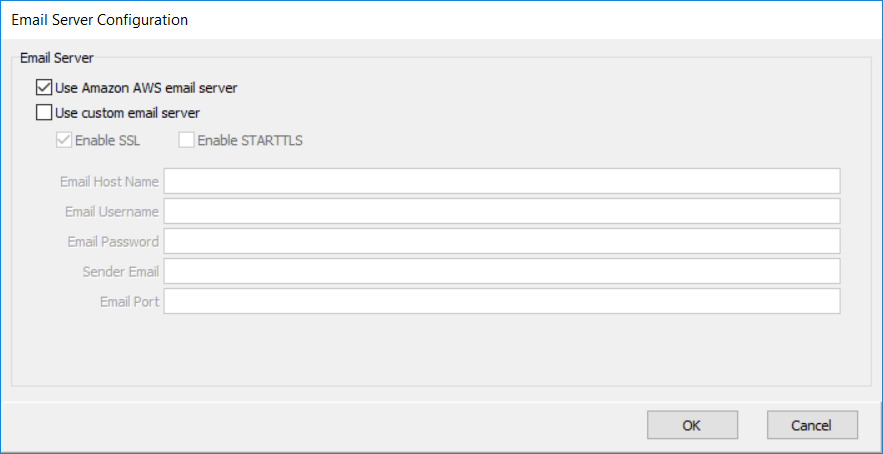
- Once you have completed the Configuration page, click Next to continue.
The Runtime page appears. This page allows you to start and stop Health Checker. Health Checker will automatically detect and apply configuration changes, even while it is running. The Update button allows you to manually force Health Checker to apply configuration changes.
The Runtime page also provides feedback on the current running status of Health Checker and displays its most recent operations in a table.
However, before you start running Health Checker, you must choose an Operation Mode–whether to run Health Checker as an application or as a service.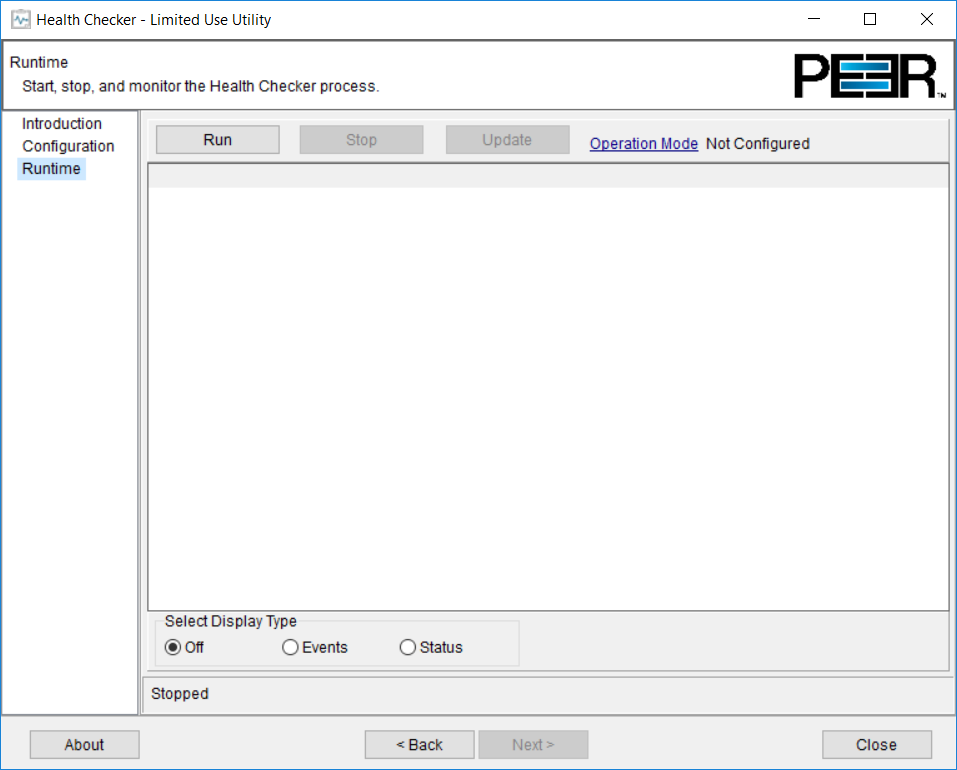
- Click the Operation Mode link.
The Operation Mode Selection dialog appears. As discussed above, we recommend running the Health Checker as a service. This requires that a domain account be available for use by the service.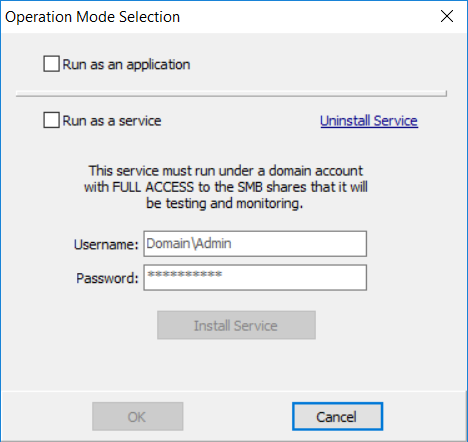
- To set up the Health Checker service:
- Check Run as a service.
- Enter the appropriate domain username (in the format <DOMAIN>\<USERNAME>) and password.
- Click Install Service.
- Click OK.
- Click Run in the Runtime page.
The service will start in a Waiting mode where Health Checker is listening for new paths to test and monitor. Once a scheduled task is configured to push job and share information to Health Checker and the task runs, the Health Checker service will change from Waiting mode to Running mode.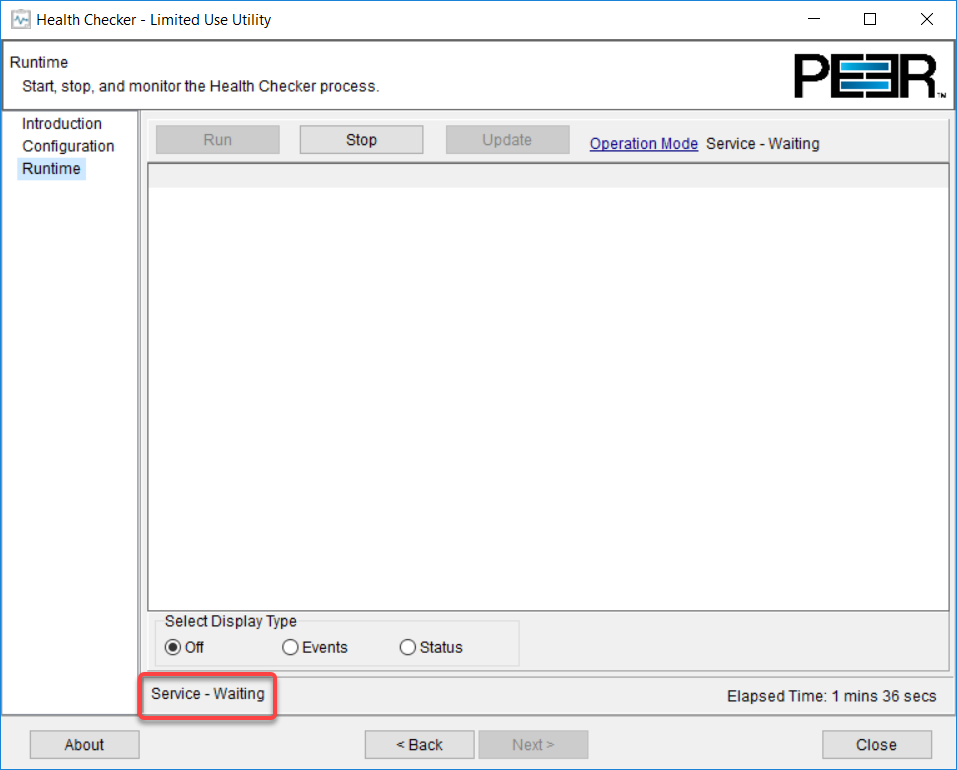
The configuration of Health Checker is now complete. Follow the steps in the next section to configure PeerGFS to push configuration information to Health Checker.
Schedule a PeerGFS task to send configuration information to Health Checker
The last step in setting up Health Checker is to configure PeerGFS to push jobs and share and subscription information to Health Checker via a scheduled task.
Job, share, and subscription information provides Health Checker with the details of what to monitor and where to send replication performance details. It includes a list of jobs and shares to monitor (taken from the jobs configured in PeerGFS), subscription, environment, and Real-Time Delta (RTD) settings. This integration eliminates the need to manually type in path details for your running PeerGFS jobs.
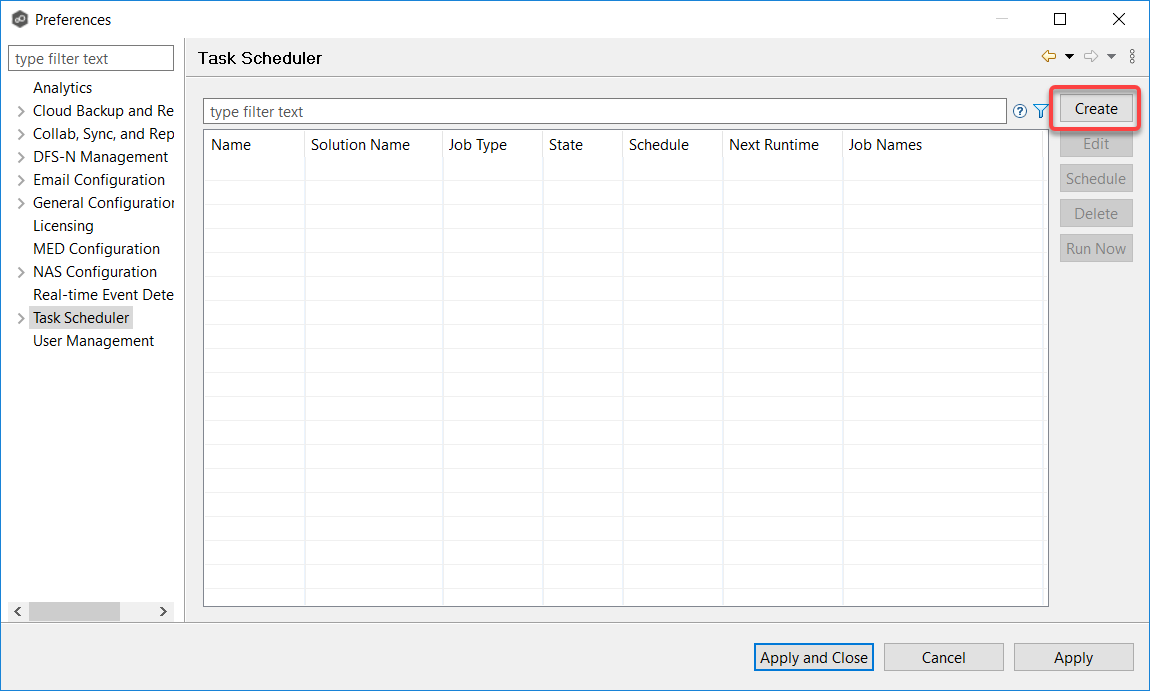
- Open the PMC rich client or web client.
- From the Window menu, select Preferences.
- Select Task Scheduler in the navigation tree.
- Click Create.
- In the Create Scheduled Task wizard, enter a name for the task.
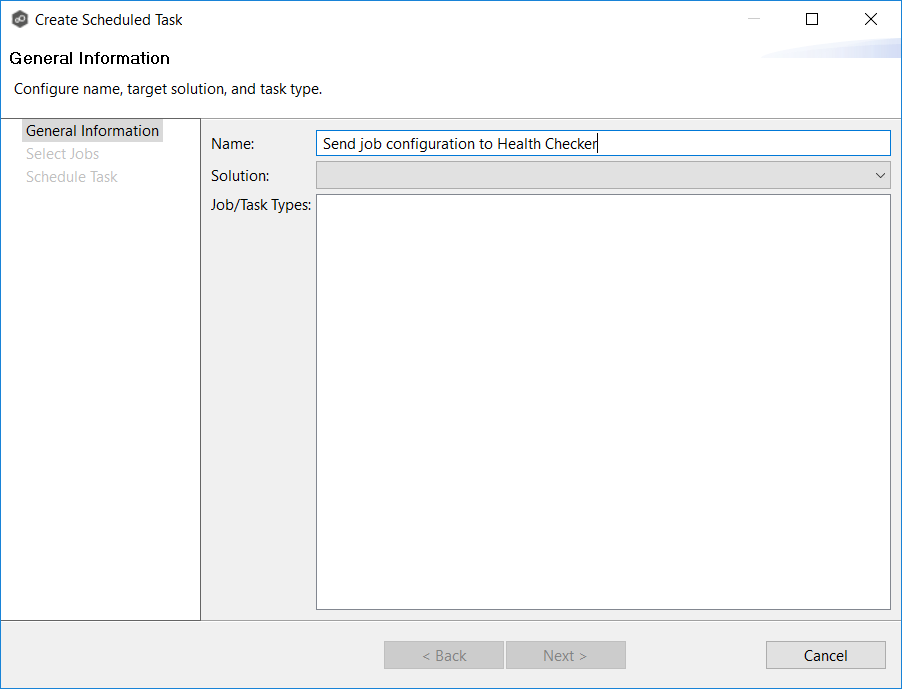
- Select File Collaboration, Synchronization and Replication from the Solution dropdown.
- Select Configure Health Checker for Job/Task Types.
- Click Next to continue.
The Select Jobs page appears.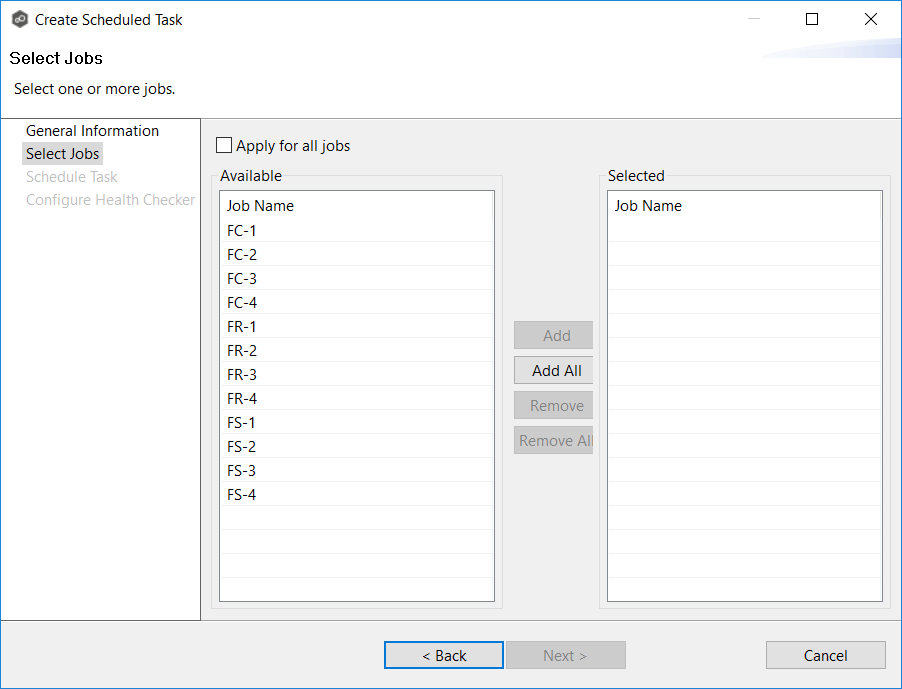
- Check Apply for all jobs to have this task automatically use all current and future jobs. You can also select specific jobs.
- Click Next to continue.
The Schedule Task page appears. Set your desired schedule for running this task.
We typically recommend using the Daily option under Settings, and then selecting Repeat task every under Advanced Settings to check the Health Checker's configuration every hour. If no PeerGFS jobs have been started or stopped since the last time the task ran, the jobs and shares that Health Checker is monitoring will not be touched.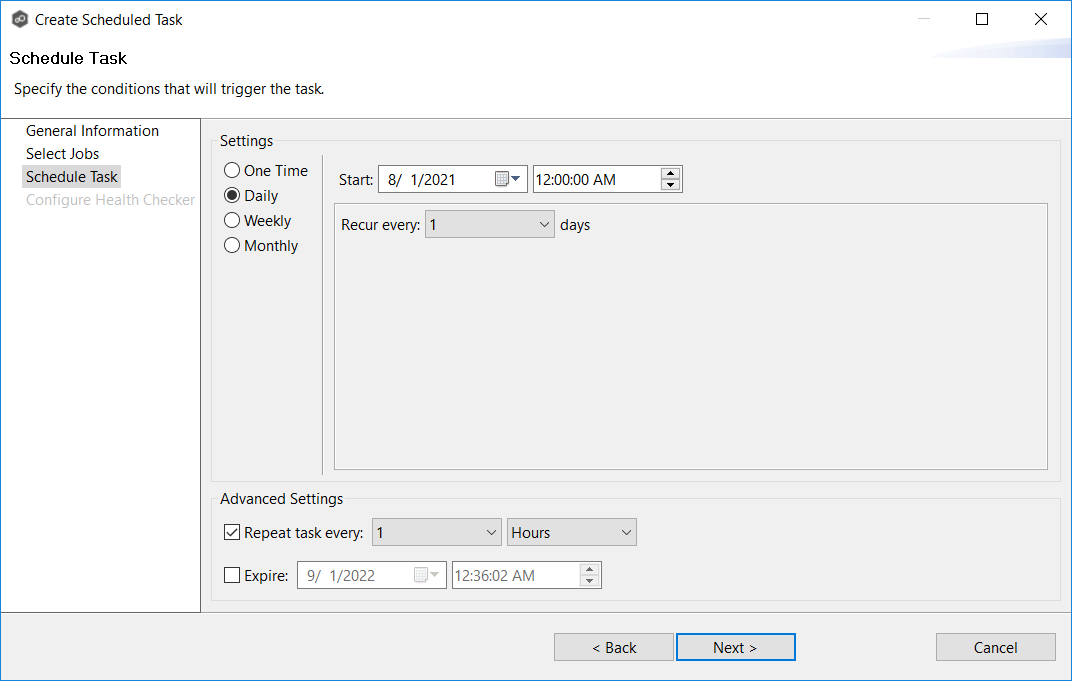
- Click Next to continue.
The Configure Health Checker page appears.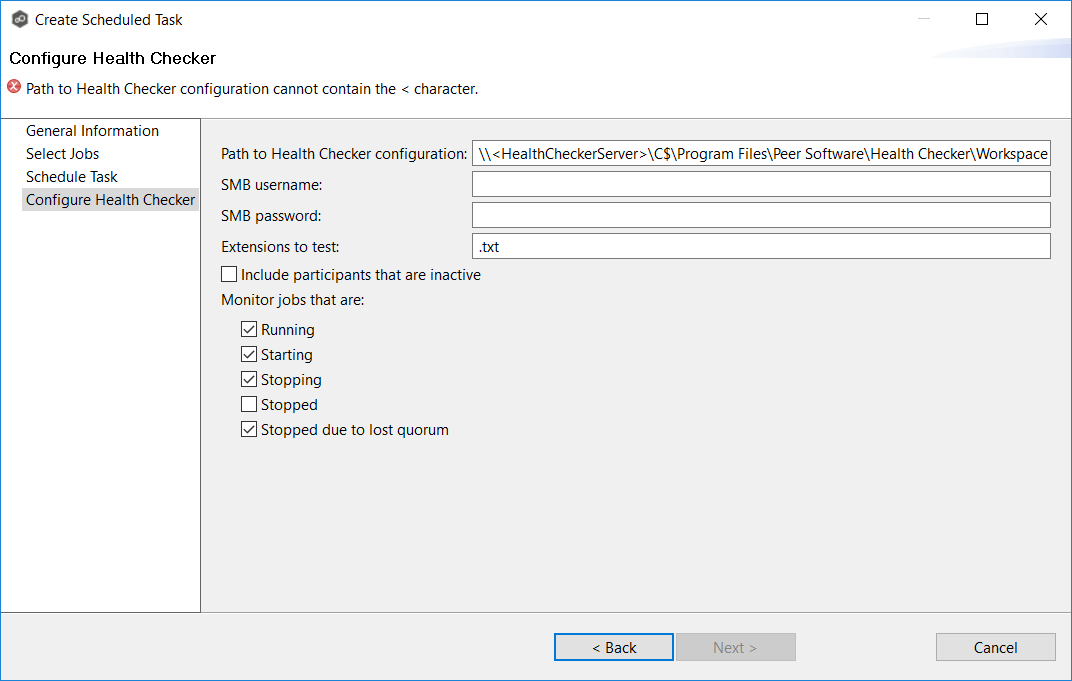
Enter the requested information:
Field Description Path to Health Checker Configuration Enter the UNC path to the Peer Software\Health Checker\Workspace folder on the Health Checker server. This folder is controlled by the Health Checker itself, so we recommend simply replacing <HealthCheckerServer> with the name or IP address of the server on which the Health Checker is installed. If you have installed the Health Checker in a location other than C:\Program Files, then you will need to update the C$\Program Files part of the path as well.
SMB Username By default, the PMC services run under the local service account, which typically cannot write to shares across the network. Enter an SMB username (in the format <DOMAIN>\<USERNAME>) that can read and write files inside of the Health Checker's configuration folder.
SMB Password
Enter the password for the SMB username that can read and write files inside of the Health Checker's configuration folder.
Extensions to Test Enter a semi-colon delimited list of extensions for the Health Checker to test. You can also enter NOEXT to test files without extensions. For example: _.txt;.docx;.xlsx;NOEXT
Note: NOEXT should not be used when PeerGFS is set up with file collaboration jobs.Include participants that are inactive
If checked, a participant that is manually disabled within a collaboration, synchronization, or replication job will be passed to the Health Checker. We recommend leaving this unchecked. Monitor jobs that are The jobs and shares that are monitored by Health Checker are based on the watch directories configured in your jobs in PeerGFS. Select the jobs that you want monitored according to their running status:
- Running – Active participants of all jobs that are running will be passed to the Health Checker.
- Starting – Active participants of all jobs that are starting will be passed to the Health Checker.
- Stopping – Active participants of all jobs that are stopping will be passed to the Health Checker.
- Stopped – Participants of all jobs that are stopped will be passed to the Health Checker. We do not recommend checking this option unless you plan to keep your PeerGFS jobs always running.
- Stopped due to lost Quorum – Active participants of all jobs that are stopped due to lost quorum will be passed to the Health Checker. This particular option is important for email alerting.
Enter the requested information.
Click Finish to complete the wizard.
The task appears in the Task table.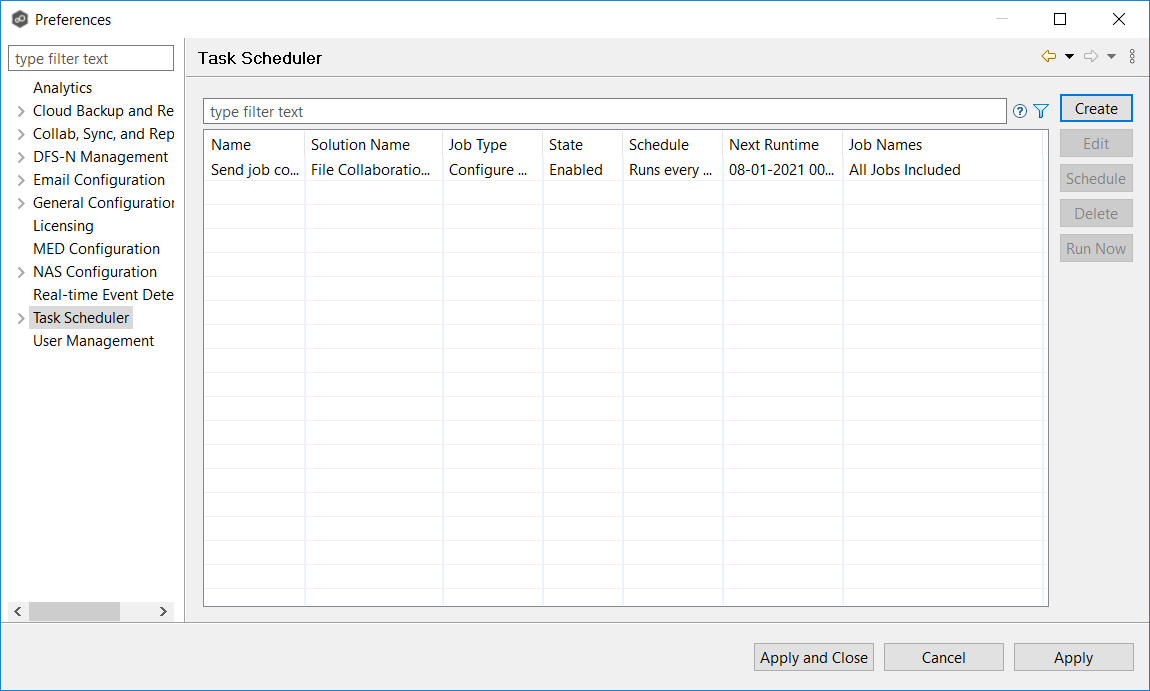
- If you would like to perform a manual update of the Health Checker's configuration, select the newly created task in the Task Scheduler table and click Run Now.
- Click Apply and Close.
Once the Health Checker receives its configuration from the Peer Management Center, its status will change from the Waiting state to the Running state and it will begin testing and monitoring jobs and shares.
Related articles
- Analytics
- Health Checker
- How do I install Health Checker on a remote server?
- How do I update PeerIQ?
- PeerIQ
- Proactive Monitoring
- What anonymous diagnostic data is collected?
- What is my Subscription ID?
- What is PeerIQ?
- What is Proactive Monitoring?
- What is the Health Checker?
- What types of data are uploaded to Proactive Monitoring?