
Achieving high availability for the PMC through active-passive configuration (v5.2 only)
Version applicability
This article applies to PeerGFS version 5.2 only.
If you are using a different version, see one of the following:
• Achieving high availability for the PMC through active-passive configuration (v4.7.0–v5.1.1)
• Achieving high availability for the PMC through active-passive configuration (v6.0 and later)
This article describes how to achieve high availability for the Peer Management Center by setting up an active-passive configuration.
It covers:
- An overview of active-passive configuration.
- Setting up active-passive configuration.
- Performing manual failover to the passive PMC.
- Configuring automatic failover to the passive PMC.
Overview
With an active-passive configuration, you run an active PMC server (physical or virtual) with a second passive PMC server (physical or virtual) configured as a backup. When a failure occurs on the active PMC server, the passive PMC server is ready to take over the work of the active server. Agents will automatically failover from the active PMC server to the passive PMC server. Manual failover of the PMC itself requires minimal user interaction while automatic failover requires no user interaction. After PMC failover, jobs set to auto-start will automatically start on the passive server.
Benefits
The benefits of an active-passive configuration include the absence of a need for additional hardware and software, except for provisioning a new physical or virtual server. Furthermore, it is a simpler and more cost-effective solution to implement across multiple locations, particularly for covering PMC disaster recovery scenarios.
Licensing
Since only one PMC server is active at a time, only one PeerGFS license is needed. You are allowed to use the same license on the active and passive servers but only one server can be active at a time. If you try to start a second PMC when there is a running PMC, then the second one will not be allowed to start. When this is attempted, an alert will be sent to the running PMC before shutting down the second PMC.
Prerequisites
- Ensure that the identical version of Peer Management Center is already installed on both the active and passive servers, leaving the passive PMC unlicensed and unconfigured.
- If you are using a network of brokers, set up the broker network before setting up active-passive configuration. Details on how to set up a network of brokers can be found here: Getting Started with Network of Brokers. Once the network setup is complete, you can skip the Setting Up an Active-Passive Configuration section and jump to either Performing Manual Failover to the Passive PMC Server or Configuring Automatic Failover below.
Setting Up an Active-Passive Configuration
Setup of active-passive configuration involves:
- Task 1: Adding sites to the topology - Establish connectivity within the topology to enable mutual awareness between the two PMCs for seamless failover operations and to guarantee synchronization of their configurations.
- Task 2: Configuring Agents to failover to the passive server – Set up each Agent to automatically failover to the passive PMC when the active PMC is inaccessible, and failback to the original PMC when it is available again.
This section describes how to configure each PMC server so that they are connected together. Start with the currently active PMC followed by the passive one.
Task 1: Adding sites to the topology
To add the active and passive PMC servers to the topology perspective:
- Open the PMC on the active PMC server. The active PMC server is the one that is licensed and configured.
- Click the Open Perspective icon in the upper right corner of the PMC.
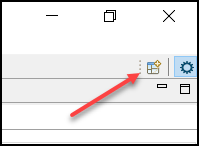
- Select Topology, and then click Open.
The Topology Perspective appears.
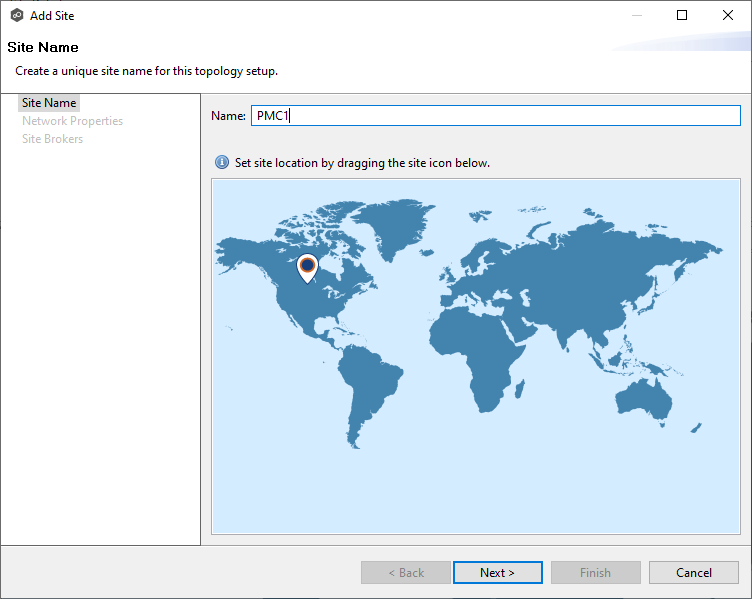
- Click the Add Site button to open the Add Site wizard.
- Name the site, drag the site icon to the desired location on the topology map, and then click Next.
- (Optional) Enable TLS to encrypt all broker connections to and from this site.
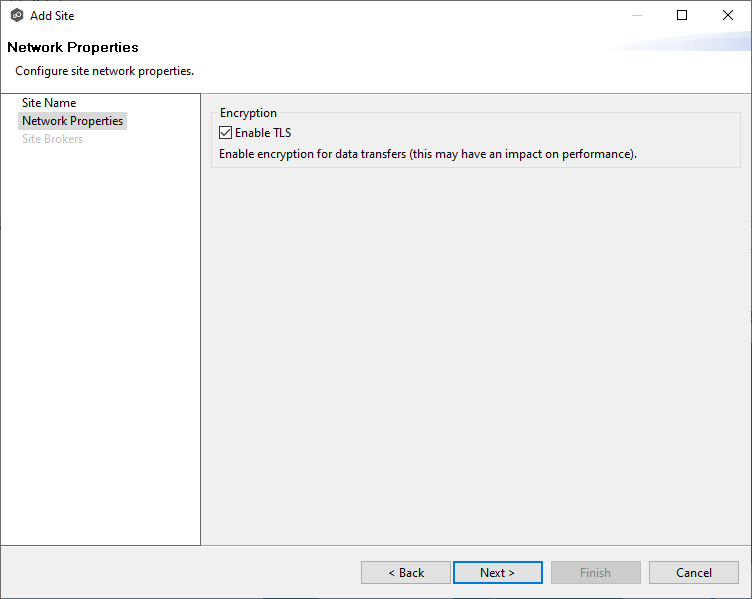
Click Next,
Configure the broker on this PMC host:
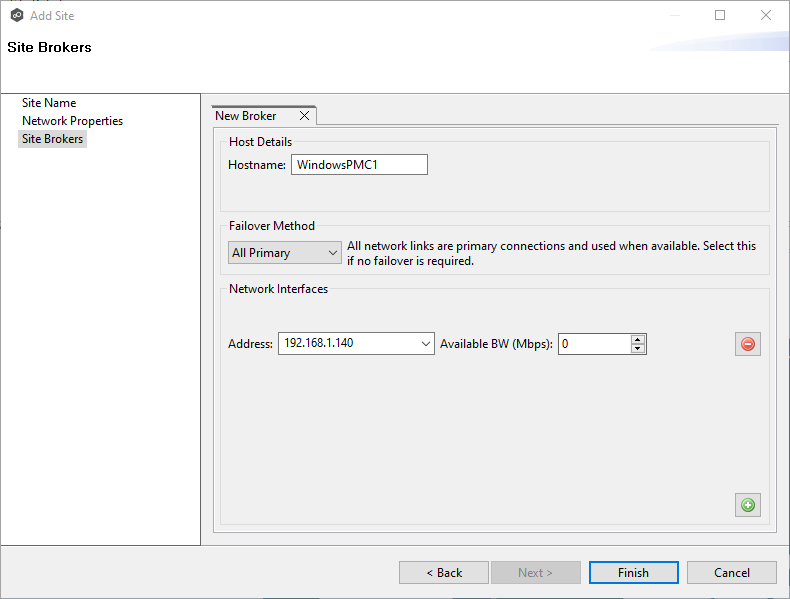
- Enter a host name in the Hostname field.
In the Failover Method section, keep the default failover method of All Primary.
In the Network Interfaces section, enter one or more IP addresses for the broker.
Keep the default value for the available bandwidth.
Note: Ensure that network routing policies are set correctly to achieve the desired behavior. Note that PeerGFS has no control over these policies, so please contact your network administrator for assistance.
- Click Finish.
- Repeat Steps 4-8 for the passive PMC.
After adding the second (passive) PMC, the new site will momentarily have a status of Unconfigured before being automatically configured with the same settings as the active PMC. After this, the second PMC should have a status of Online but will be in a passive state.
Task 2: Configure Agents to Failover to the Passive Server
This section outlines the steps needed to configure all Agents for failover to or from the passive server. This process entails making modifications to the Broker configuration for each individual Agent.
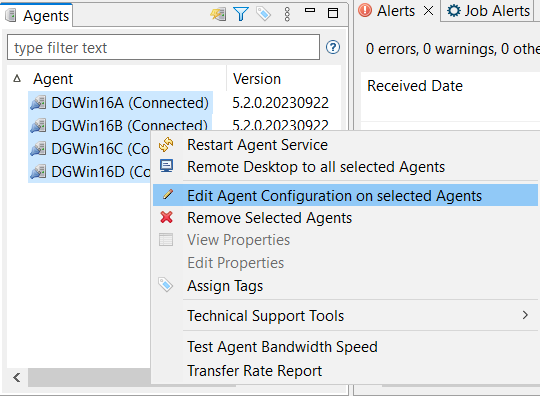
- Within the Peer Management Center client, select all Agents, right-click and select the Edit Agent Configuration on Selected Agents option, and then click OK in the message that appears.
In the Failover Brokers section, add the broker IP address for the passive server in Broker Hosts field (if there is an address already present, then add the new address separated by a comma).
Note: Do not change the primary broker, even if there are multiple values in Broker Hosts. If a network of brokers is deployed, then ensure that both the active and passive PMC are included in one of the Broker Hosts fields.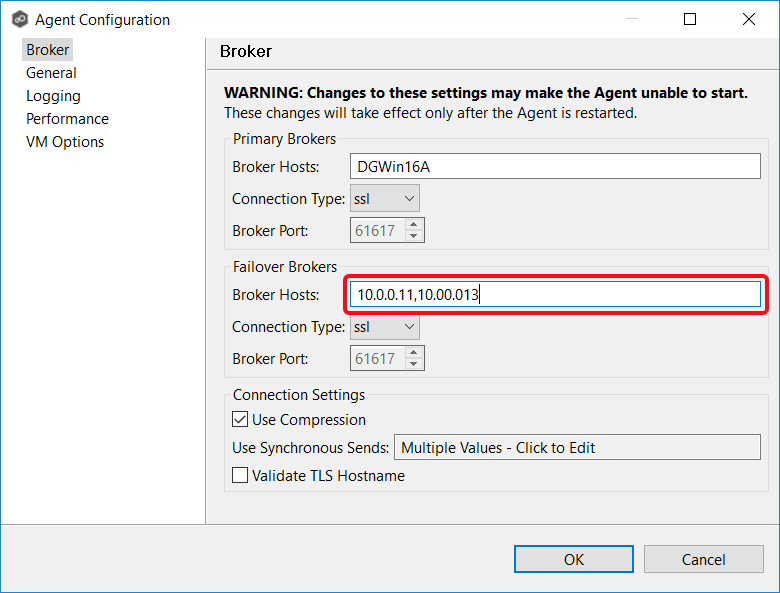
- Set the connection type appropriately for your environment, and then click OK.
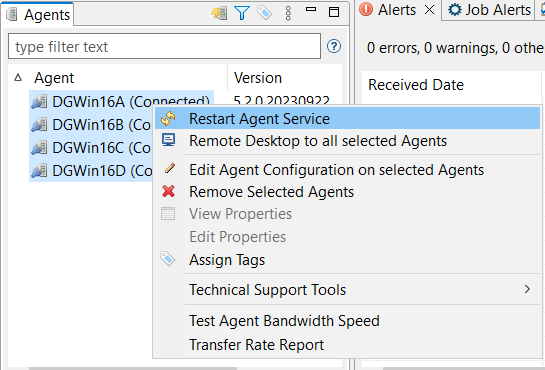
- Restart all Agents by selecting all Agents in the Agents view, and then right-clicking and selecting the Restart Agent Service option.
Performing Manual Failover to the Passive PMC Server
This section describes the actions to take when failing over between the active and passive PMC servers. There are two scenarios covered in this section:
- Performing a planned failover between PMC servers
- Manually enabling a passive PMC after failure
Scenario 1: Performing a planned failover between PMC servers
Occasionally, deliberate control transfer between PMC servers may be necessary, often as part of routine maintenance procedures.
To activate a passive PMC server:
- Open the PMC on the currently active PMC server.
- Open the Topology perspective.
- Select the passive PMC site in the Sites panel.
- Click the Activate PMC button.
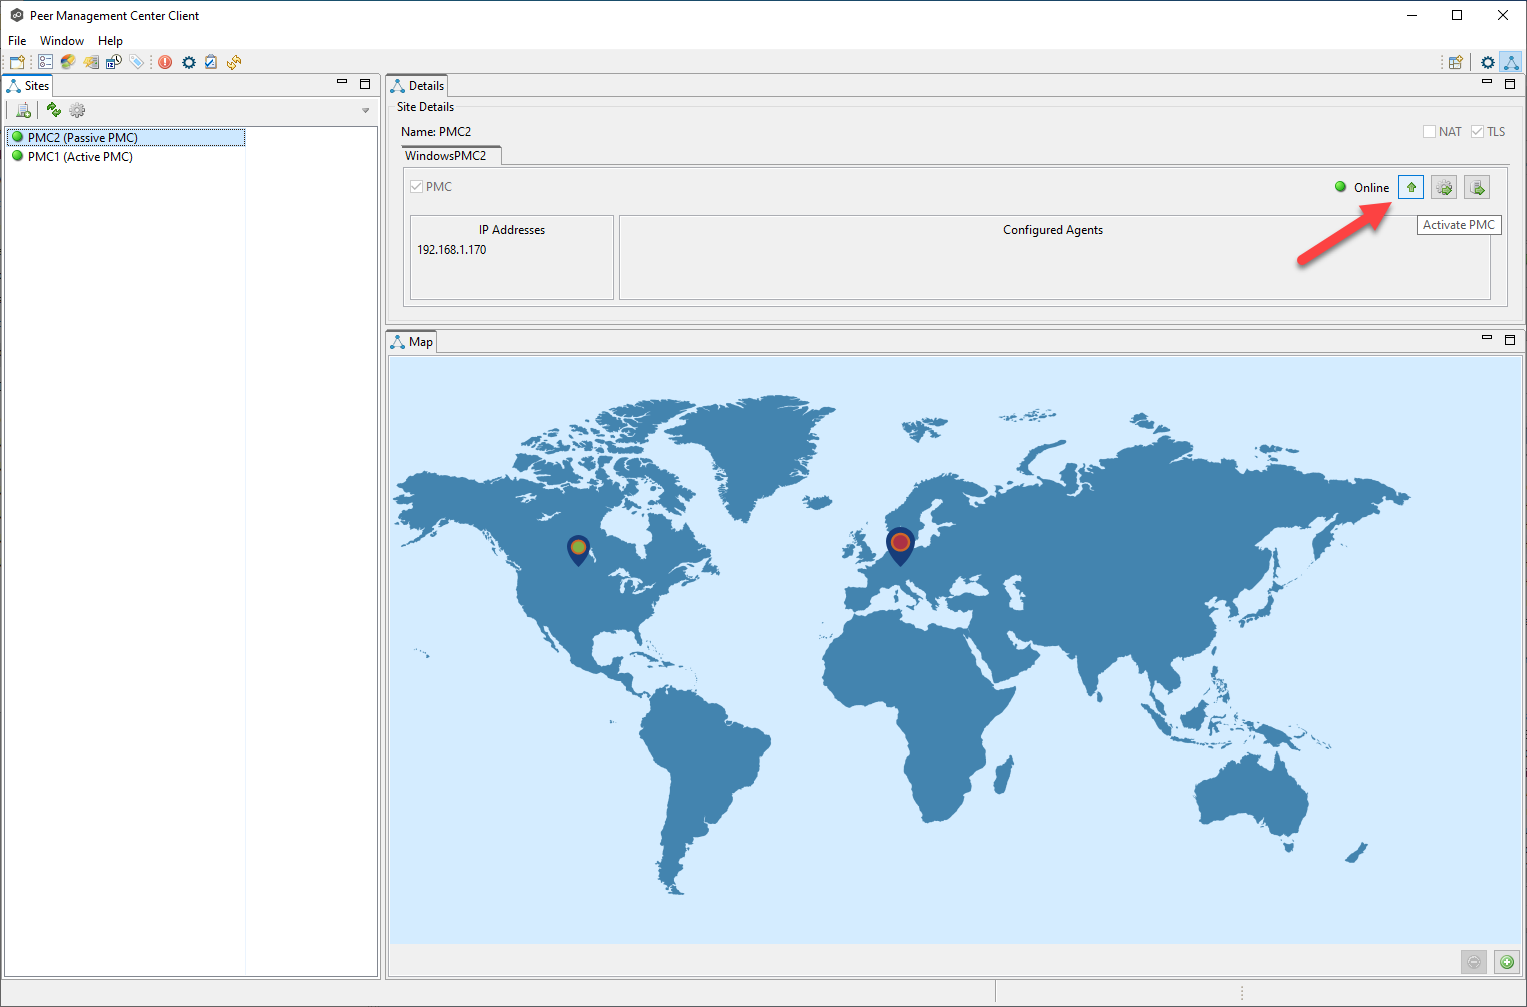
- Click OK in the message that appears.
Once this has been done, the two PMCs will negotiate the handover of control. Any jobs that are configured to automatically start will do so.
Scenario 2: Manually enabling a passive PMC after failure
In the event of a genuine failure necessitating environment recovery, this section describes the process to disable the active PMC and manually start the passive PMC. Even if connectivity between the PMCs is lost, it remains necessary to deactivate the currently active PMC.
Disable the active PMC
To disable the active PMC, follow these steps if the original active PMC server is still available:
- Launch the PMC on the active PMC server.
- Open the Topology perspective.
The passive PMC will appear to be offline as there is no network connectivity between them.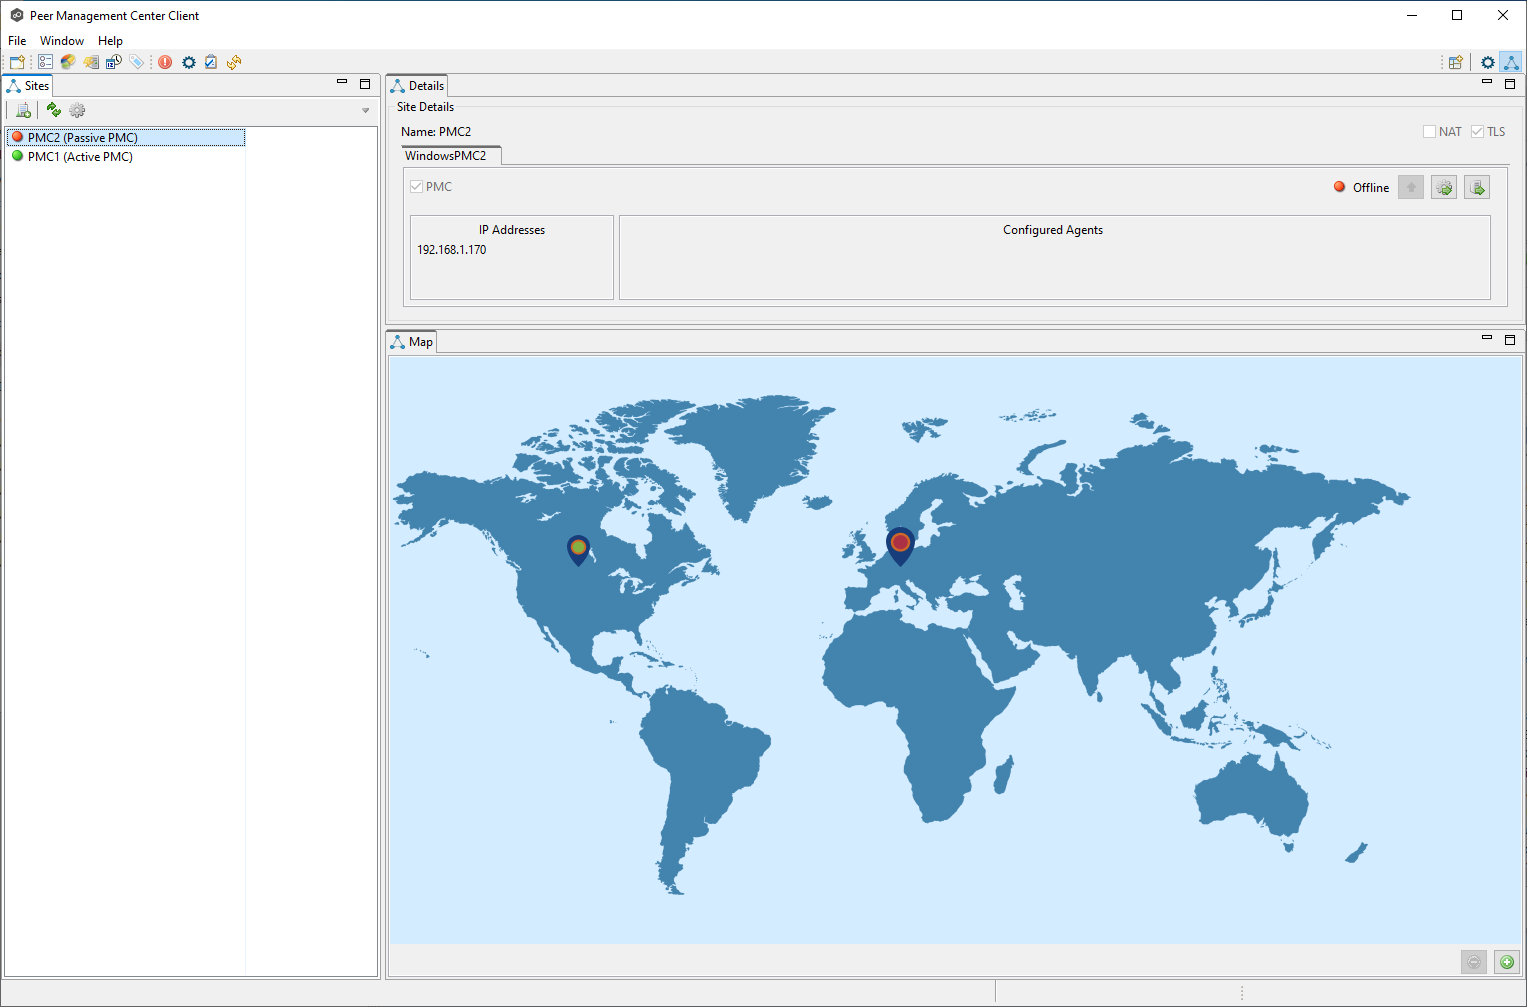
- Select the active PMC in the Sites view, and then click the Deactivate PMC button in the Details view.

The PMC will automatically close and all Peer Management services will be stopped.
Enable the passive PMC
To enable the passive PMC, you must manually start the Peer Management service. These steps vary depending on the operating system hosting the passive PMC.
- Log in to the passive PMC server.
- Open the Windows Services application and find the Peer Management Services.
The number of Peer Management services listed will vary, depending on your installation.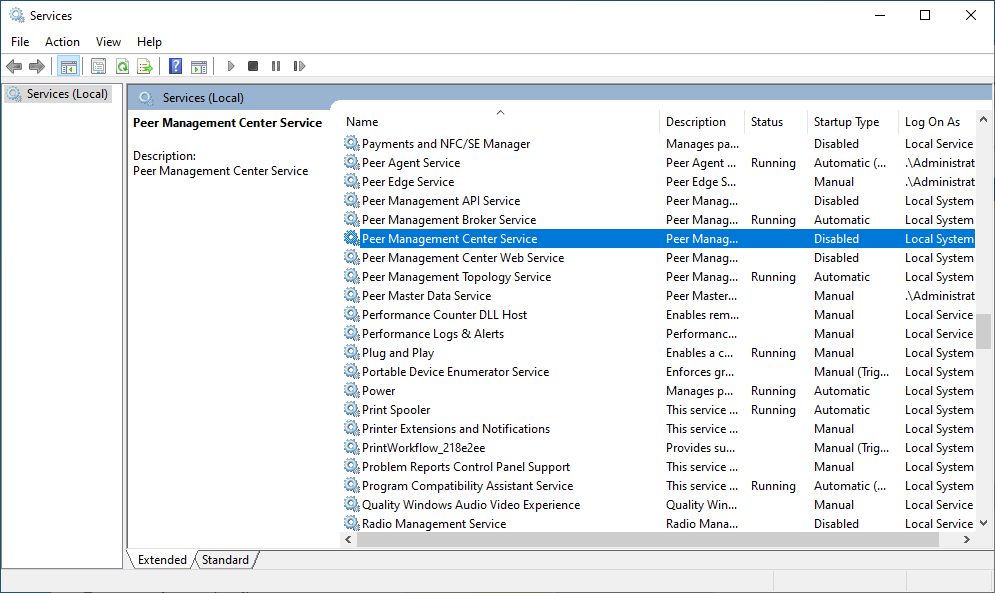
- Edit the properties of each disabled service:
- Change Startup type from Disabled to Automatic.
- Click OK to save the changes.

- Start the services that were just enabled.
The PMC will start and become active. Any jobs marked to automatically start will do so.
Configuring Automatic Failover
The preceding sections have explained the manual execution of failover operations. However, depending on your license, you can configure two PMCs to automatically switch over between each other in the event of a failure.
To enable automatic failover:
- Verify that the environment is licensed for automatic failover.
- Install the watch node broker.
- Configure automatic failover.
Note: In automatic failover scenarios, no PMC is designated as more important or given higher priority. As a result, automatic failback is not inherent. If there is a preference for a specific PMC to be active, it must be manually accomplished by following the steps outlined in the planned manual failover process.
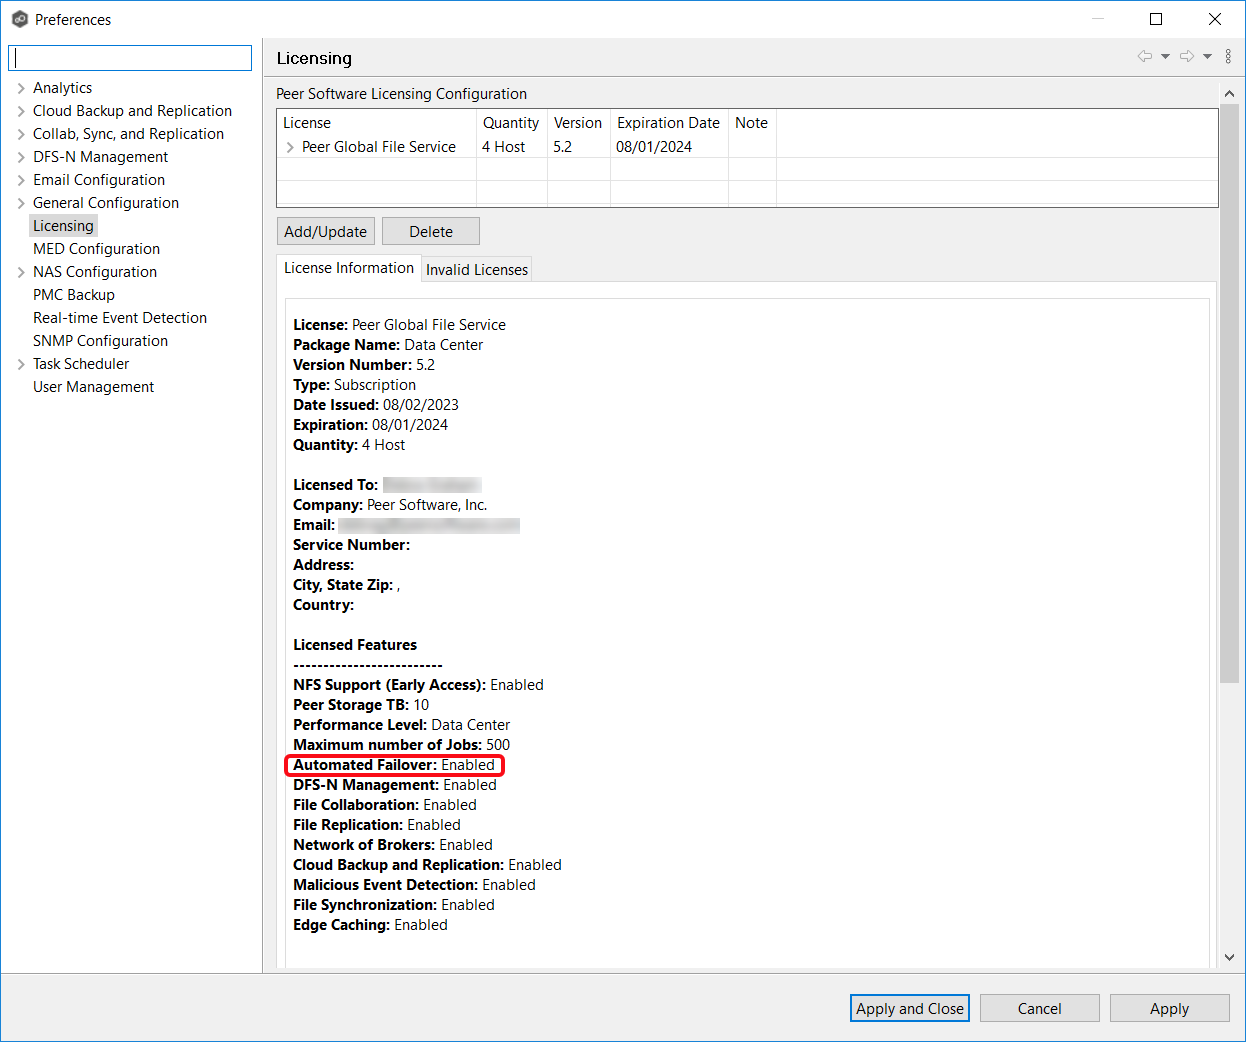
Verify that the environment is licensed for automatic failover
- Open the PMC client (rich or web)
- From the Help menu, select Licenses.
- Verify that Automatic Failover is enabled in the Licensed Features section.
Install the watch node broker
For automatic failover to function, each PMC server must be aware of the connected and disconnected status of other PMC servers in the environment. This awareness is facilitated through the establishment of a reliable third point of view. To achieve this, a broker known as a watch node is introduced to the environment, positioned independently and not affiliated with either PMC site.
- Use Remote Desktop to connect to a Windows Server where the broker is to be installed.
- Download the broker installer using one of the following methods:
• In the PMC, select the Download Broker Installer command from the Help menu.
• Use the download link that is included in the email containing your new PeerGFS license. - Right-click the installer and choose Run as administrator.
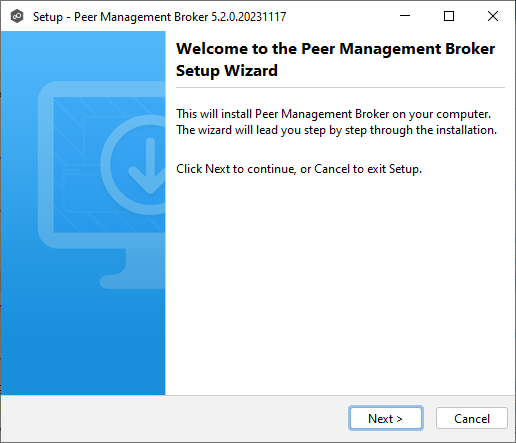
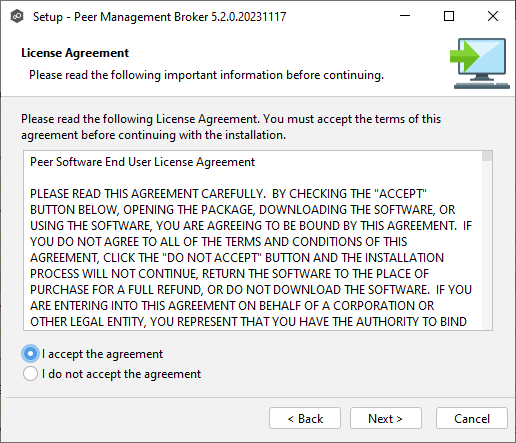
- Read and accept the license agreement.
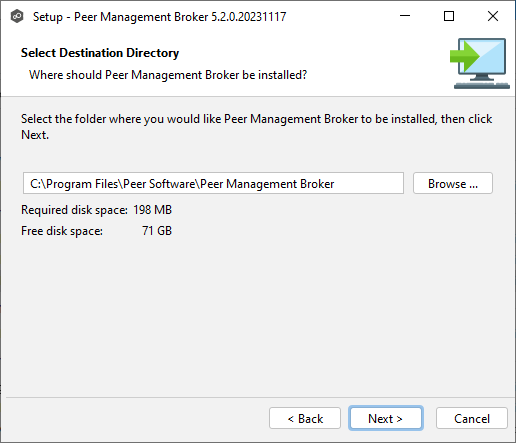
- Confirm the location of the installation directory.
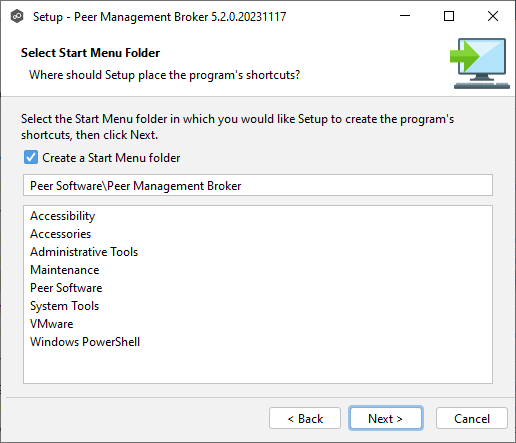
- Confirm the location of the Start Menu folder.
- Finish the installation. If this is a new installation, add the recommended firewall rules if needed.
All brokers connect to each other on TCP ports 61616 (TCP) or 61617 (TLS); therefore access to these ports is required.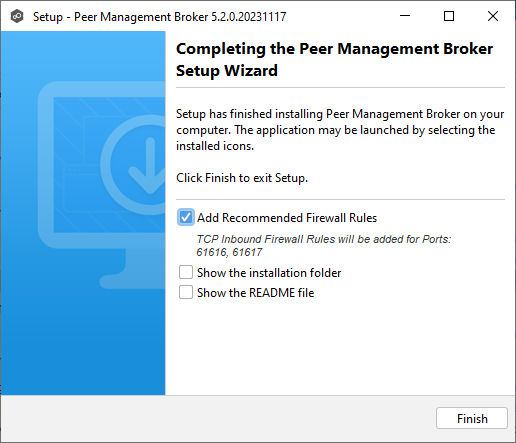
- Once the watch node broker has been installed, add the new site to the topology perspective in the same way as described in Task 1. Adding sites to the topology.
Configure automatic failover
To configure automatic failover:
- Navigate to the topology perspective within the PeerGFS client.
- Click the Failover Options button.
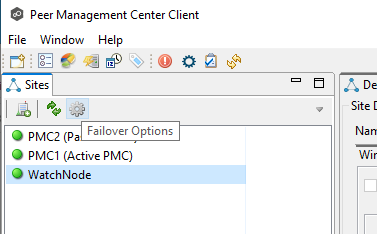
The Failover Options dialog appears.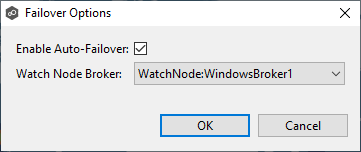
- Select Enable Auto-Failover.
- Select a watch node broker. If your environment utilizes a Network of Brokers, all configured brokers will be available as options.
- Click OK.
Best Practices for PMC Failover and Network Planning
Considerations during a failover event:
PeerGFS web server configuration
- Take note of the hostname used in your PeerGFS web service configuration, especially if you plan to use web access during a failover event.
- The web service port (default: 8443) binds to the hostname specified in the configuration.
- To ensure access to either PMC’s web server—during normal operation or after a failover—set the hostname to the default value of
0.0.0.0. This allows access using the server’s NetBIOS name, FQDN, or IP address. - During a failover, point your browser to the secondary PMC’s address.
Network connectivity
- Ensure that all PMCs and the watch node broker can receive incoming network connections.
Location planning
- Place the watch node broker in a neutral location relative to both PMCs.
- In both local and distributed environments, avoid creating a single point of failure by positioning PMCs and the watch node broker strategically.
- A well-planned layout helps ensure resilience in the event of a failover.
Troubleshooting
PMC startup failure
- Verify that another PMC instance is not already running.
- If automatic failover is enabled, ensure that the watch node broker or passive PMC is online.
Lack of passive PMC or watch node broker
If automatic failover is enabled and there is no passive PMC or watch node broker available:
- A PMC using automatic failover requires the presence of either a watch node broker or passive PMC to remain active.
- If neither is available, you must disable automatic failover to allow the PMC to continue running.
To manually disable automatic failover:
- Edit the
SPGlobal.prefsfile located in theworkspace/prefsdirectory. - Change the value of
autoFailoverfromtruetofalse.
Related articles
- Achieving high availability for the PMC through active-passive configuration
- Achieving high availability for the PMC through active-passive configuration (v4.7.0 - v5.1.1)
- Achieving high availability for the PMC through active-passive configuration (v5.2 only)
- Achieving high availability for the PMC through active-passive configuration (v6.0 and later)
- Can a job back up files that were created between two specific dates?
- Can PeerSync change an IP address to point to a backup server?
- Firewall Requirements
- Getting Started with Network of Brokers
- Maximize network throughput
- Move a Peer Agent to another Windows server
- Peer Global File Service - Environmental Requirements
- PeerGFS jobs fail to start after initial job due to NetAPP ONTAP v9.15.1 upgrade
- PeerSync - Environmental Requirements
- Prerequisites
- Schedule upload of PMC and Agent logs to Peer Software Support