
This document outlines how to upgrade PeerSync and the PeerSync Listener (PSListener).
Registration Information
Your registration details will continue to work with minor releases as well as patch updates. However, based on our Product Lifecycle Policy, major releases will require new registration details.
To upgrade to the latest major releases of PeerSync and the PeerSync Listener, request an upgrade using our Product Upgrade Request form.
Step-by-step upgrade guide
-
Use Remote Desktop to connect to the Windows Server where PeerSync is installed.
-
Stop PeerSync.exe and PSProfiler.exe. Be sure to check the Processes list in Task Manager to make sure that no other users are running either executable.
-
[Optional] Browse to your existing PeerSync installation folder and make a backup of your .SNC file(s) by copying them to an alternate location. These files are normally located under the Profiles subfolder.
-
Download the PeerSync installation file using the download link that is included in the email containing your new PeerSync registration details.
-
Right-click on the downloaded PeerSync installation file and select Run as administrator.
-
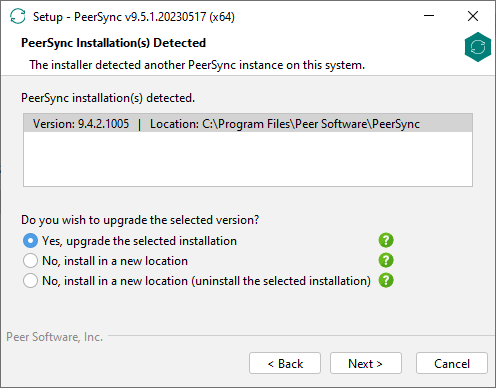
When prompted to upgrade, select Yes then Next.
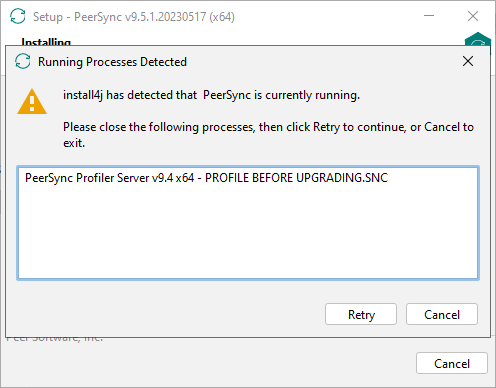
If the Profiler is open, you will see the following warning. Make sure to close it in order to proceed.
-
If you are using the optional PeerSync Listener, follow these steps to upgrade it:Use Remote Desktop to connect to the Windows Server where the Listener is installed.Stop PSListener.exe and PSLConfig.exe. Be sure to check the Processes list in Task Manager to make sure that no other users are running either executable.Download the PSListener installation file using the download link that is included in the email containing your new PeerSync registration details.Right-click on the downloaded PSListener installation file and select Run as administrator.Use all of the default settings.
-
Once PeerSync and the optional PeerSync Listener are upgraded, use the PeerSync Profiler to open your existing .SNC file(s).
-
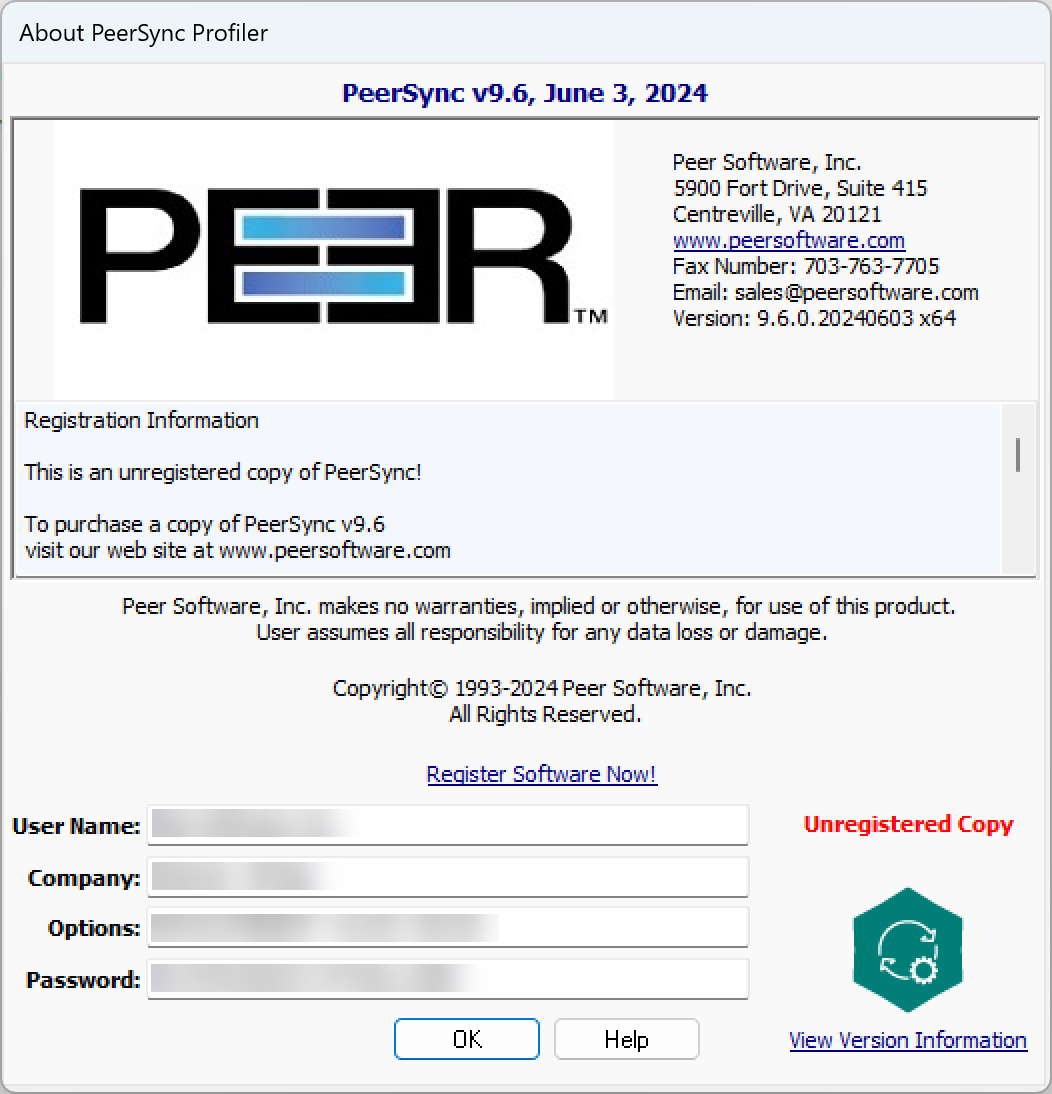
When you first open the Profiler after the upgrade, you will be prompted to enter your new registration details. Enter your new User Name, Company, Options, and Password, then click OK.
-
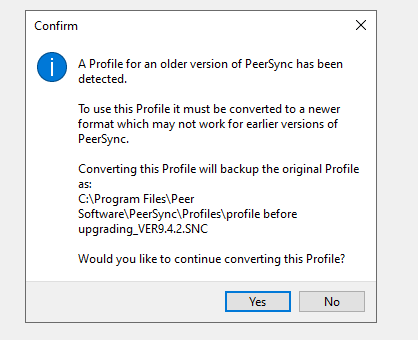
When prompted, click Yes to convert your .SNC file to work with the newer version of PeerSync.
-
If you have PeerSync and/or the PeerSync Listener running as a service, go to the Services window on the appropriate Windows Servers and re-enter your logon credentials. Then restart the appropriate PeerSync Professional Series Software and PSListener Utility Software services.
Related articles
Page: Can I use DFS Namespaces when specifying folder paths in PeerSync? Page: Configure PeerSync Listener's advanced settings Page: Configure the Agent installer to run unattended Page: Configure the PeerSync Listener installer to run unattended Page: Does PeerSync Listener have to be installed on both servers when using the ByteReplicator? Page: How do I install Health Checker on a remote server? Page: How does the ByteReplicator work? Page: Move a Peer Agent to another Windows server Page: Set up synchronization/replication over TCP Page: Upgrade PeerSync and PeerSync Listener Page: What is the disk space requirement for PeerSync? Page: Where can I find the installers for PeerGFS components? Page: Why does ByteReplicator use .BRTMP temporary files?