
|
Last Updated |
28 August 2025 |
Overview
This guide covers the legacy PeerGFS integration method for Dell Unity. Starting with PeerGFS 6.3, Unity supports a CEE over HTTP integration. If you run Dell Unity OE 5.x or later—or if you need NFS or multi-protocol workloads—use the current Dell Unity Configuration Guide. This guide does not cover those scenarios.
This guide steps you through configuring your environment to work with a Dell EMC storage platform in preparation for installing Peer Software solutions. The last section of this guide provides troubleshooting information. During the configuration process, you will be installing and configuring software on the server that will host Peer Software solutions. This server is hereafter referred to as the CEE server. The software you will be installing and configuring includes:
-
CEE (Common Event Enabler) framework – Required to receive real-time notifications from Dell EMC storage platforms.
-
.NET Framework – Core Windows software needed to run the CEE framework.
-
RabbitMQ Server – Message broker required by Peer Software solutions to receive real-time notifications from CEE.
-
Erlang – Required by Rabbit MQ Server.
Requirements
-
Your Dell Unity storage device must be running Unity Operating Environment 4.2 or later.
-
Local administrator rights are required for most of the installation and configuration tasks.
-
See
Dell Unity Prerequisitesfor other requirements.
Terminology
-
CEE server – A Windows server hosting CEE framework and your Peer Software solutions.
-
Common AntiVirus Agent (CAVA) – A software service that provides anti-virus and event-publishing services for Dell storage platforms.
-
Common Event Enabler (CEE) framework – A Dell software product required to obtain real-time event notifications from a Unity storage platform. Used to be called Celerra Event Enabler.
-
Common Event Publishing Agent (CEPA) – A software service that provides event publishing services for Dell storage platforms.
-
NAS Server – A Dell Unity storage server that uses the SMB, NFS, or FTP/SFTP protocols to catalog, organize, and transfer files within designated file system shares.
-
SMB/CIFS – The Server Message Block (SMB) Protocol is a network file-sharing protocol; it supersedes Common Internet File System (CIFS), an earlier protocol. SMB is used in this document to refer to both protocols.
-
Unity – All-Flash and Hybrid Flash unified storage platforms.
-
Unisphere – A web-based application for managing the Unity platform.
Configuration Tasks
Task 1. Confirming Configuration Readiness
-
Ensure that the Dell Unity prerequisites are met for the Peer Software solution you will be using.
-
If your storage platform (e.g., Unity and VNX) requires licensing for the Common Event Enabler (CEE) framework, ensure that CEE is licensed.
-
Ensure that the Unity storage device is already configured to serve data via SMB. You should be able to access an SMB share from a Windows client BEFORE attempting to continue.
-
Ensure that the date and time on the Unity storage device are synchronized with any associated domains and the CEE server.
Task 2. Installing the .NET Framework on the CEE Server
-
Run Windows PowerShell as an administrator.
-
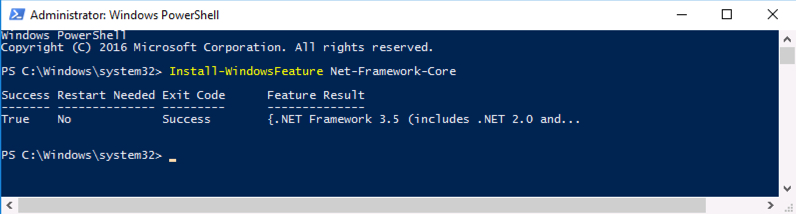
Enter the following command to install .NET Framework v3.5:
Install-WindowsFeature Net-Framework-CoreAfter the installation is complete, the results are displayed in the PowerShell window.
-
Close the PowerShell window.
Task 3. Installing CEE Framework on the CEE Server
-
If any versions of CEE framework software earlier than v8.6 (including stand-alone CAVA or CEPA) are already installed on the CEE server, uninstall them before continuing.
-
Download and stage the 64-bit CEE framework installer on the CEE server.
-
If deploying for use with Isilon, we require v8.7.0 of the CEE framework. To obtain one of these versions, please contact Dell EMC technical support or your Peer Software technical contact.
-
If deploying for use with Unity or VNX, we support v8.9.1 of the CEE framework. CEE v8.9.1 can be found here: https://dl.dell.com/downloads/DL81214_Common-Event-Enabler-8.9.1.0-for-Windows---32-and-64-bit.iso. Note that this download requires a Dell EMC support login.
-
-
Install the CEE framework software:
-
Run the CEE framework installer as an administrator.
The Welcome page of the CEE Install wizard appears. -
Click Next.
The License Agreement page appears. -
Accept the terms of the license agreement, and then click Next.
The Customer Information page appears. -
Enter your user name and organization, select Anyone who uses this computer (all users), and then click Next.
The Setup Type page appears. -
Select Complete, and then click Next.
The Symantec SAV for NAS page appears.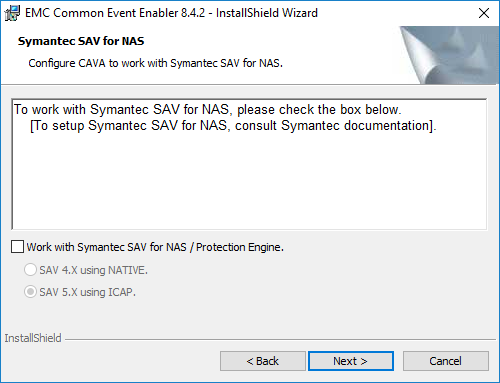
-
Ensure that the Work with Symantec SAV for NAS/Protection Engine checkbox is not selected, and then click Next.
The Ready to Install the Program page appears. -
Click Install.
When the installation is complete, the InstallShield Wizard Completed page appears. -
Click Finish.
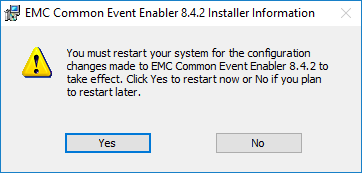
A dialog prompting you to restart the system appears.
-
Click No. You will restart the system later.
-
Task 4. Configuring CEE on the CEE Server
-
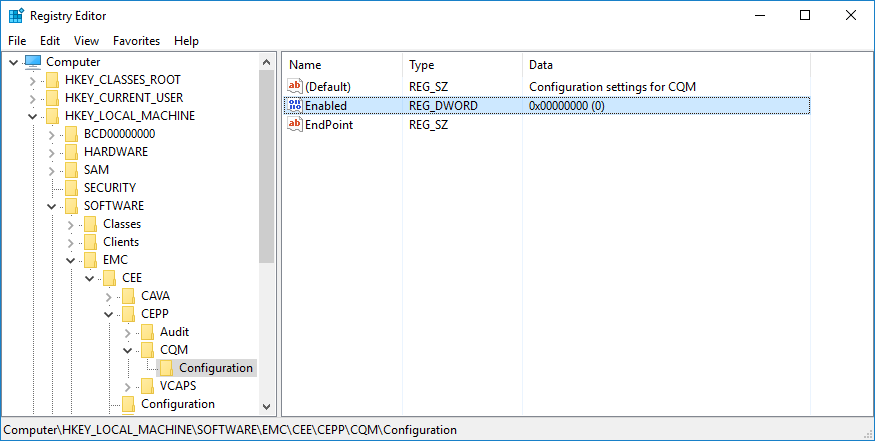
Modify the registry value to instruct CEE framework to send events to RabbitMQ:
-
Open the Registry Editor as an administrator.
-
Navigate to the following location: HKEY_LOCAL_MACHINE > Software > EMC > CEE > CEPP > CQM > Configuration.
-
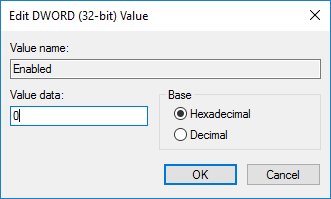
Double-click the Enabled registry key.
The Edit DWORD (32-bit) Value dialog appears. -
Change the number in Value data to 0, and then click OK.
-
Close the Registry Editor.
-
-
Set the login credentials for the EMC CAVA service. The credentials should be the same as the ones you will use for the Peer Software service.
-
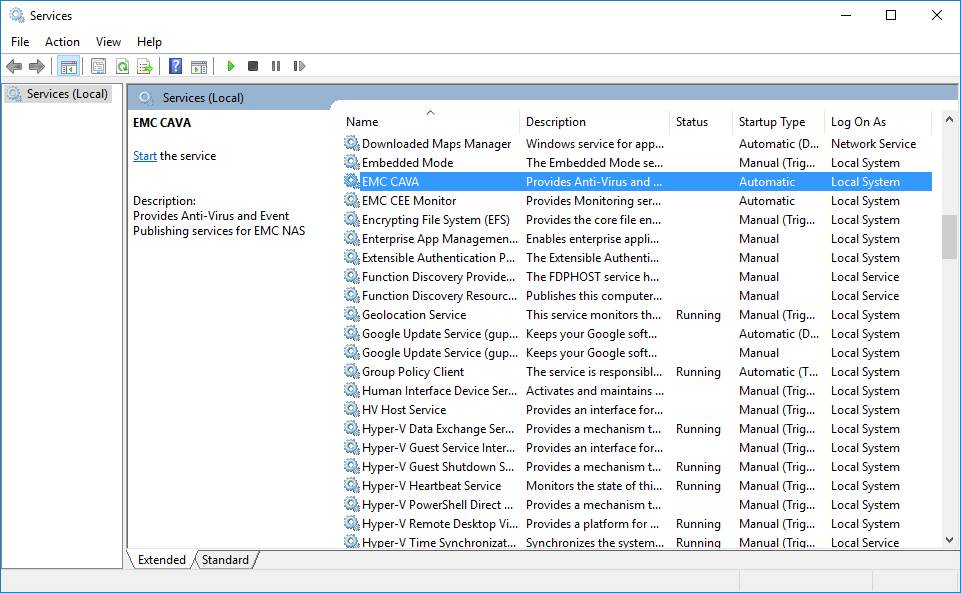
Open the Windows Services manager as an administrator.
-
Find the service named EMC CAVA.
-
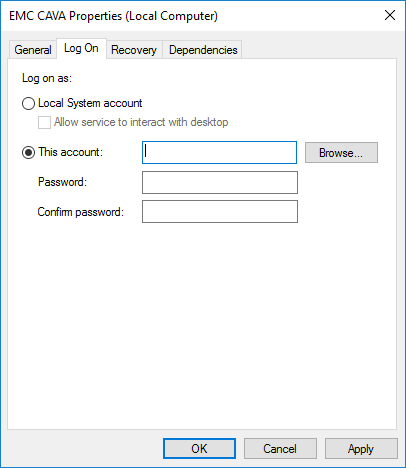
Double-click EMC CAVA.
The EMC CAVA Properties (Local Computer) dialog appears. -
Click the Log On tab.
-
Enter the account name and password, and then click OK.
A Services dialog appears, confirming that log-on rights have been granted. -
Click OK.
-
-
Restart the EMC CAVA service:
-
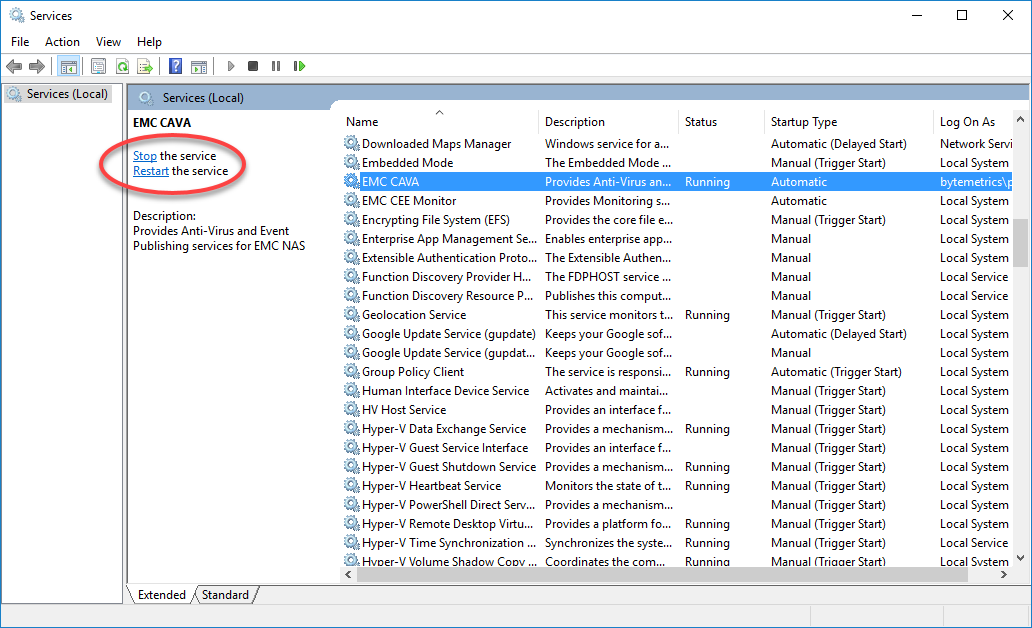
Select the EMC CAVA service.
-
Click the Restart link. (If the service is not already running, click the Start link instead.)
-
Close the Services manager window.
-
Task 5. Installing Erlang on the CEE Server
-
Download and stage the 64-bit Erlang installer on the CEE server.
-
If deploying for use with Isilon, we require v20.3 of Erlang. Erlang v20.3 can be found here: https://erlang.org/download/otp_win64_20.3.exe.
-
If deploying for use with Unity or VNX, we support v25.x versions of Erlang (such as v25.2). Erlang v25.2 can be found here: https://github.com/erlang/otp/releases/download/OTP-25.2/otp_win64_25.2.exe
-
-
Install the Erlang software:
-
Run the Erlang installer as an administrator.
The Erlang Setup wizard appears. The Choose Components page is displayed. -
Do not make any changes to the default selections.
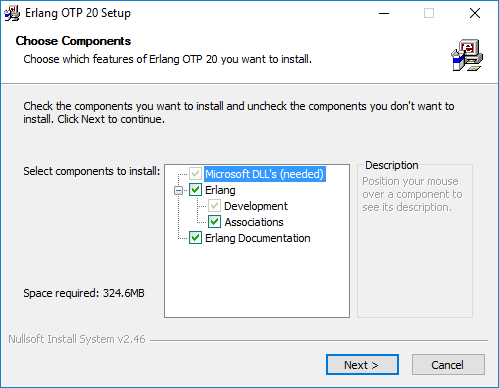
-
Click Next.
The Choose Installation Location page appears. -
Accept the default location by clicking Next.
The Choose Start Menu Folder page appears. -
Do not make any changes to the default location.
-
Click Install.
If the system does not have the correct C++ runtime installed, the Microsoft Visual C++ installer dialog appears.
Continue with Step 2g if the dialog appears; otherwise, skip to step 2i. -
Click the checkbox to agree to the license terms and condition, and then click Install.
After the Visual C++ installation is completed, the dialog displays a message confirming the success of the installation. -
Click Close to close the confirmation dialog.
The Erlang Setup wizard displays a status dialog while installing Erlang. -
Click Close when the installation has completed.
-
Task 6. Installing and Configuring RabbitMQ Server on the CEE Server
-
Download and stage the 64-bit RabbitMQ Server installer on the CEE server.
-
If deploying for use with Isilon, we require v3.7.4 of RabbitMQ. RabbitMQ v3.7.4 can be found here: https://github.com/rabbitmq/rabbitmq-server/releases/download/v3.7.4/rabbitmq-server-3.7.4.exe.
-
If deploying for use with Unity or VNX, we support v3.11.x versions of RabbitMQ (such as v3.11.10). RabbitMQ v3.11.10 can be found here: https://github.com/rabbitmq/rabbitmq-server/releases/download/v3.11.10/rabbitmq-server-3.11.10.exe.
-
-
Install the RabbitMQ Server software:
-
Run the RabbitMQ Server installer as an administrator.
The RabbitMQ Server Setup wizard appears. The Choose Components page is displayed. -
Do not make any changes to the default selections.
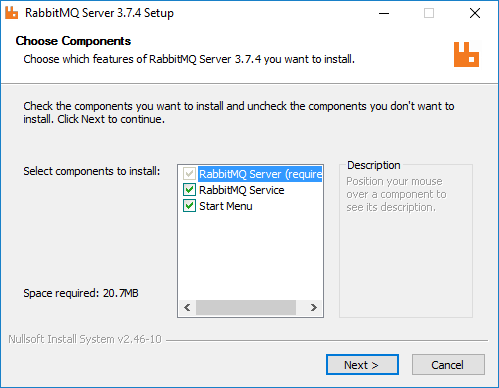
-
Click Next.
The Choose Install Location page appears. -
Accept the default location by clicking Install.
The Setup wizard displays a status dialog while installing RabbitMQ Server. -
Click Next when the installation is complete.
-
Click Finish to close the setup wizard.
-
-
Enable the RabbitMQ Server management plugin:
-
Open a command prompt as an administrator.
-
In the command prompt window, change to the directory that the RabbitMQ Server is installed (typically C:\Program Files\RabbitMQ Server\rabbitmq_server-X.X.X\sbin, where X.X.X is the version number).
-
Enter the following command in the command prompt window:
rabbitmq-plugins enable rabbitmq_managementThe command prompt window displays confirmations that the plug-ins have been configured and enabled.
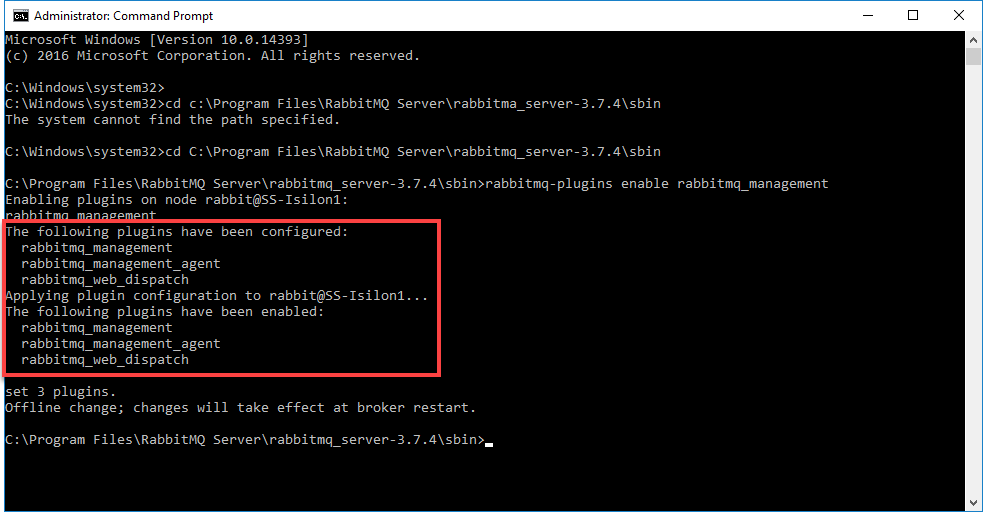
-
Close the command prompt window.
-
-
Restart the RabbitMQ service:
-
Reopen the Services manager as an administrator.
-
Select the Rabbit MQ service.
-
Click the Restart link.
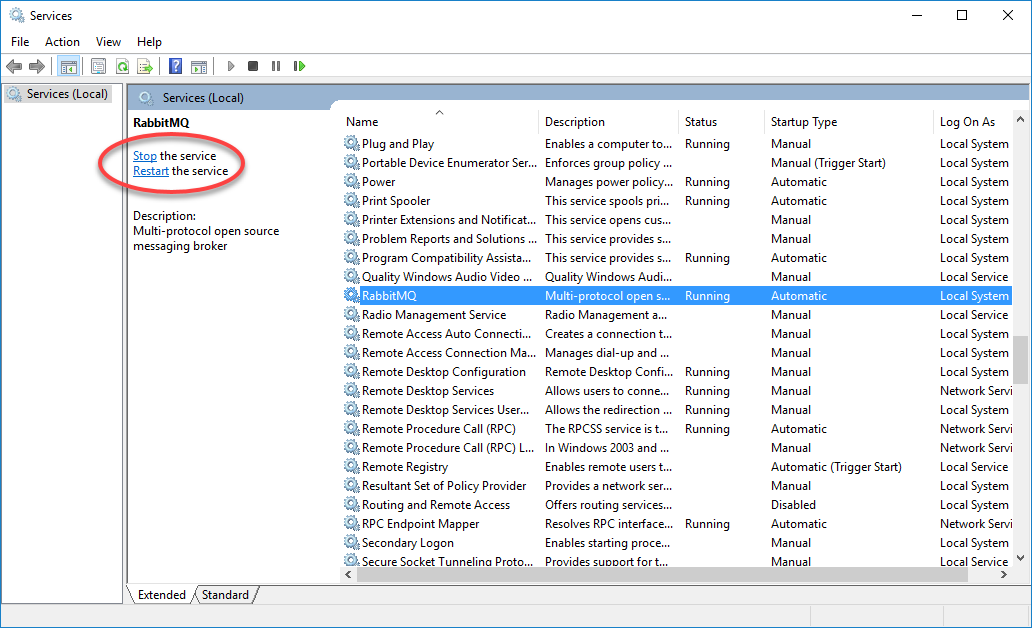
-
Close the Services manager.
-
-
Enable the RabbitMQ Server to receive messages:
-
Open Notepad as an administrator.
-
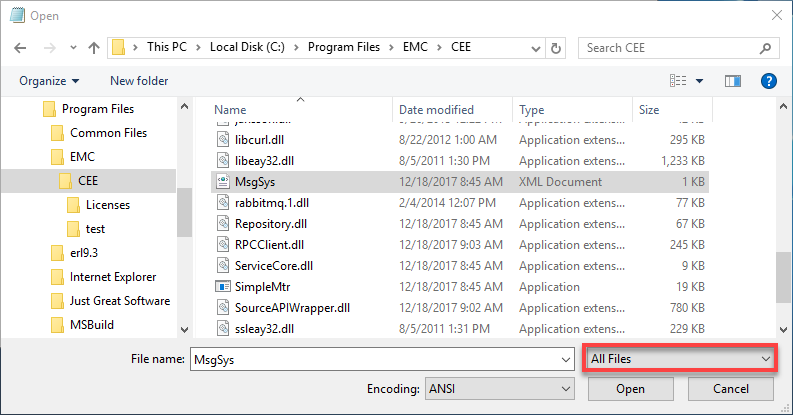
Open the file MsgSys.xml in Notepad.
This file should be located in the installation directory of CEE framework (for example, C:\Program Files\EMC\CEE).To locate the MsgSys.xml file, change the file filter drop-down list from Text Document (.txt)* to All Files; otherwise, only text files will be displayed in the Open dialog.
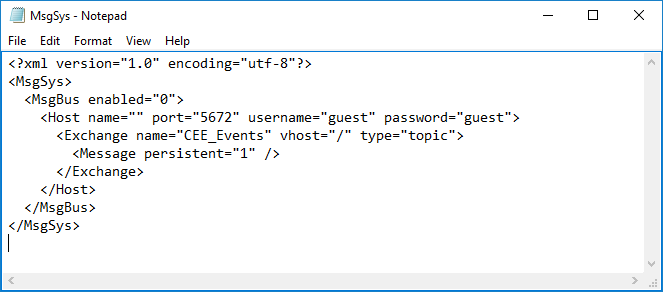
The MsgSys.xml file is displayed in a Notepad window.
-
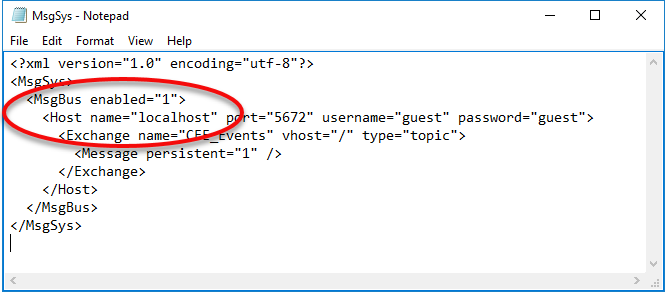
Make the following changes to the file:
-
Find the following line:
<MsgBus enabled="0">
and set MsgBus enabled to "1".
-
Find the following line and set Host name to "localhost" :
<Host name="" port="5672" username="guest" password="guest">
The file now appears as follows:
-
-
Save your changes to MsgSys.xml, and then close the file.
-
-
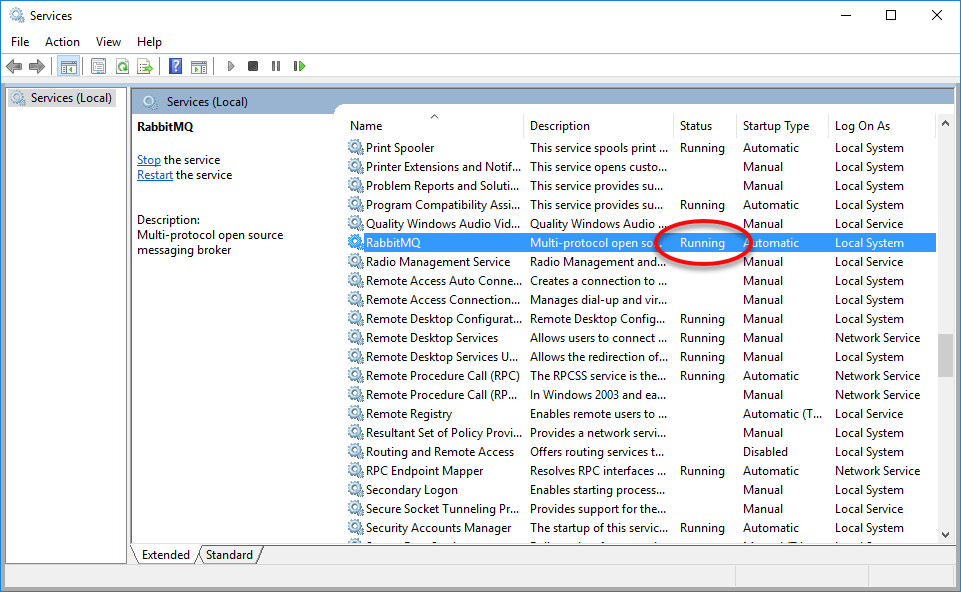
Ensure that the RabbitMQ Service is installed and running:
-
Reopen the Services manager as an administrator.
-
Find the service named RabbitMQ.
-
Confirm that the service is running.
-
Close the Services manager.
-
Task 7. Configuring the Unity Storage Device
The event publishing system on the Dell Unity storage device is responsible for sending event and client activity notifications to the Peer Software solutions. You can configure the event notification settings on a Dell Unity storage device using their Unisphere web interface. You must be an admin user of the Unity storage device to configure the settings.
-
Open a browser window.
-
Enter the IP address of the Unity storage device in the browser's address bar.
-
Enter your user name and password, and then click OK.
The Dashboard page of the Unisphere web application is displayed. -
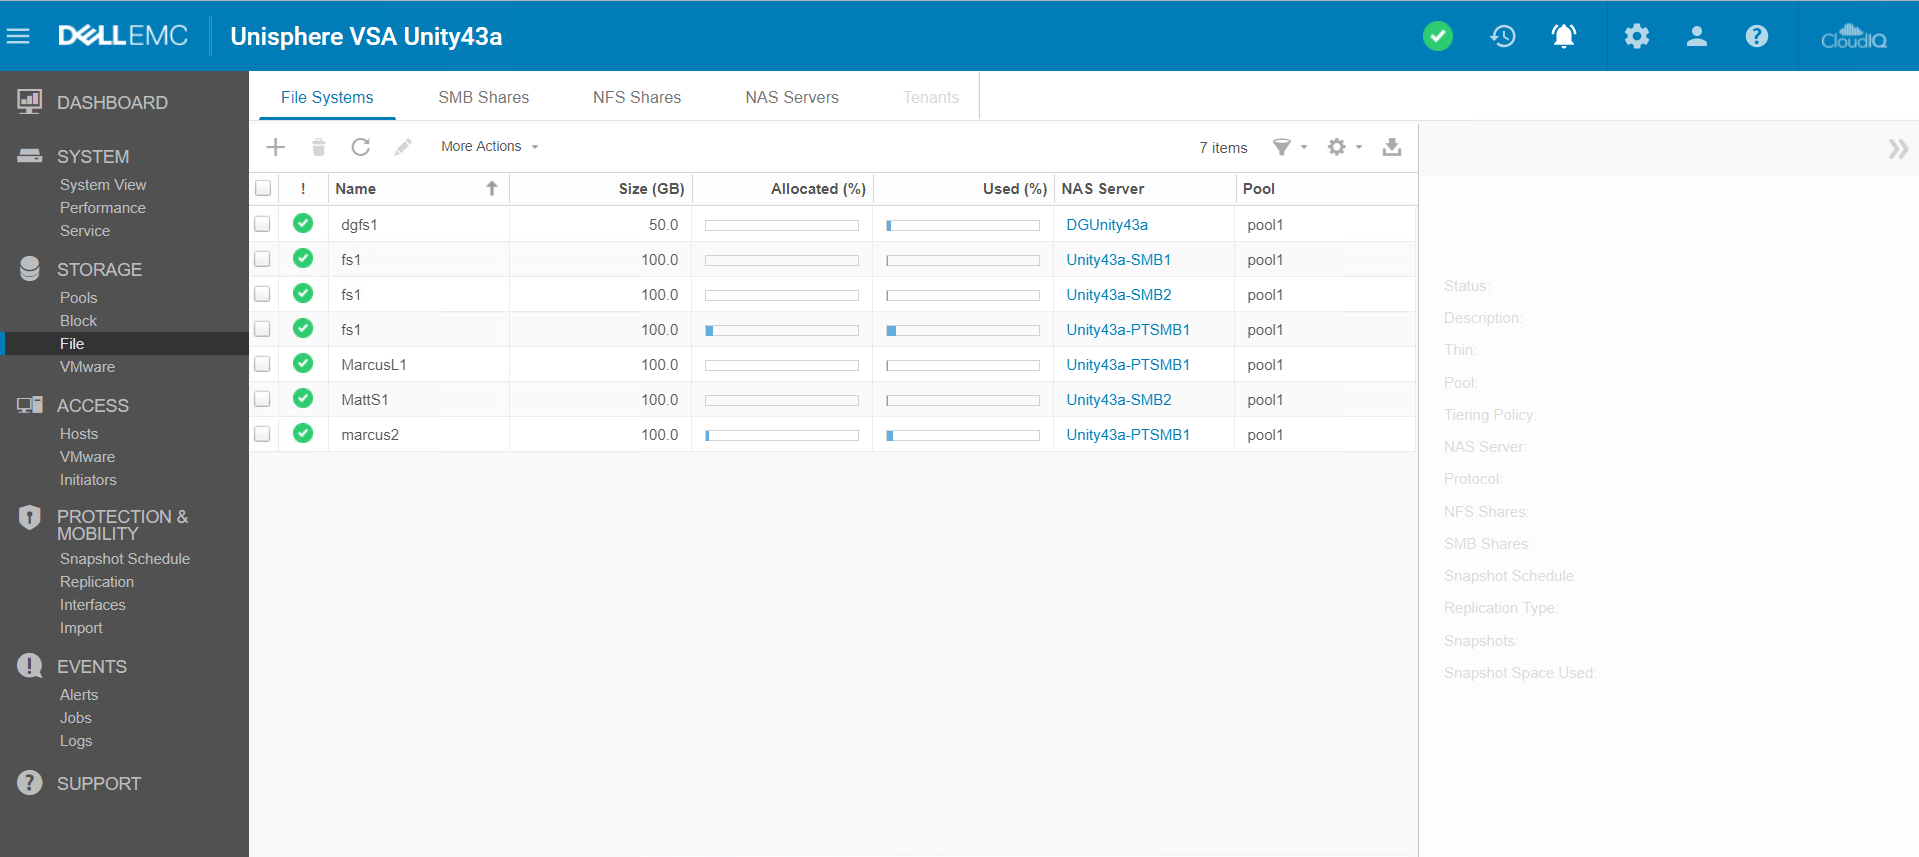
Click the File link in the Storage section of the navigation pane on the left.
The File Systems page that appears displays a list of the attached file systems.
-
For each file system you want to monitor, enable the storage device to track end-user activity on the file system:
-
Double-click the name of the file server.
The Properties dialog appears. -
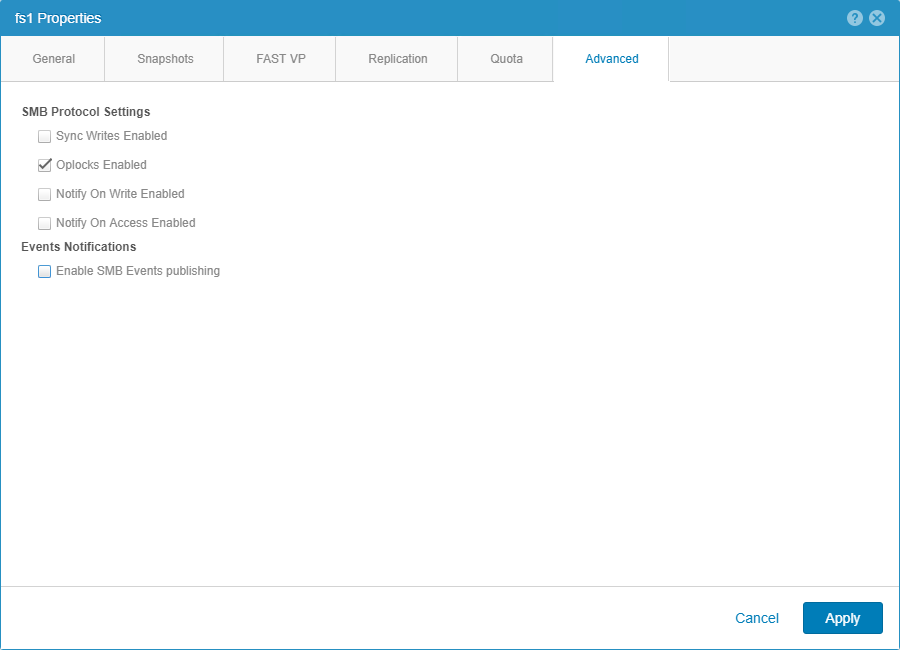
Click the Advanced tab.
-
If not already selected, click the Enable SMB Events publishing checkbox.
-
Click the Apply button, and then click the Close button.
-
Repeat for each file system you want to monitor.
-
-
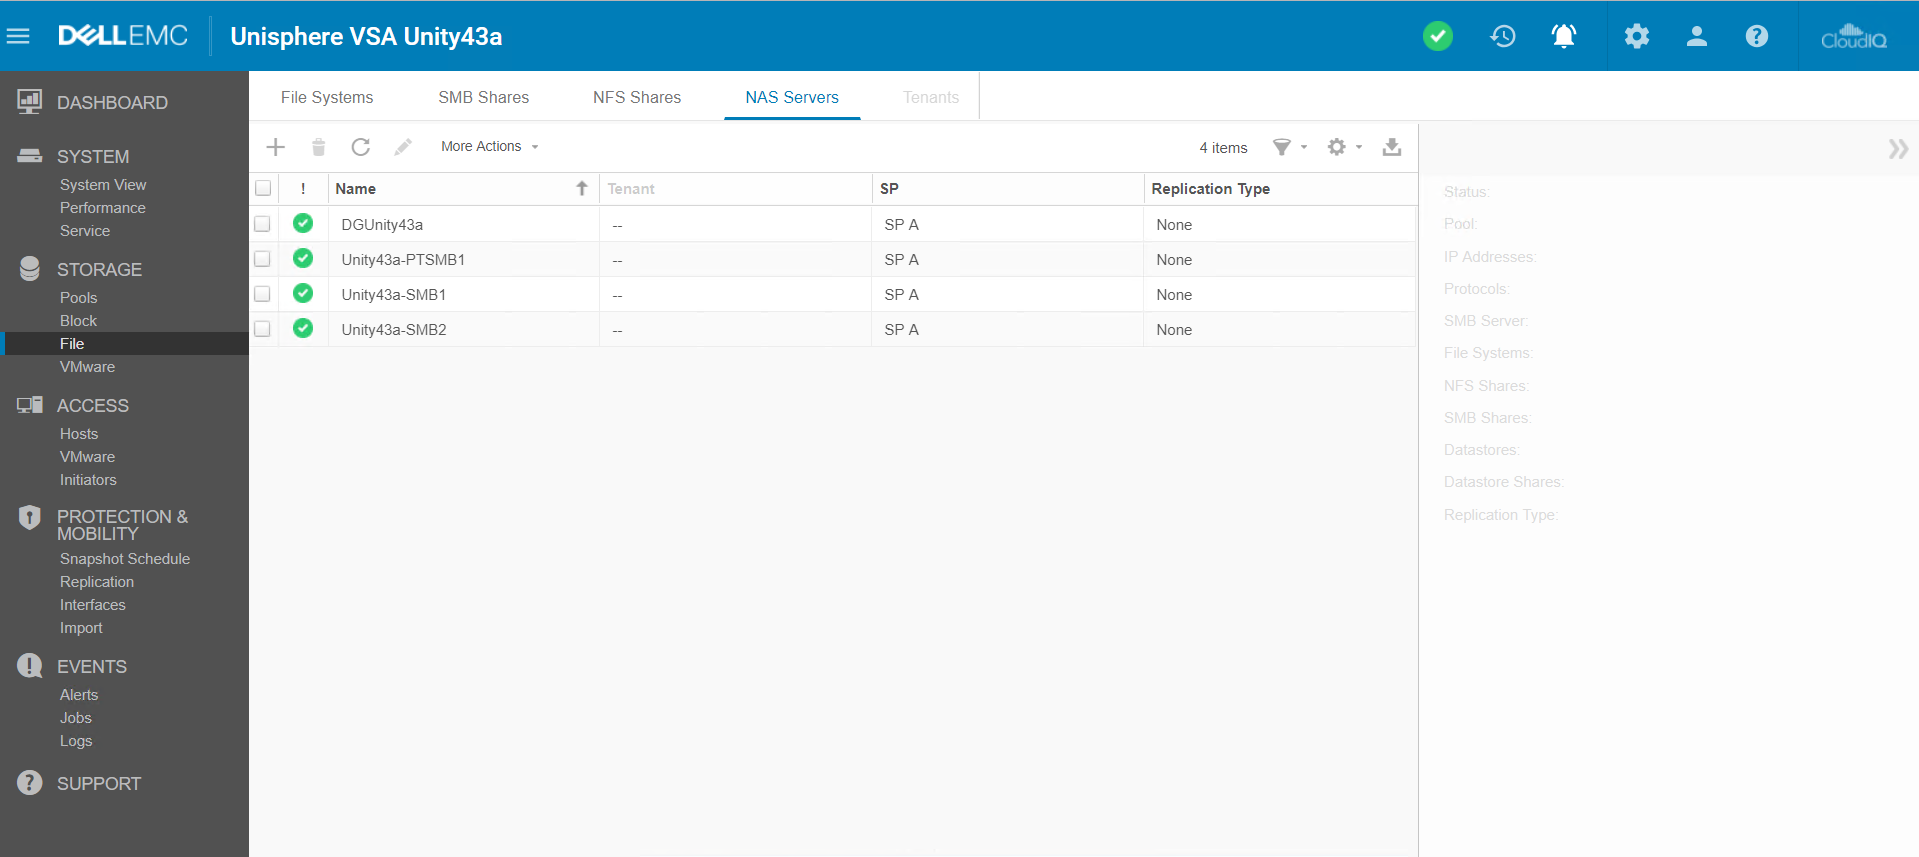
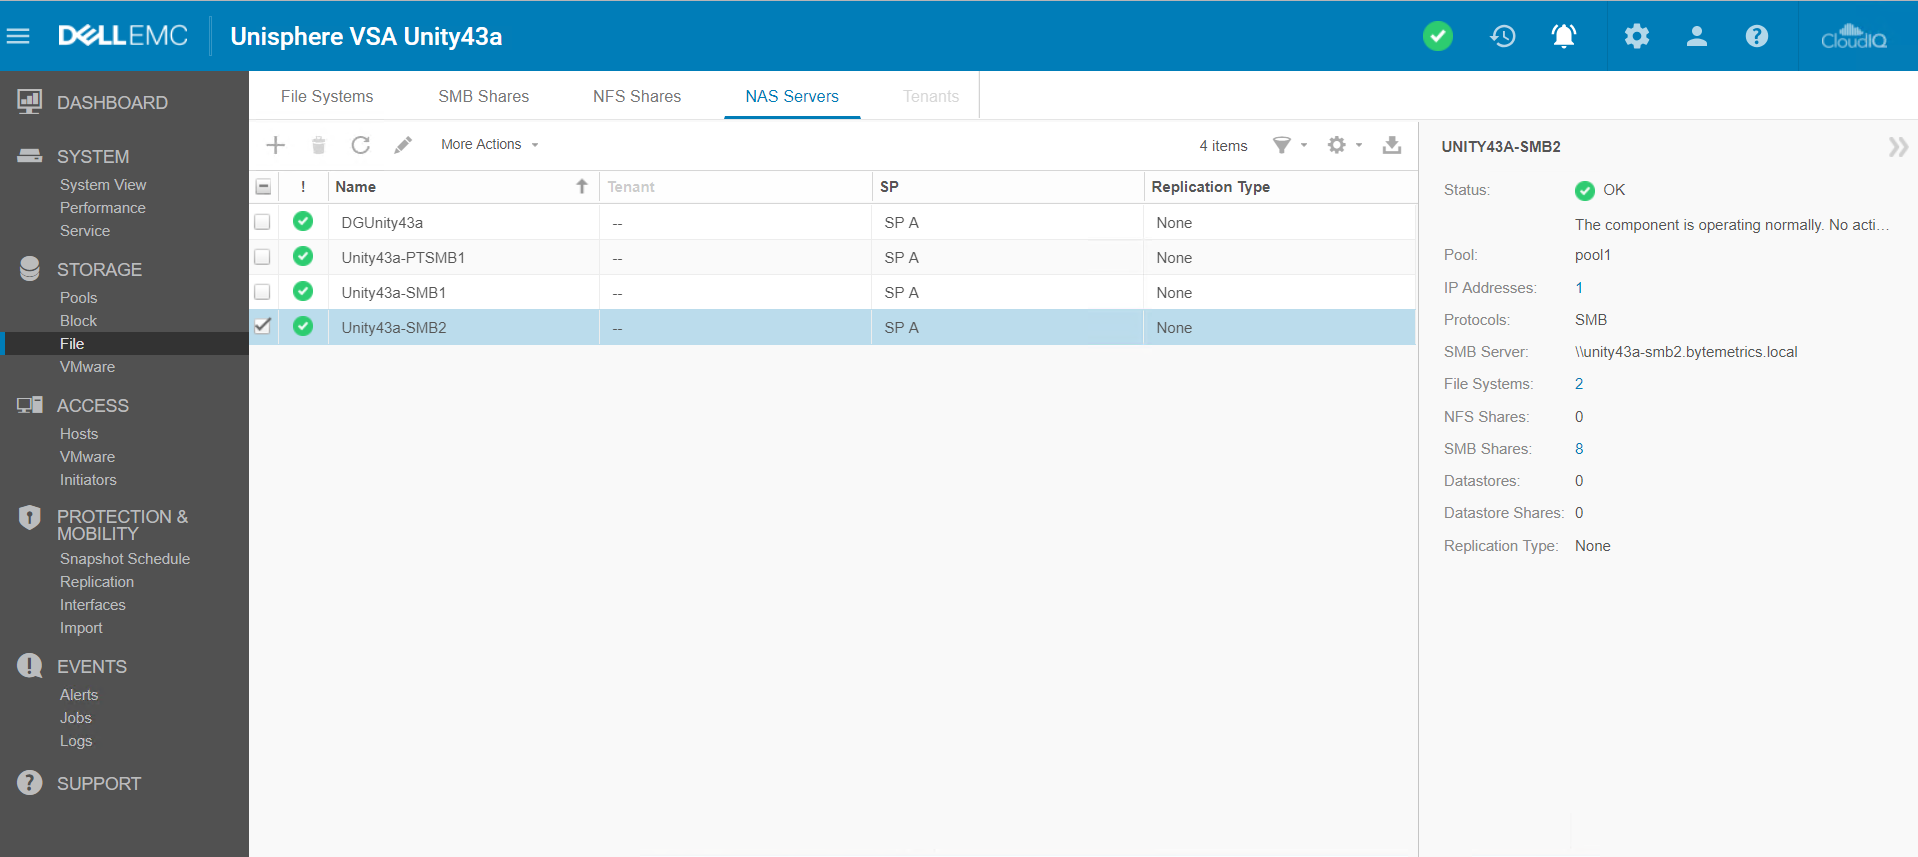
Click the NAS Servers tab.
A list of NAS servers is displayed.
-
Double-click the name of the NAS server you want to monitor.
The Properties dialog appears.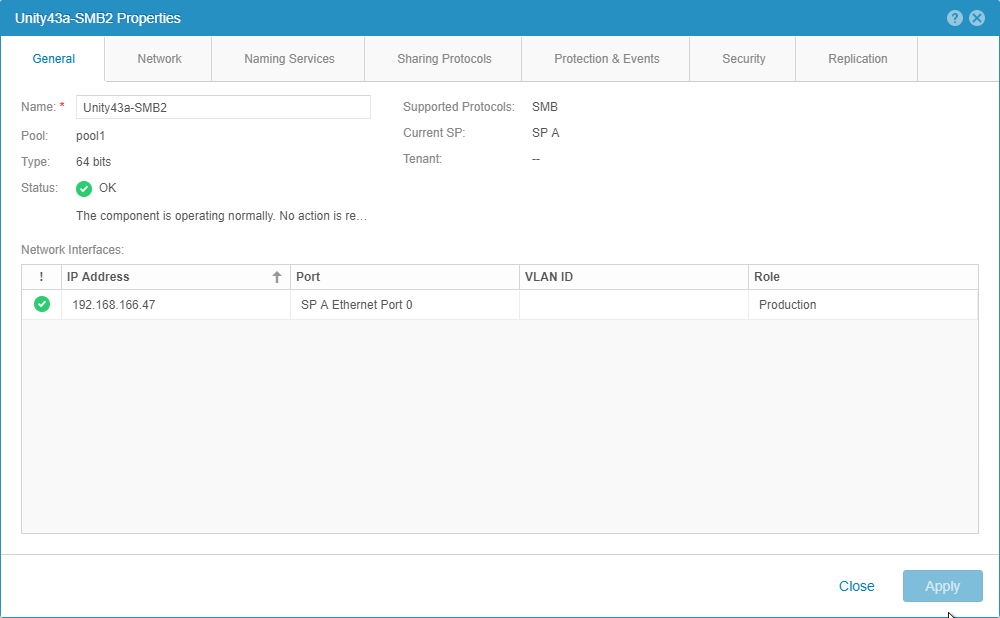
-
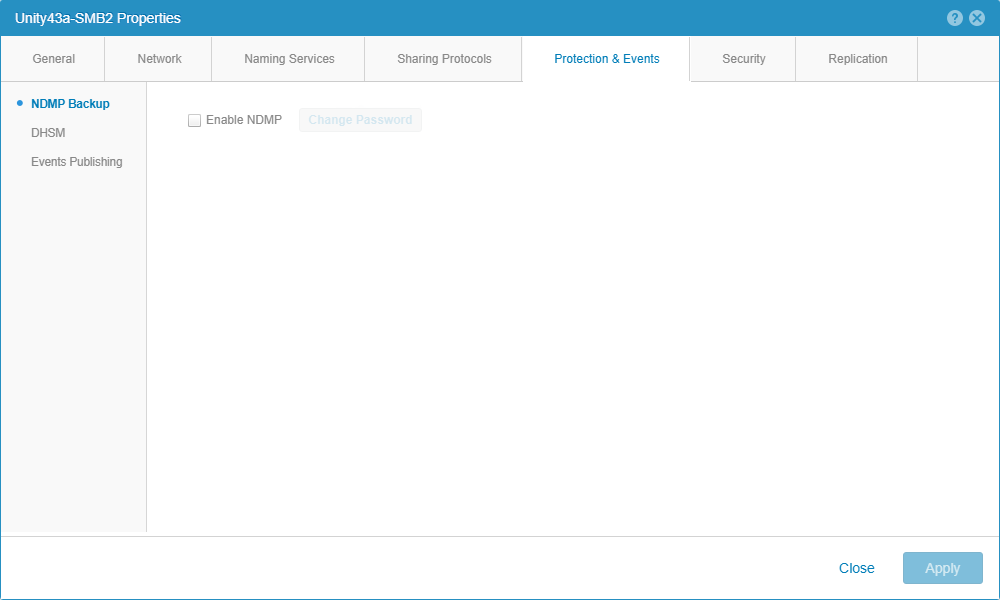
Click the Protection & Events tab.
-
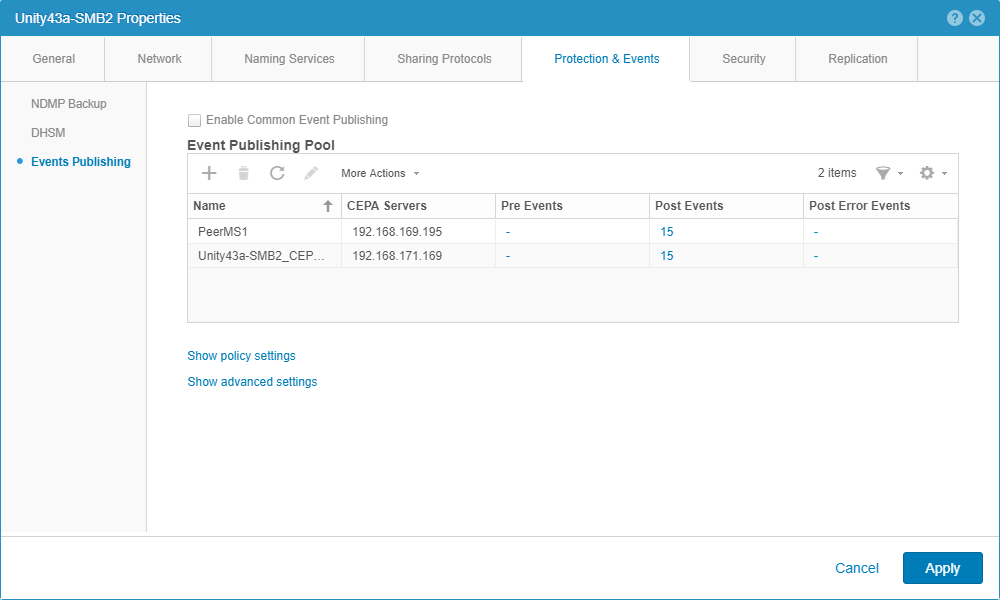
Click the Events Publishing link in the navigation pane on the left.
The Event Publishing Pool is displayed.
-
If not already selected, select the Enable Common Event Publishing checkbox, and then click Apply.
-
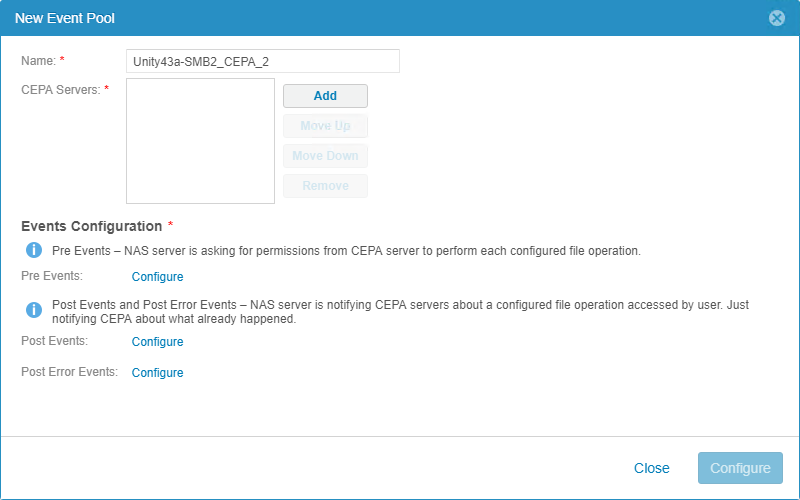
If there are no existing event pools, the New Event Pool dialog automatically appears. If there are existing event pools, click the Add icon (

Note: One event pool must be dedicated to Peer Software solutions. Only one CEPA server in the pool that is dedicated to use. A maximum of three event pools are allowed per NAS server.
-
Click the Add button.
The Add new server dialog appears.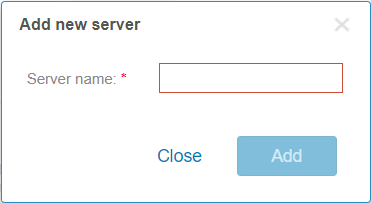
-
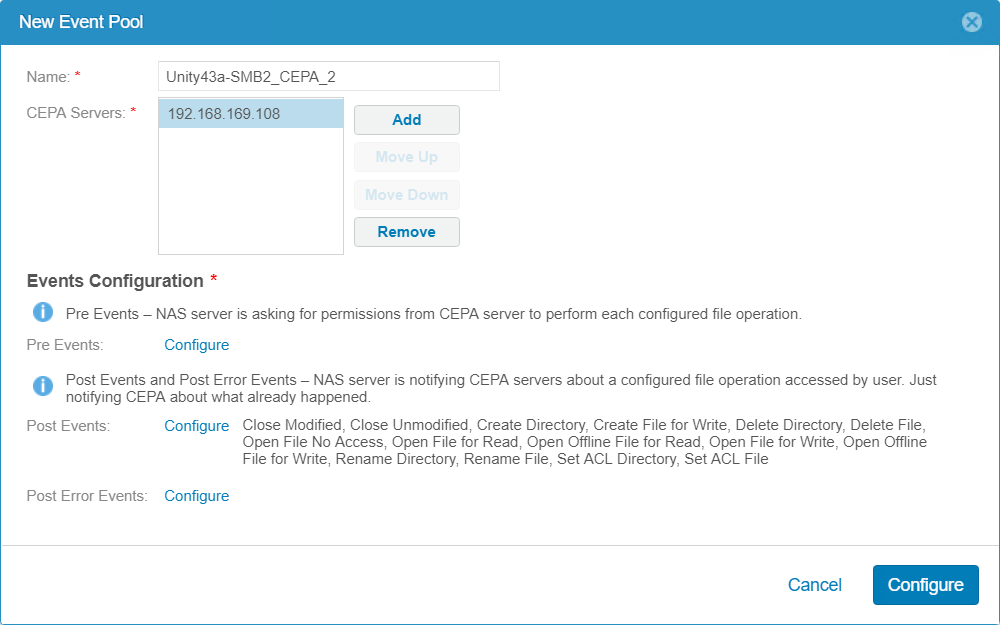
Enter the name or IP address of the CEE server, and then click Add.
The New Event Pool dialog reappears. The server name or IP address is now listed in the CEPA Servers field. -
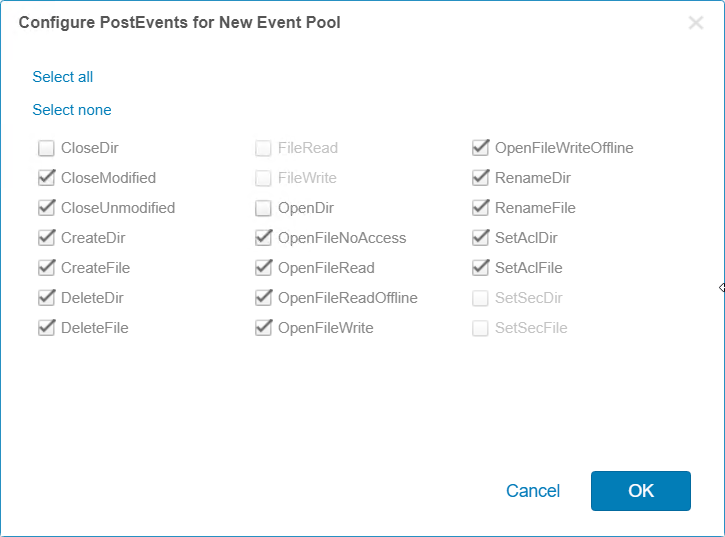
Click the Configure link for Post Events.
The Configure Post Events dialog appears. -
Click Select all.
All the checkboxes are selected. -
Deselect the CloseDir and OpenDir checkboxes.
-
Click OK.
The New Event Pool dialog reappears. The selected events are listed next to Post Events.
-
Click the Configure button in the lower right corner of the dialog.
The configuration is applied, and the Properties dialog reappears. The new event pool is now listed in the Event Publishing Pool section. -
Click the Apply button, and then click the Close button.
Task 8. Installing and Configuring the Dell EMC Unity/VNX/VNXe NAS Management Tool
-
Download the Dell EMC Unity/VNX/VNXe NAS Management tool. You can download the software from Dell EMC's support site (requires a Dell EMC account):
https://download.emc.com/downloads/DL48750_Unity-and-VNX-FileCifsMgmt.exe-8.1.9.157.exe
-
Install the NAS Management tool software:
-
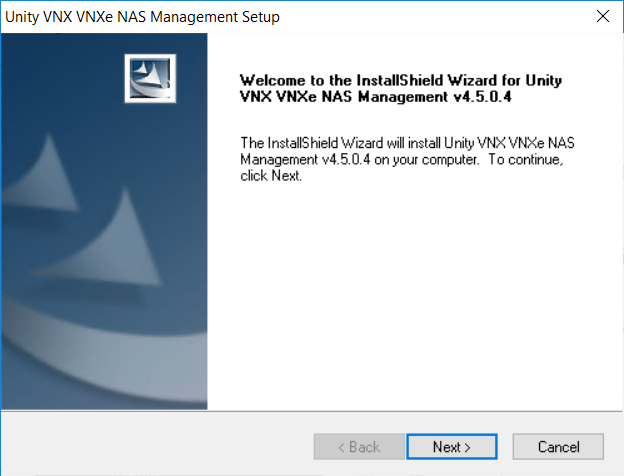
Run the NAS Management installer as an administrator.
The Unity VNX VNXe NAS Management Setup wizard appears.
-
Click Next.
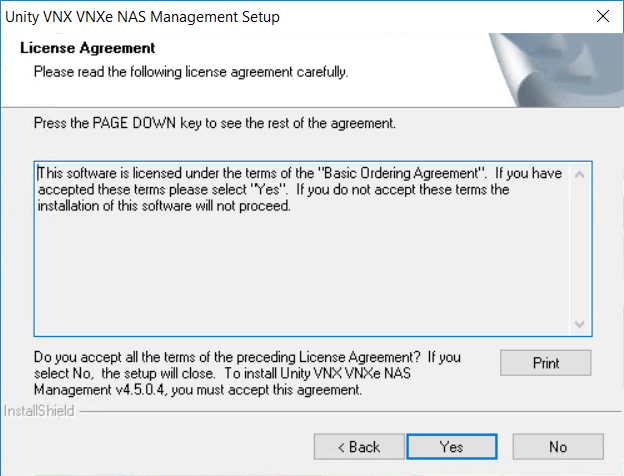
The License Agreement page appears.
-
Click Yes to accept the license agreement.
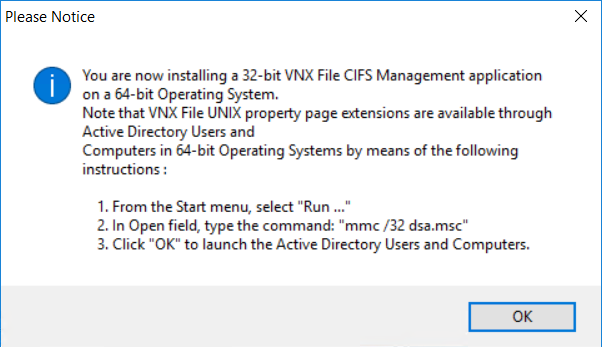
A notification about installing the 32-bit version appears.
-
Click OK.
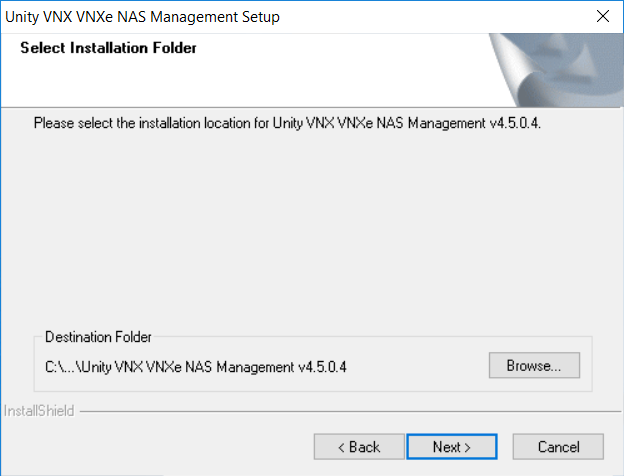
The Select Installation Folder page appears.
-
Click Next to accept the default location.
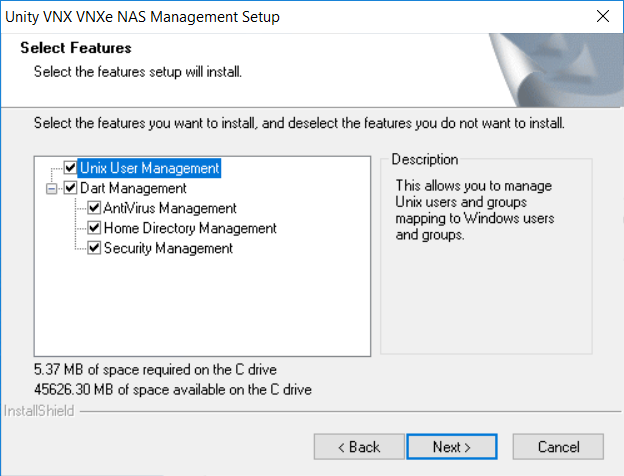
The Select Features page appear.
-
Click Next to install all the features.
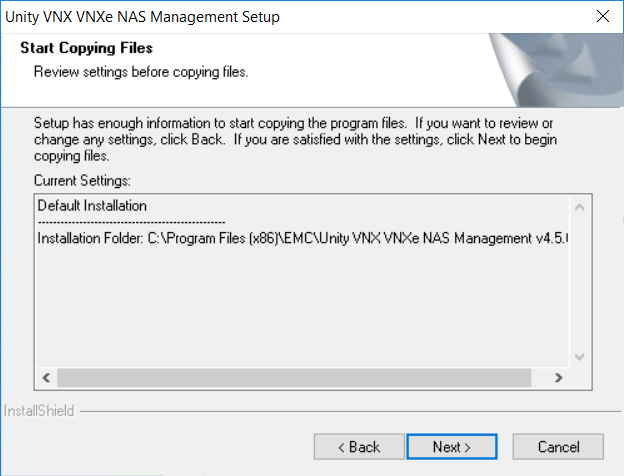
The Start Copying Files page appears.
-
Click Next to start the installation.
-
Click Finish when the installation has completed.
-
-
Open the EMC Unity/VNX/VNXe NAS Management console.
-
Open the Control Panel and navigate to System and Security > Administrative Tools.
-
Open EMC Unity VNX VNXe NAS Management as an administrator.
-
-
Connect to all appropriate NAS servers:
-
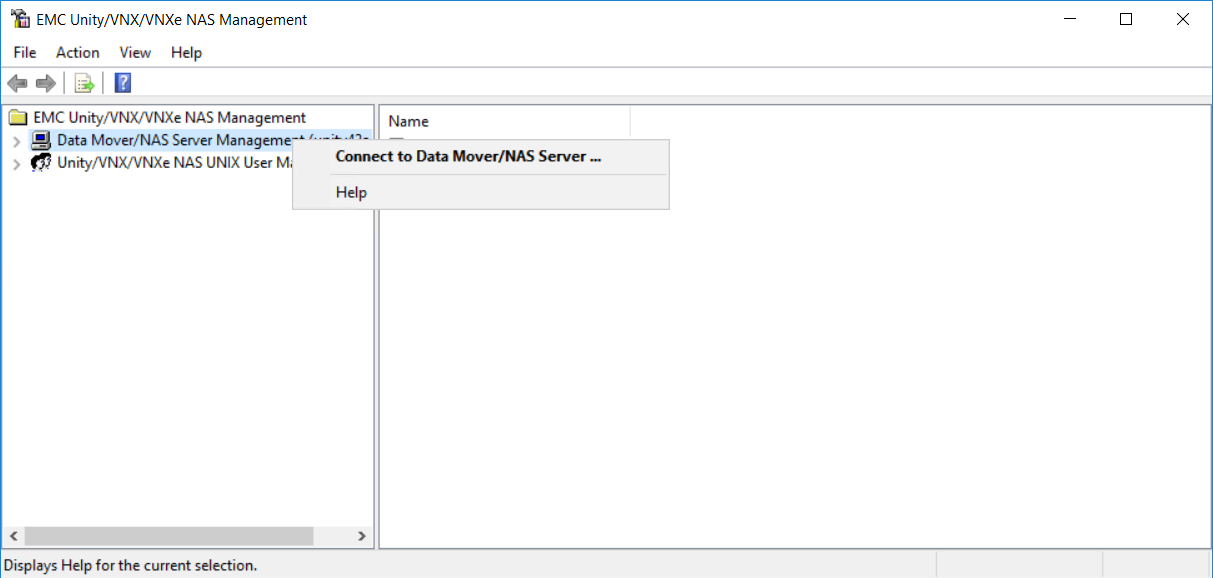
In the navigation pane, right-click the Data Mover/NAS Server Management folder, and then select Connect to Data Mover/NAS Server… from the shortcut menu.
-
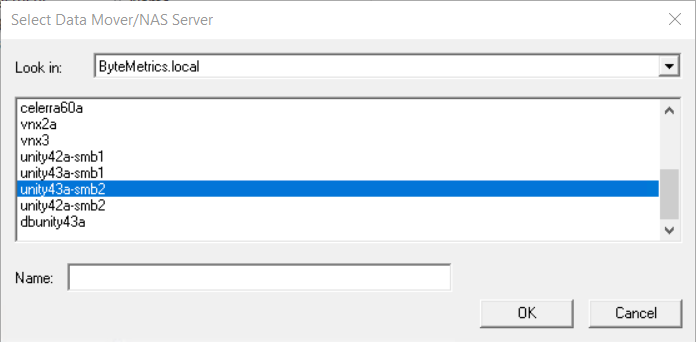
In the Select Data Mover/NAS Server dialog that appears, select the appropriate VNX Data Mover or Unity NAS server, and then click OK.
-
-
Add the Peer Agent or PeerSync service account to the EMC Event Notification Bypass and EMC Virus Checking security policies:
-
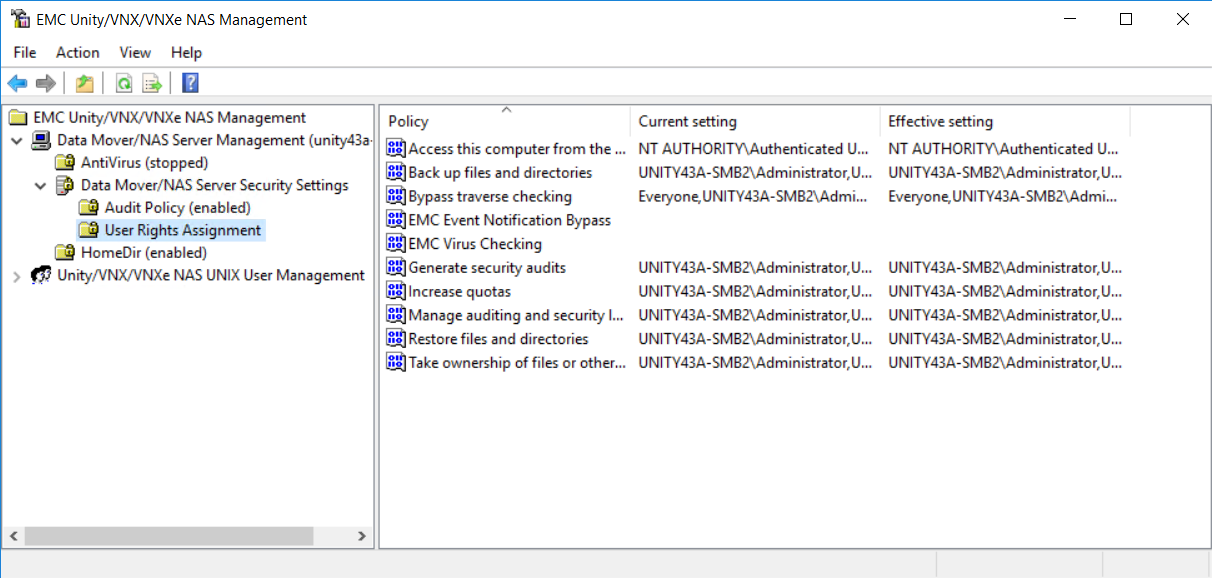
Navigate to the Data Mover/NAS Server Management > Data Mover/NAS Server Security Settings >User Rights Assignment folder.
The list of user rights assignment settings appears in the details pane and includes their current setting and effective setting.
-
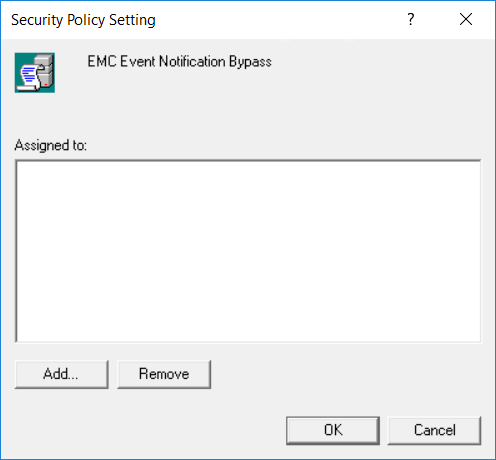
In the details pane, right-click the EMC Event Notification Bypass policy, and then select Security from the shortcut menu.
The Security Policy Setting dialog appears and lists users or groups that are already assigned to the selected user rights assignment. If no assignments exist, the list is blank.
-
Click Add.
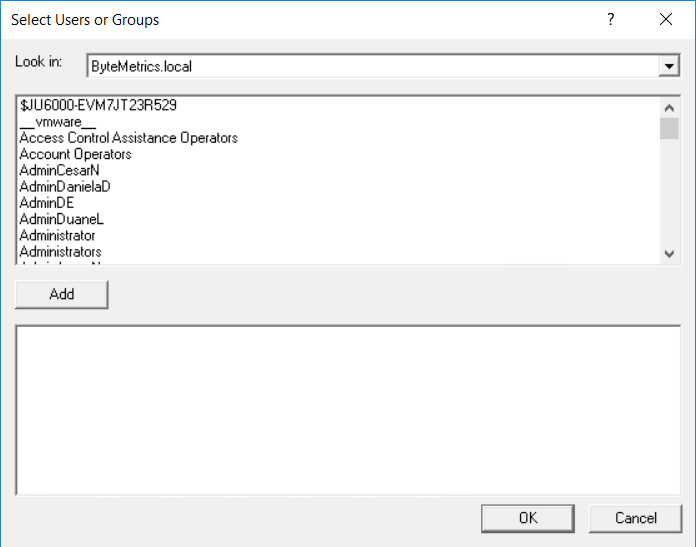
The Select User or Groups dialog appears. -
In the Look in box, select the domain in which the Agent or PeerSync account is located.
-
In the upper pane, select the Peer Agent or PeerSync service account, and then click Add.
The account appears in the lower pane. -
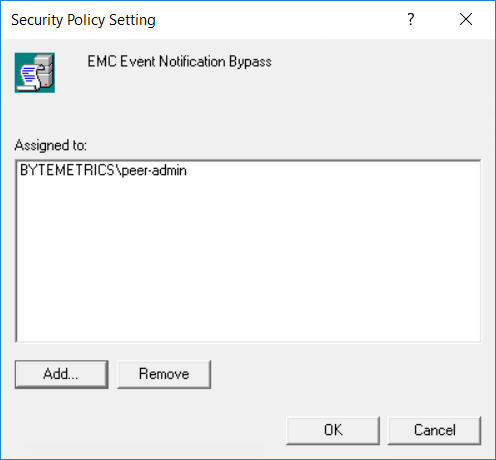
Click OK.
The account is now listed in the Security Policy Setting dialog.
-
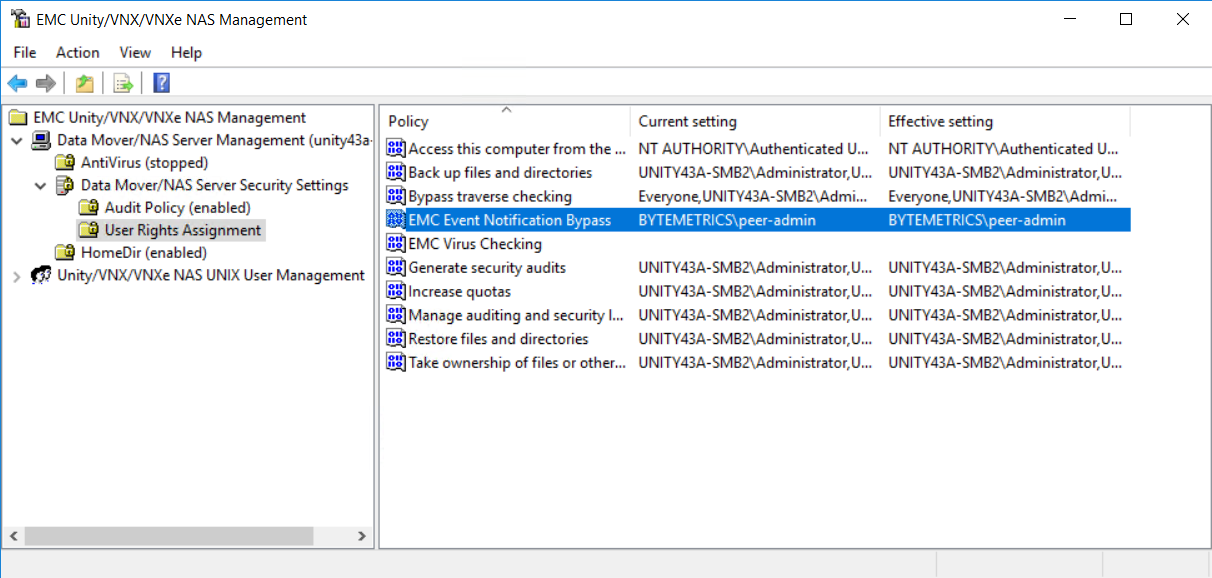
Click OK.
The account is now assigned to the EMC Event Notification Bypass policy.
-
Repeat Steps 5b-g for the EMC Virus Checking policy.
Note: No testing should be performed with this service account once these settings are in place.
-
-
Restart the EMC CAVA service:
-
Reopen the Services manager as an administrator.
-
Select the EMC CAVA service.
-
Click the Restart link.
-
The setup of your Unity/VNX/VNXe storage device is now complete.
Troubleshooting
Error 0x800F0954 When Installing .NET Framework 3.5
When installing .NET 3.5 on Windows Server 2019, the following error may appear:
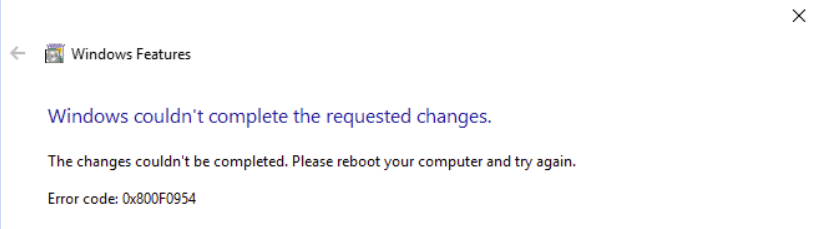
The error 0x800f0954 refers to CBS_E_INVALID_WINDOWS_UPDATE_COUNT_WSUS, which indicates that your system may have been configured to use a WSUS server (on your domain network) to get updates instead of connecting to Windows Update servers directly.
You need to reinstall the .NET package from a Server 2019 installation disk by following these steps:
-
Attach the Windows Server 2019 installation disk to the server.
-
Run the following command in an elevated command prompt.
dism /online /enable-feature /featurename:NetFX3 /Source:H:\sources\sxs /LimitAccesswhere H:\ represents the drive letter of the attached Windows Server 2019 installation disk.
Error 1053 When Starting CAVA Service
If you get Error 1053 when you try to start the EMC CAVA service, ensure that the .NET 3.5 Framework is installed on the CEE server, and then restart the EMC CAVA service on the CEE server.
Starting RabbitMQ Issue
If you experience an issue with starting RabbitMQ, try the following steps:
-
On the CEE server, open a command prompt as an administrator.
-
Navigate to the directory where RabbitMQ Server is installed (typically C:\Program\Files\RabbitMQ Server\rabbitmq_server-X.X.X\bin, where X.X.X is the version number).
-
Enter the following three commands:
rabbitmq-service stop
rabbitmq-service remove
rabbitmq-server start -
If the start command results in an error about an Erlang cookie, reset the HOMEDRIVE and HOMEPATH environment variables to a locally accessible folder (such as C:\Users\Public). To set these environment variables:
-
Open a command prompt as an administrator.
-
When prompted to allow changes, click Yes.
-
Enter the following commands in the command prompt window:
set HOMEDRIVE=C:
set HOMEPATH=/Users/Public
-
-
Rerun the following command and verify that no Erlang cookie errors are encountered:
rabbitmq-service start -
Use Ctrl+C to stop the RabbitMQ Server process.
-
Delete the folder C:\Users\%Username%\AppData\Roaming\RabbitMQ.
-
Enter the following commands in the command prompt window:
rabbitmq-service install
rabbitmq-service start -
Verify that the folder C:\Users\%Username%\AppData\Roaming\ was recreated and populated with db and log folders.
Technical Support
USA +1 703-763-7700
EMEA +49 89 2620763-22
UK/IE +44 20 777 098 22
Related Articles
- Achieving high availability for the PMC through active-passive configuration
- Achieving high availability for the PMC through active-passive configuration (v4.7.0 - v5.1.1)
- Achieving high availability for the PMC through active-passive configuration (v5.2 only)
- Achieving high availability for the PMC through active-passive configuration (v6.0 and later)
- Configuration Guides
- Configure PeerSync to synchronize in a clustered environment
- Configure the Agent installer to run unattended
- Configure the PeerSync Listener installer to run unattended
- Dell PowerScale Syslog Configuration Guide
- Dell PowerScale | EMC Isilon Configuration Guide
- Dell PowerStore Configuration Guide
- Dell Unity Configuration Guide
- Dell Unity Legacy Configuration Guide
- How do I install Health Checker on a remote server?
- Move a Peer Agent to another Windows server